Curved Ceiling? No Problem.
Bend 1x4s between the walls to get an expensive look without a lot of extra work.
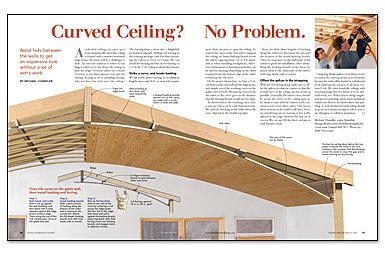
Synopsis: A cathedral ceiling can bring a great sense of openness and space to a room, but with a small investment of time and money, you can add some drama by arcing a curved ceiling across the room. Builder Michael Chandler describes using furring and backing boards to build this economical upgrade.
A cathedral ceiling can open up a room dramatically, but if the ceiling is framed with a massive structural ridge beam, the beam will be a challenge to hide. An obvious solution is either to use bigger rafters or to fur down the ceiling to hide the ridge. Oversize rafters are a waste of wood, so my three-person crew opts for furring. As long as we’re installing furring, why not have fun and curve the ceiling?
The furring turns a chore into a delightful, economical upgrade. Adding 1×4 furring to the framing package costs less than increasing the rafters to 2x12s or I-joists. We can install the backing and the curved furring on a 27-ft. by 27-ft. ceiling in about three hours.
Strike a curve, and locate backing
We use 1×4 #2 spruce furring. It’s available in lengths up to only 16 ft., so most jobs require more than one piece to span the ceiling. To control the curve of the 1x4s and to support the ceiling, we fasten backing boards across the rafters, spacing them 3 ft. to 4 ft. apart. Just as when installing strong backs, different combinations of dimensional lumber can be used for backing, depending on the offset required from the bottom edge of the rafter to back up the 1×4 curve.
On the project shown here, we bent a 16-ft. 1×4 between the end wall and the ridge beam, and simply traced the resulting curve on the gable-end drywall. Measuring down from the rafter to the curve gave us the distance that the backing boards would need to span.
As shown below, the resulting curve isn’t a true arc, but a curve with flattened ends. We add fire blocking in the walls where the curve dips below the double top plate.
Next, we slide short lengths of backing along the rafters to determine the size and the location of the actual backing boards. Then we snap lines on the underside of the rafters to guide the installation. After assembling the backing boards on the floor, we attach them to the underside of the rafters with ring-shank nails or screws.
Offset the splices in the strapping
With the 1×4 furring strips, make sure to offset the splices in adjacent courses so that the overall curve of the ceiling can stay as fair as possible. Generally, the fairest curve should be across the center of the ceiling span, so it’s smart to start with the clearest stock centered across every other rafter. This leaves short sections at the walls to fill later. Next, we install long pieces starting at the walls, spliced on the ridge, between the first set of curves. We cut and fill the short end pieces with knottier stock.
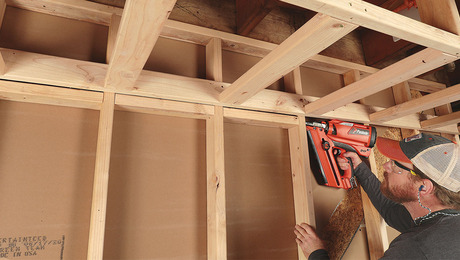
Using ring-shank nails (or even deck screws) to fasten the furring strips is worthwhile because the nails will be loaded in withdrawal from fighting the tension of all those tortured 1x4s. We often finish the ceilings with wood paneling, but two layers of 3 ⁄8-in. drywall work, too. When you’re using tongue-and-groove paneling, spray-foam insulation ensures an effective air barrier above the paneling. A well-detailed drywall ceiling should stop air movement enough to allow you to use fiberglass or cellulose insulation.
For more drawings and details, click the View PDF button below:
Fine Homebuilding Recommended Products
Fine Homebuilding receives a commission for items purchased through links on this site, including Amazon Associates and other affiliate advertising programs.
Plate Level
Smart String Line

100-ft. Tape Measure
