FHB Logo Facebook LinkedIn Email Pinterest Twitter X Instagram Tiktok YouTube Plus Icon Close Icon Navigation Search Icon Navigation Search Icon Arrow Down Icon Video Guide Icon Article Guide Icon Modal Close Icon Guide Search Icon Skip to content
Subscribe
Log In
  • How-To
  • Design
  • Tools & Materials
  • Restoration
  • Videos
  • Blogs
  • Forum
  • Magazine
  • Members
  • FHB House
  • Podcast
Log In

Fine Homebuilding Project Guides

Siding & Exterior Trim

Guide Home
  • Choosing Siding
  • Installing Siding
  • Choosing Exterior Trim
  • Installing Exterior Trim
  • Repairing Siding & Trim
How-To

The Efficient Way to Trim Exterior Windows

The key to durable trim and a safer and faster job is to assemble the trim first and install it later.

By Mike Vacirca Issue 205
  • X
  • facebook
  • linkedin
  • pinterest
  • email
  • add to favorites Log in or Sign up to save your favorite articles

Synopsis: Trimming exterior windows can be an ordeal, unless you learn the lessons that Seattle builder Mike Vacirca presents in this article. Vacirca’s process for exterior windows begins by assembling the trim first, then installing it as one piece. He starts by measuring every window to be sure he has correct dimensions. Vacirca then mills the windowsills, and is sure to keep the casing square during assembly. Finally, he installs the unit, nailing in the casing but screwing in the sill.

I can no longer call myself a trim carpenter because these days, I do a little bit of everything. I was a trim carpenter for most of the past 15 years, though, and a boat builder before that, so I feel comfortable saying that I know a thing or two about trimming out a window, and about how water affects wood.

Every time I dropped a piece of window trim from scaffolding 30 ft. in the air, I found myself remembering another career past, the days I spent working in a cabinet shop, where work is easy to control and weather isn’t a concern. Finally, I came to my senses when I was presented with 27 windows to trim for one house. That job helped me to develop a method for installing exterior trim that’s easier on my body, that is safer and faster, and that also yields more durable results. To make this process as efficient as possible, I even prime, putty, and paint the casings before installation.

Cutlists and stations add efficiency

When I worked in the cabinet shop, I organized my projects with cutlists and made shop drawings that showed how everything was going to be built before a saw ever touched wood. The process I created for assembling window trim in the shop starts with that premise. As with the cabinet work, I organize the shop into efficient workstations to build the trim. I want the workflow to move so that the pieces are cut and the assembly happens in such a way that a few folks can work at the same time and not get in each other’s way. The process, however, begins on site.

When the windows arrive, I grab a tape measure, get a notebook, and make a list of all the windows. I measure each to determine the finished height and width so that I can make a cutlist. I add 1⁄8 in. to each dimension to allow for caulk and to be sure the casing units will install easily by just slipping over the windows. Finally, I break everything into a formula. To keep track of which window is which, I use the lettered labels attached to them at the factory. Once the casing unit is built, I mark the respective letter on its back.

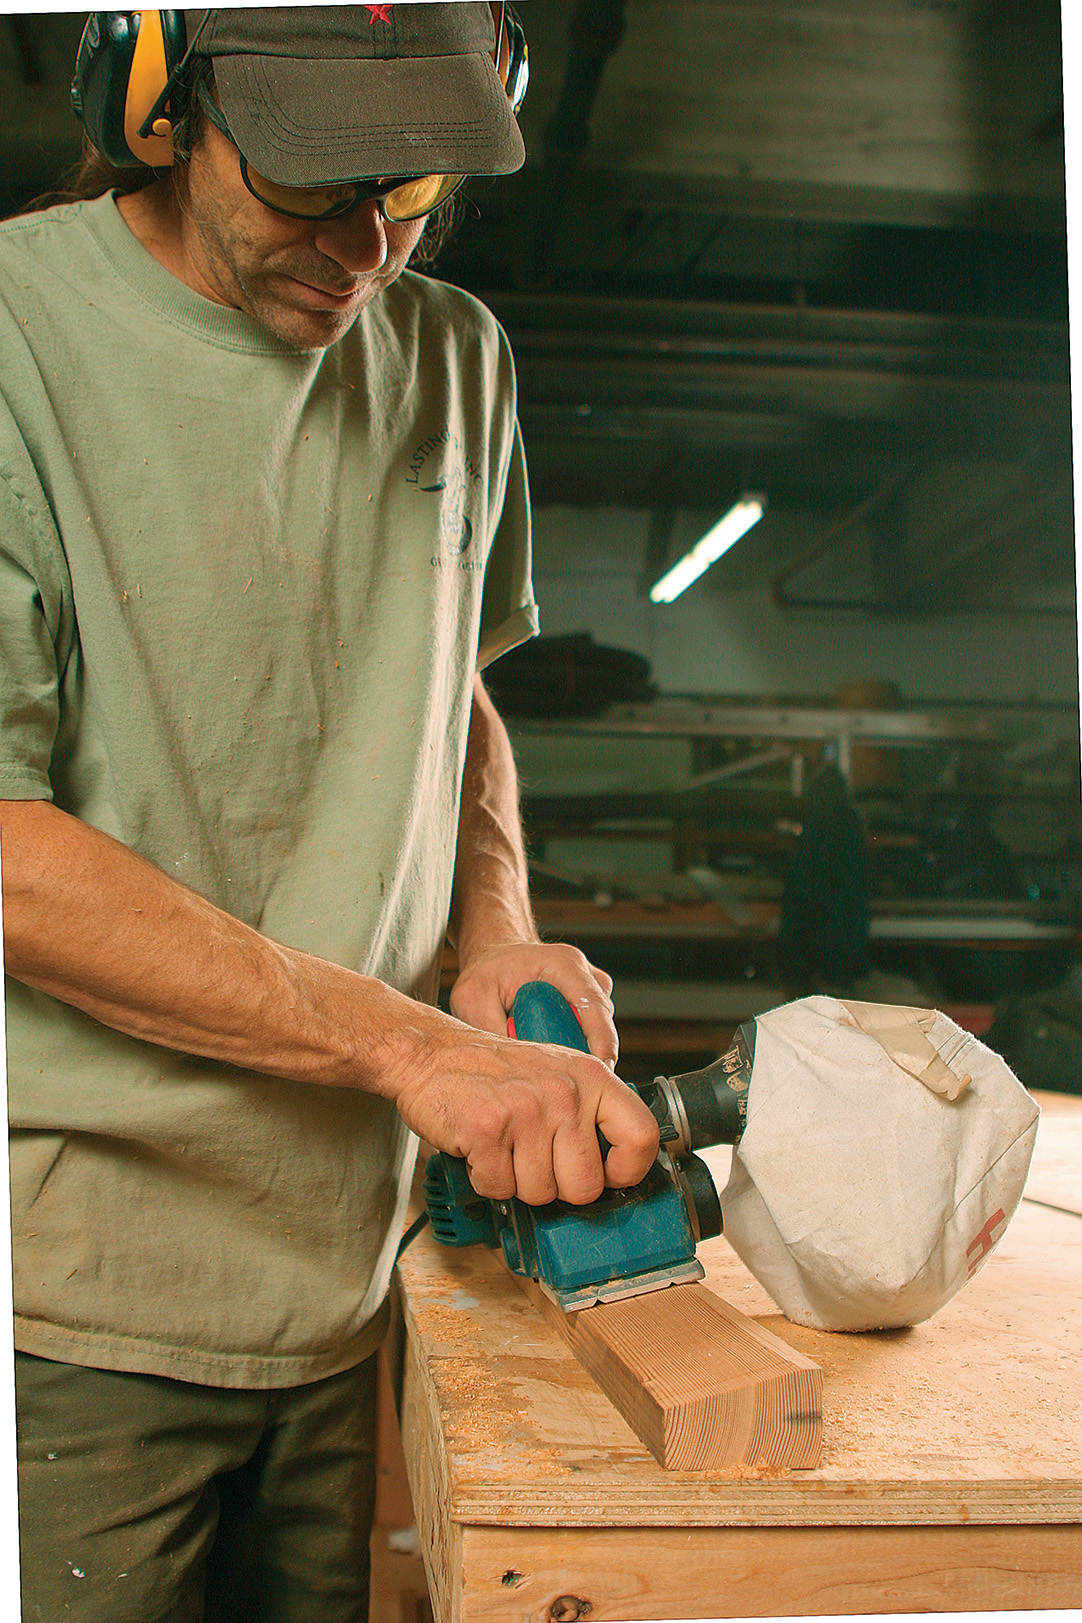
I install painted trim, so I build everything with primed stock. I cut all the pieces first, then assemble each unit with biscuits, glue, and screws to ensure that joints won’t open over time. Once all the units are built, and the nail and screw holes are filled, I prime any exposed wood and give everything a first coat of finish paint.

Get the proportions right

The windows on the project featured here are a mixture of Marvin (www.marvin.com) double hung, casement, and fixed units. All of the windows have aluminium-clad exteriors and primed wood interiors, and they are installed with a nailing flange. The nailing flange is set 1 in. back from the face of the unit, which in turn ends up 1 in. proud of the unsided building.

Because one of the functions of the trim is to protect the window, I like to use at least 5/4-in. stock. Likewise, if there is going to be a reveal between the two components in this assembly, I prefer that the trim be proud of the window. Leaving the window proud of the trim looks cheap.

Getting the trim width correct can be a bit trickier. Stock dimensions (31⁄2-in. and 51⁄2-in. boards) rarely create pleasing proportions. The right width typically depends on the size, the shape, and the style of the house and windows.

The windows on this house called for a Craftsman-style trim design, which I created using various reveals. By bumping the head casing up to 11⁄2 in. thick and by having it extend past the legs by 1⁄2 in. on each side, I was able to do two things. First, the thicker head casing provided additional protection to the window. Second, the 1⁄4-in. reveal between the head and legs added a subtle shadowline to create an interesting look. Both the head and the leg stocks are factory-primed finger-jointed cedar. It’s stable and weather resistant, and it takes paint well. I eased the edges for a softer look and a more durable finish.

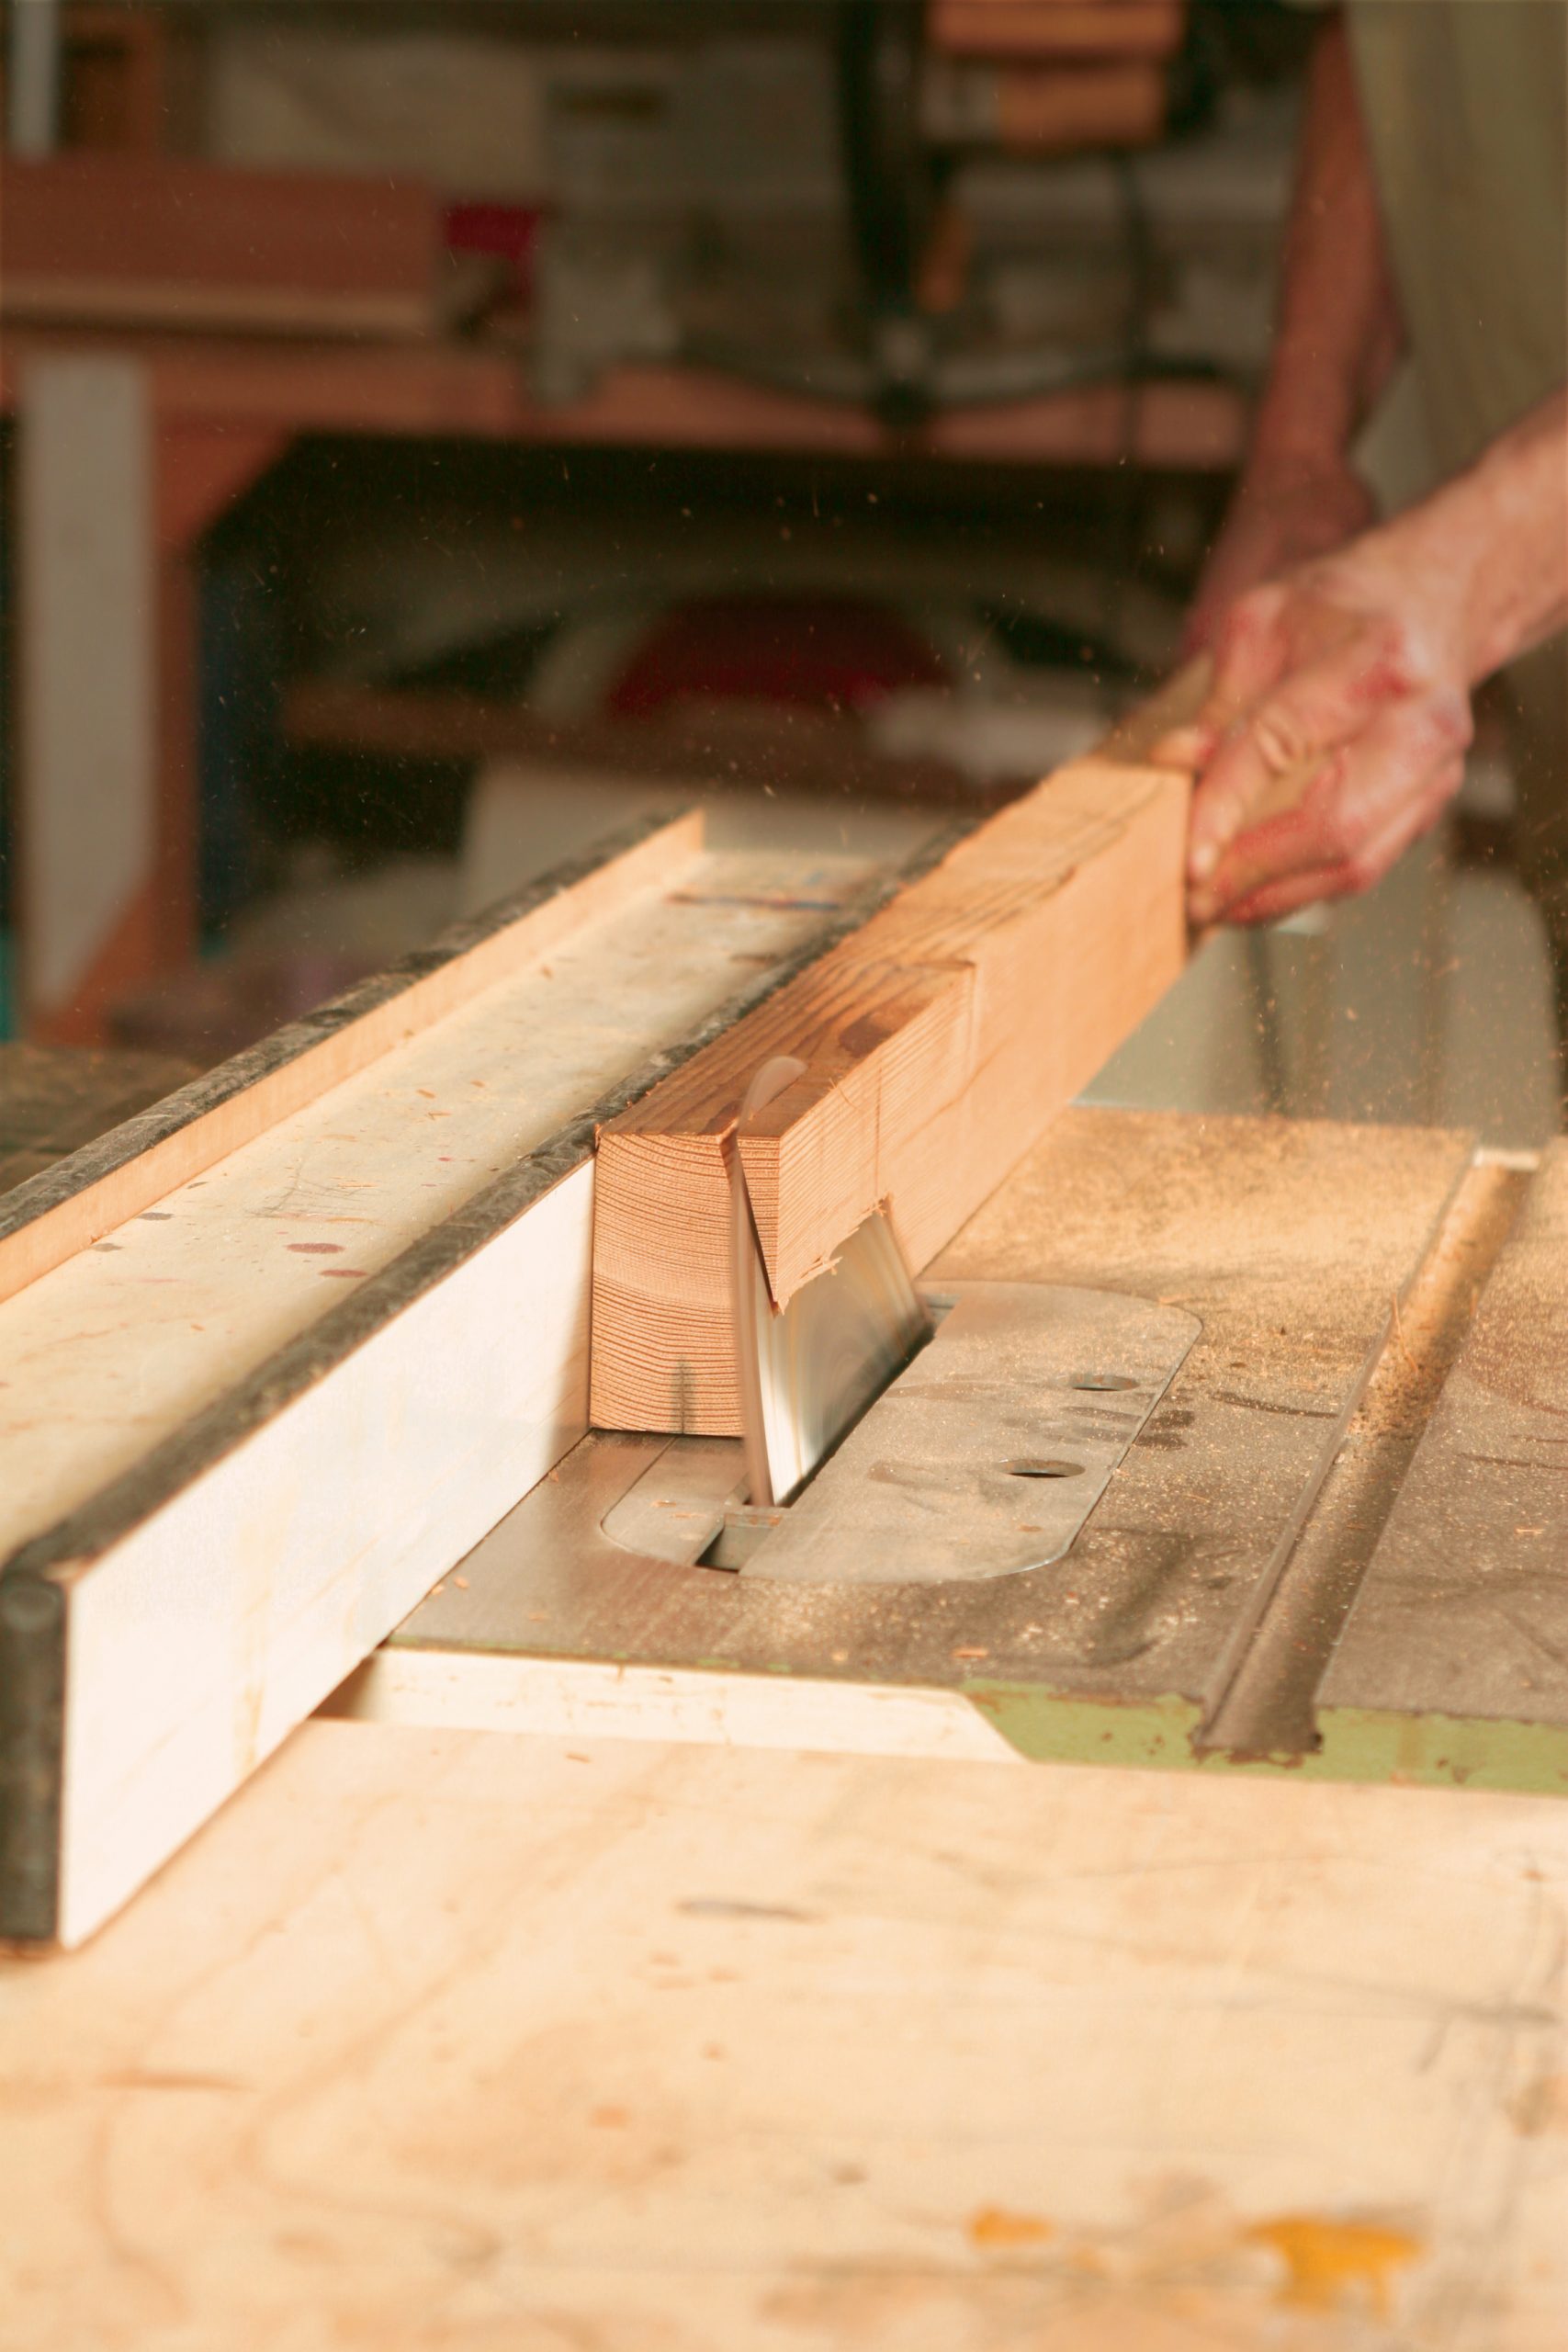
I milled the sill from durable Douglas fir. The sill’s shape is all about function. The top is pitched to shed water, and the bottom is kerfed to prevent water from wicking up behind the trim.

I made the sill run past the casing by 1⁄4 in. on each side as well. I plugged the head and the sill reveals into my formula, so I was able to cut everything first and assemble the pieces later.

I’ve used this process on four projects now with four different window-trim styles, and the results have been uniformly awesome. The trim units go up quickly and painlessly, and the painter I work with loves making just one trip to fill nail and screw holes and to caulk, and one trip for a final (second) coat. I don’t have to worry as much about the weather, and my body is thankful for the additional rest.


Mill the sill

Use a stable material like clear vertical-grain Douglas fir (shown here). Shape the stock, add a drip edge, then prime  with a high-quality exterior primer.

shape the wood with an angle when making trim for exterior windows
Straight stock gets an angled rip. Start with an appropriate length of 21⁄2-in. by 13⁄4-in. stock. Rip a 15° bevel to create the sill’s pitched face. Lower the blade and reset the fence. Then kerf the bottom of the sill to create a drip edge.

planing the face of the wood smoothly
Plane the face smooth. Use a power planer to remove saw marks and to dimension the sill’s flat top to equal the depth of the window’s cladding.

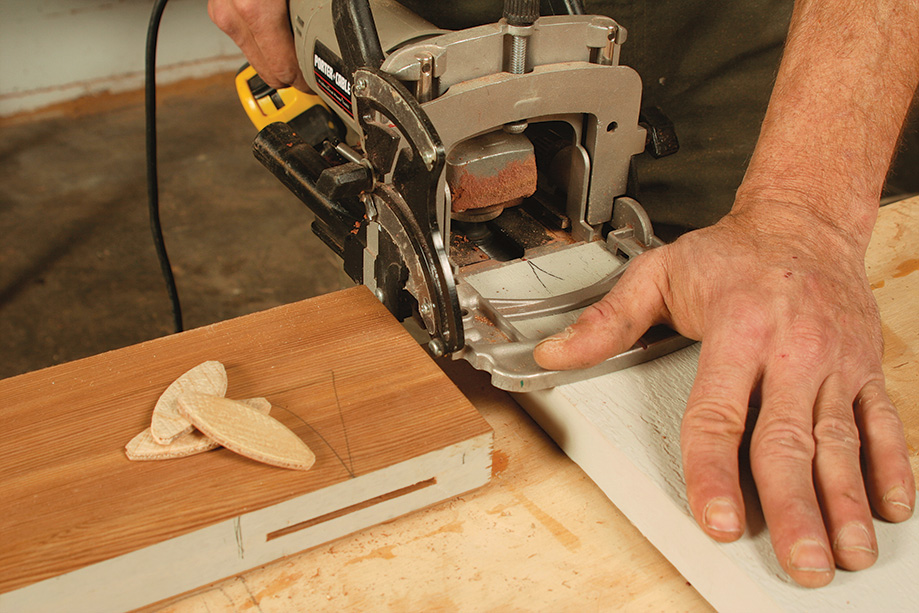
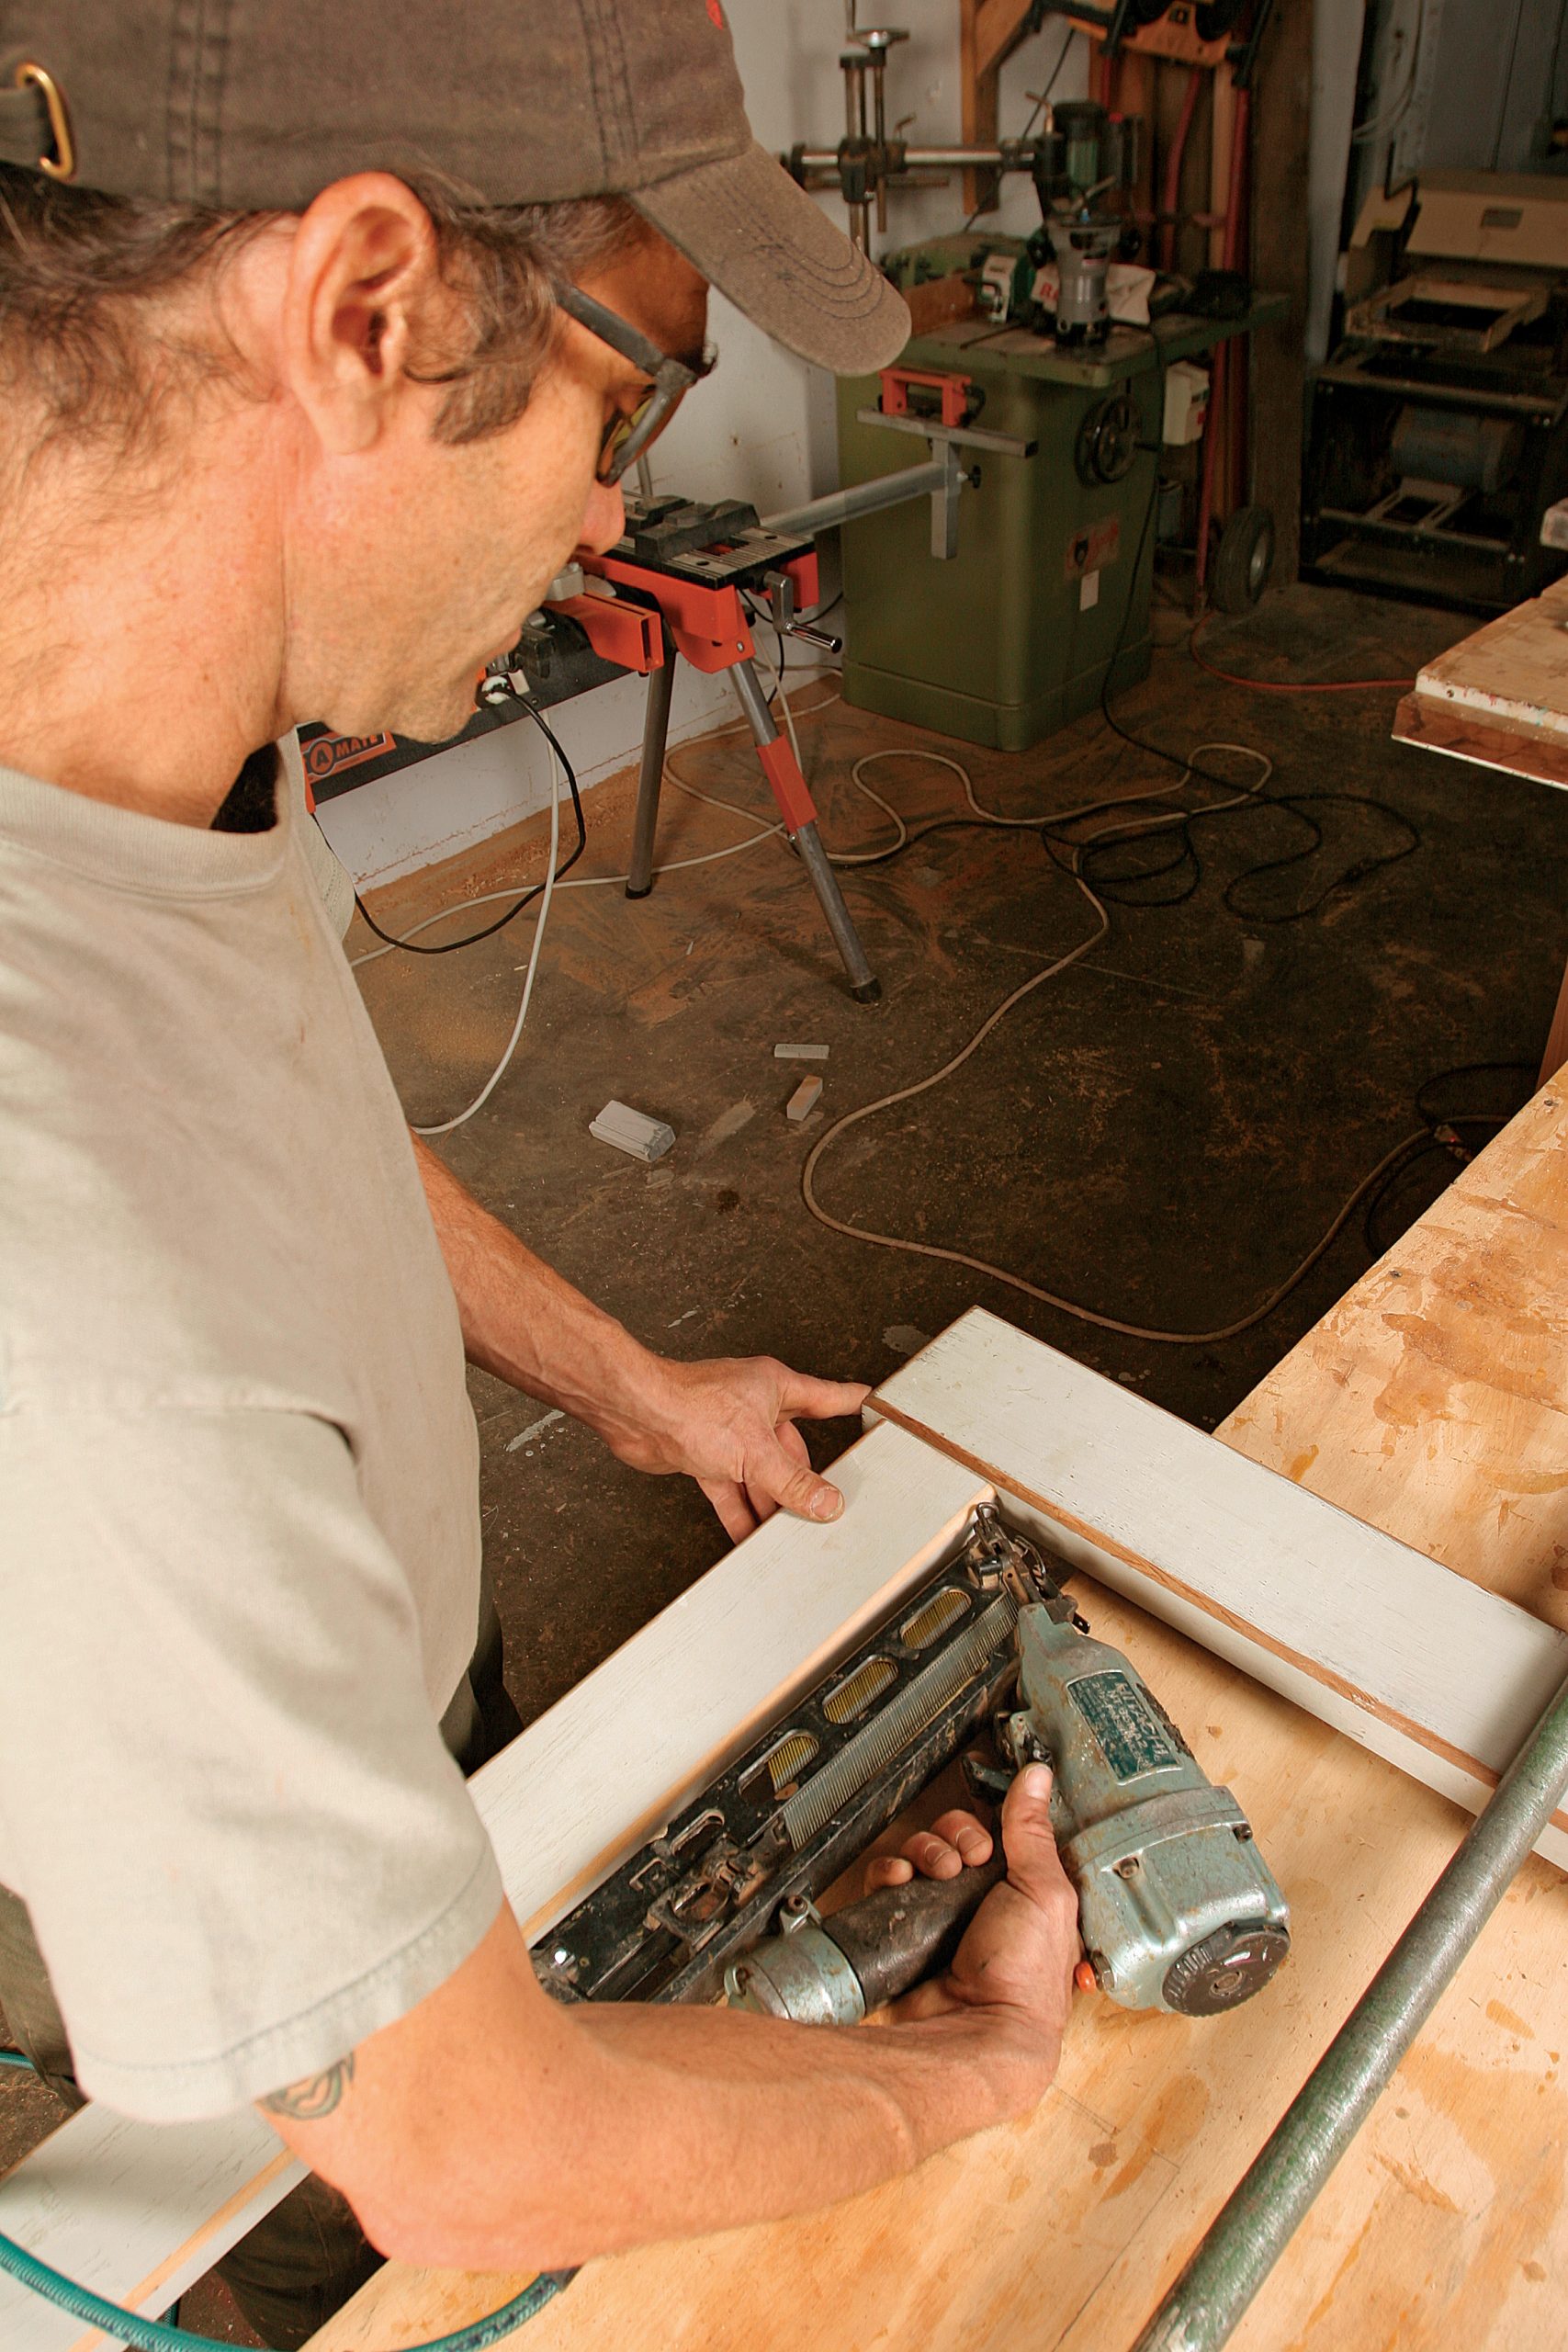
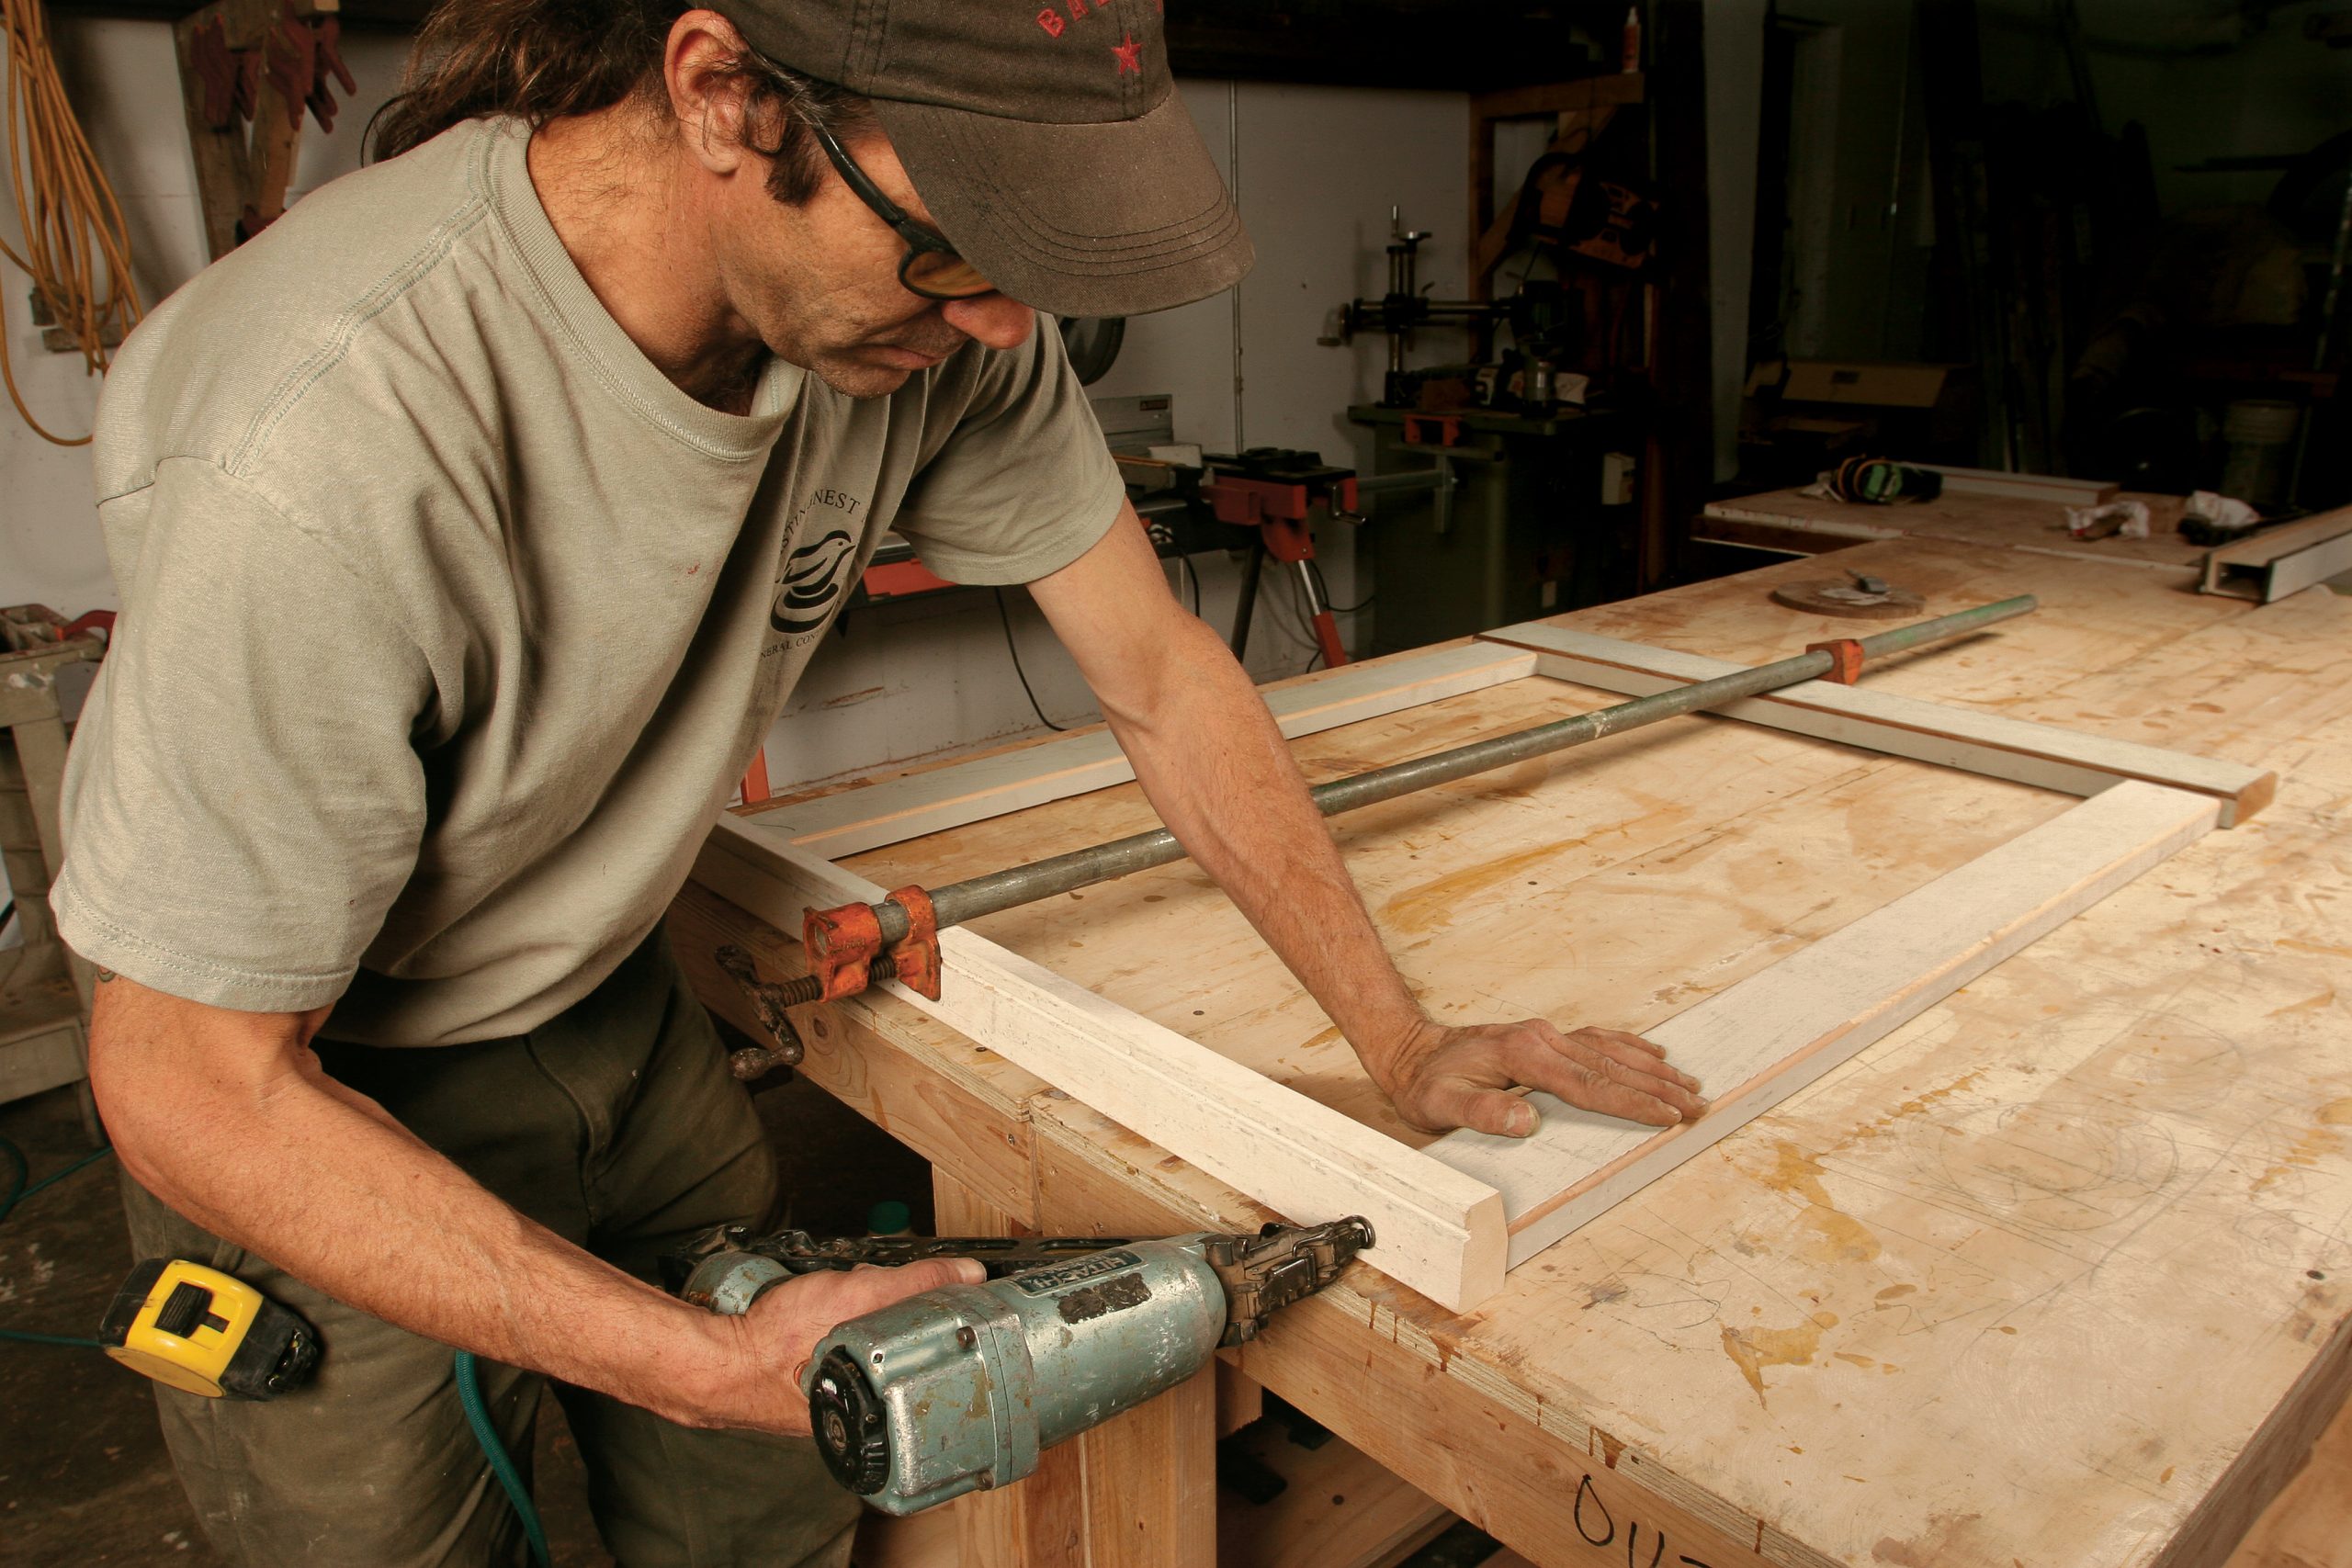
Keep the casing square during assembly

Biscuit the legs to the head, and glue and nail the sill to the legs. Use an exterior glue such as Titebond III (www.titebond.com). Dry-fit the pieces before assembly. One bar clamp is enough to hold things together as the glue dries. Use a framing square to check the assembly throughout the process.

slot the legs and head of the wood for the trim
1 Slot the legs and the head. When the head and legs are different thicknesses, register the fence to the back of the stock. Register off the face when joining heads and legs of the same thickness.

toenail the corners of the trim for exterior windows
2 Toenail the corners. Place a toenail in the inside edge of the leg using 21⁄2-in. galvanized finish nails. This adds strength to the joint while the glue dries so that it doesn’t twist during the rest of the assembly.

nail the window sill to the legs
3 Nail the sill to the legs. Attach the sill to the legs with glue and 21⁄2-in. galvanized finish nails. Leave the unit clamped for an hour while the glue sets up. Prime the end grain, then fill nail holes with a solvent-based wood filler like PL FI:X Solvent Wood Filler (www.stickwithpl.com). Complete the casing with one or two coats of finish paint.

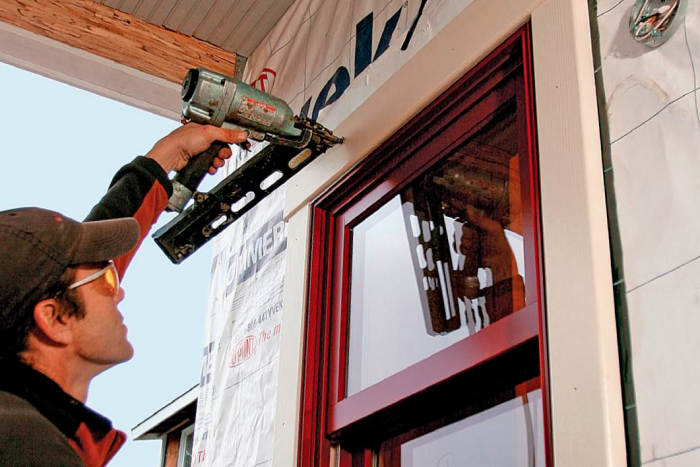
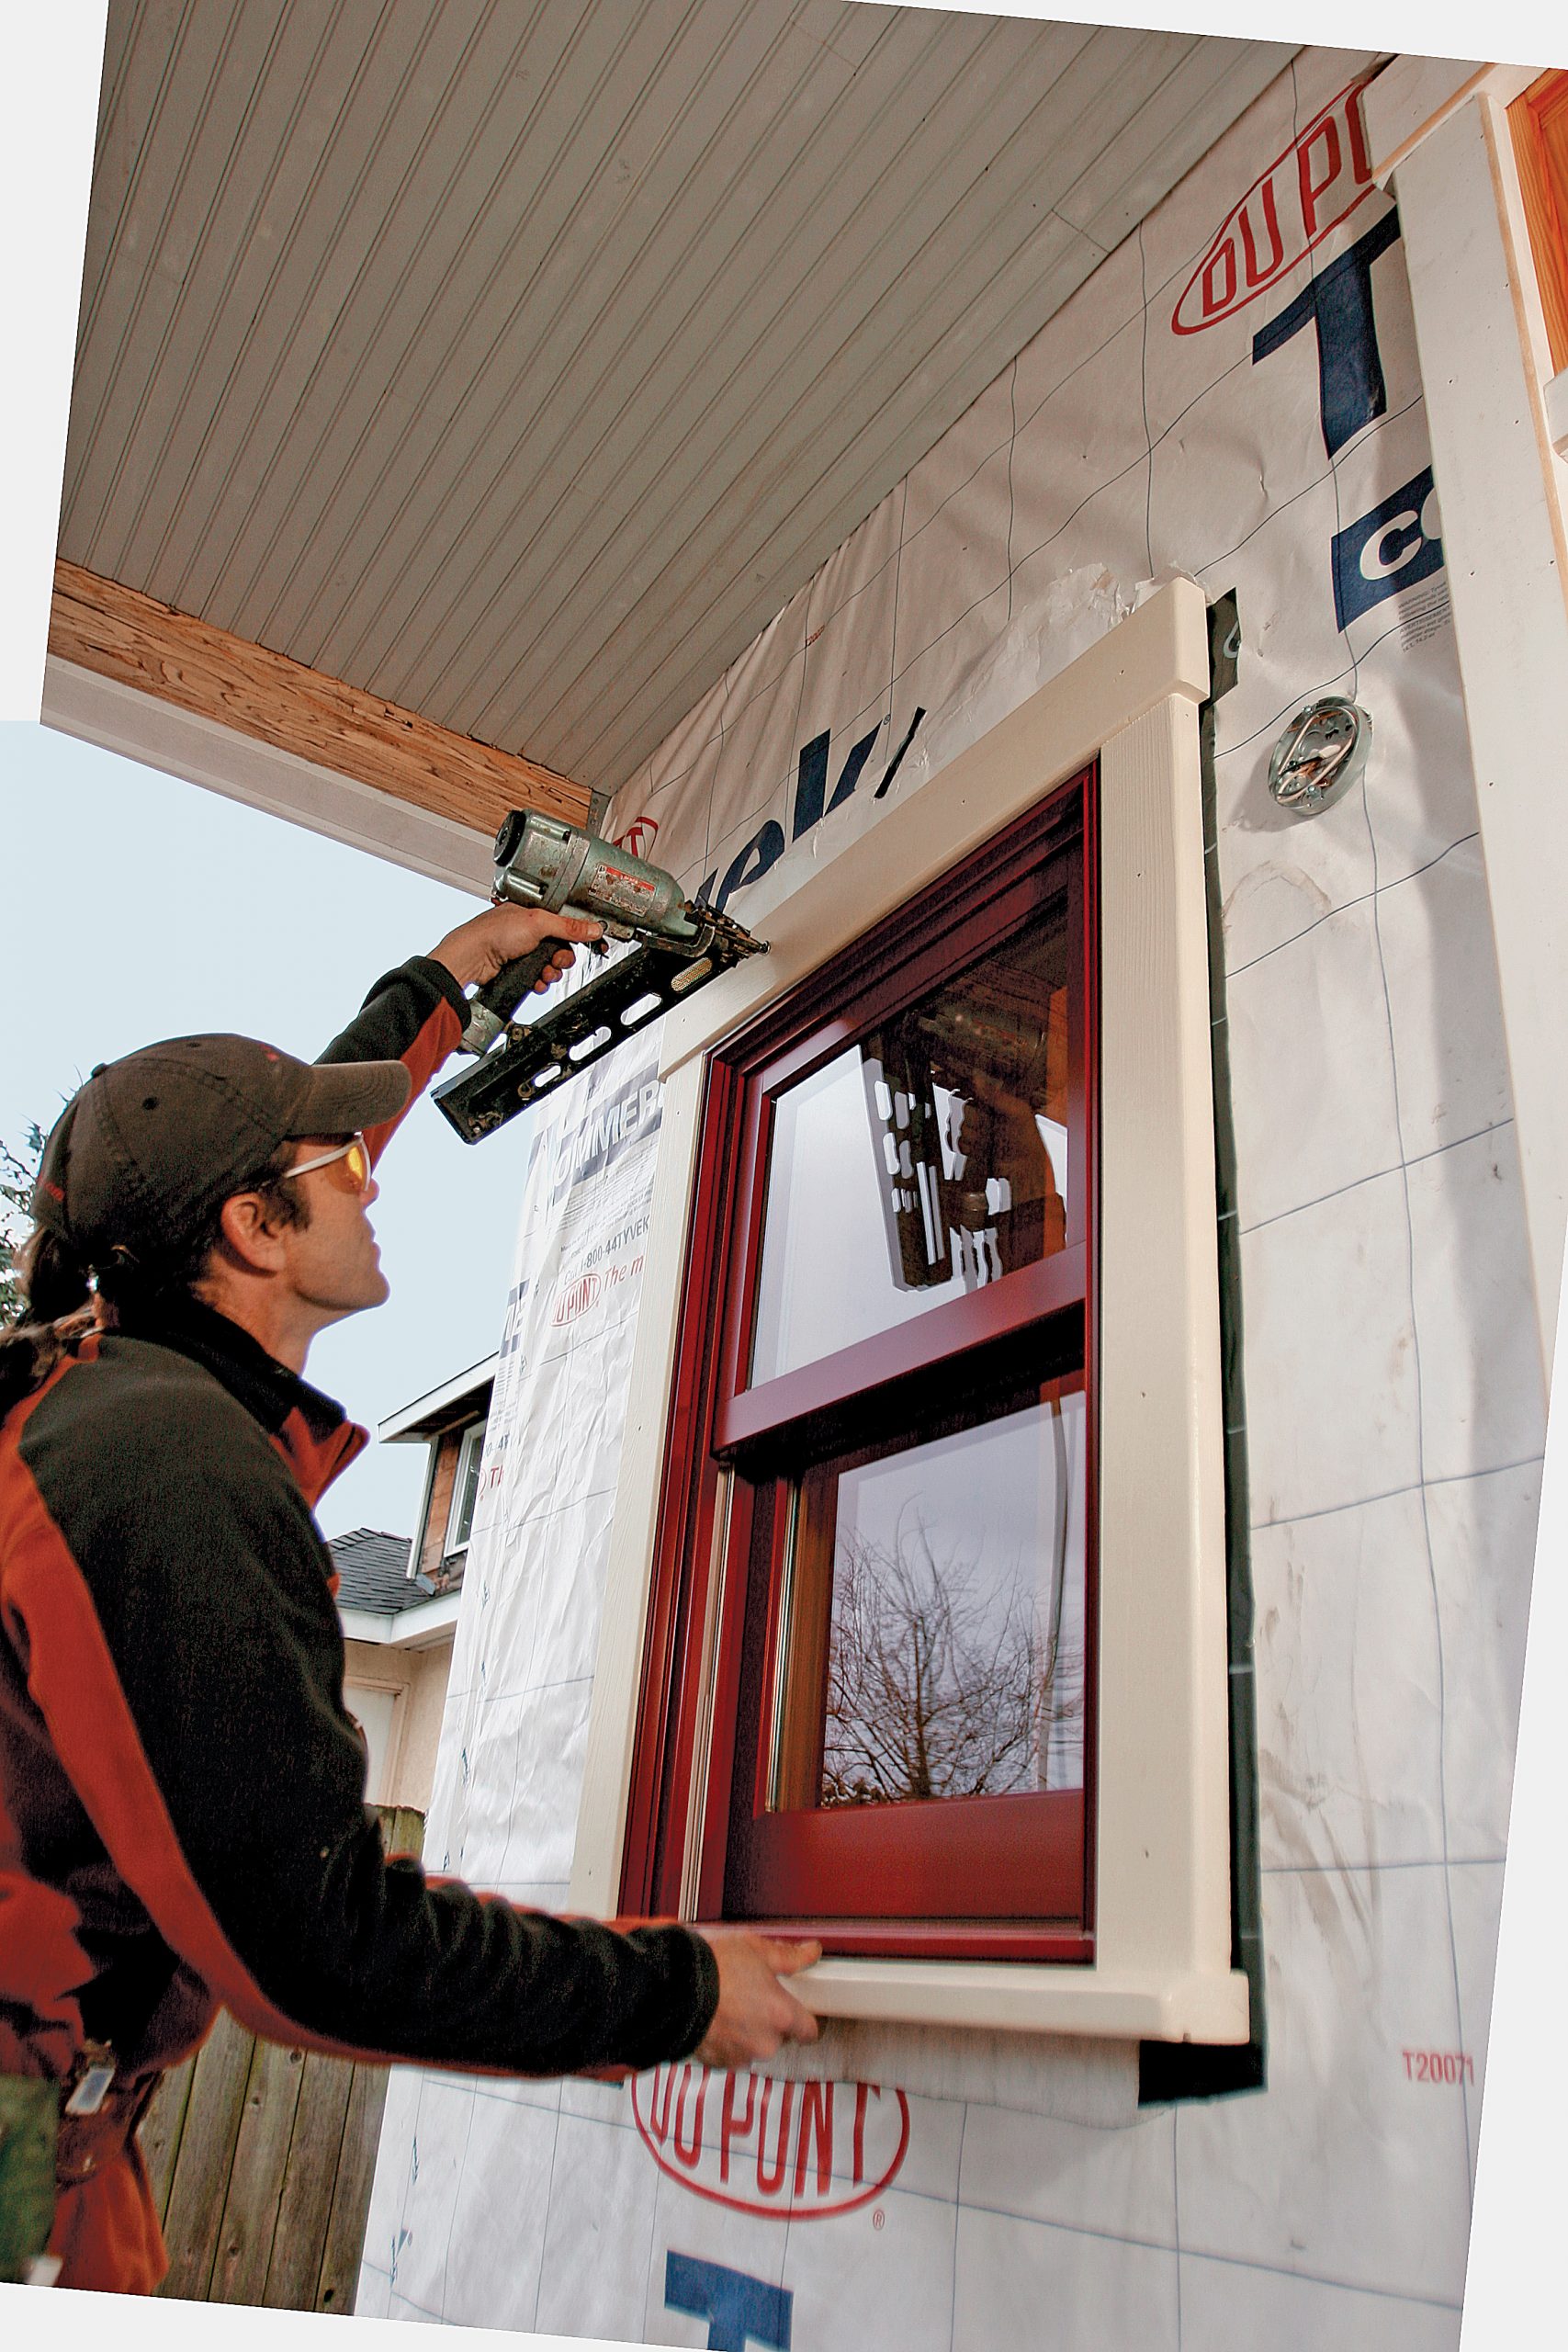
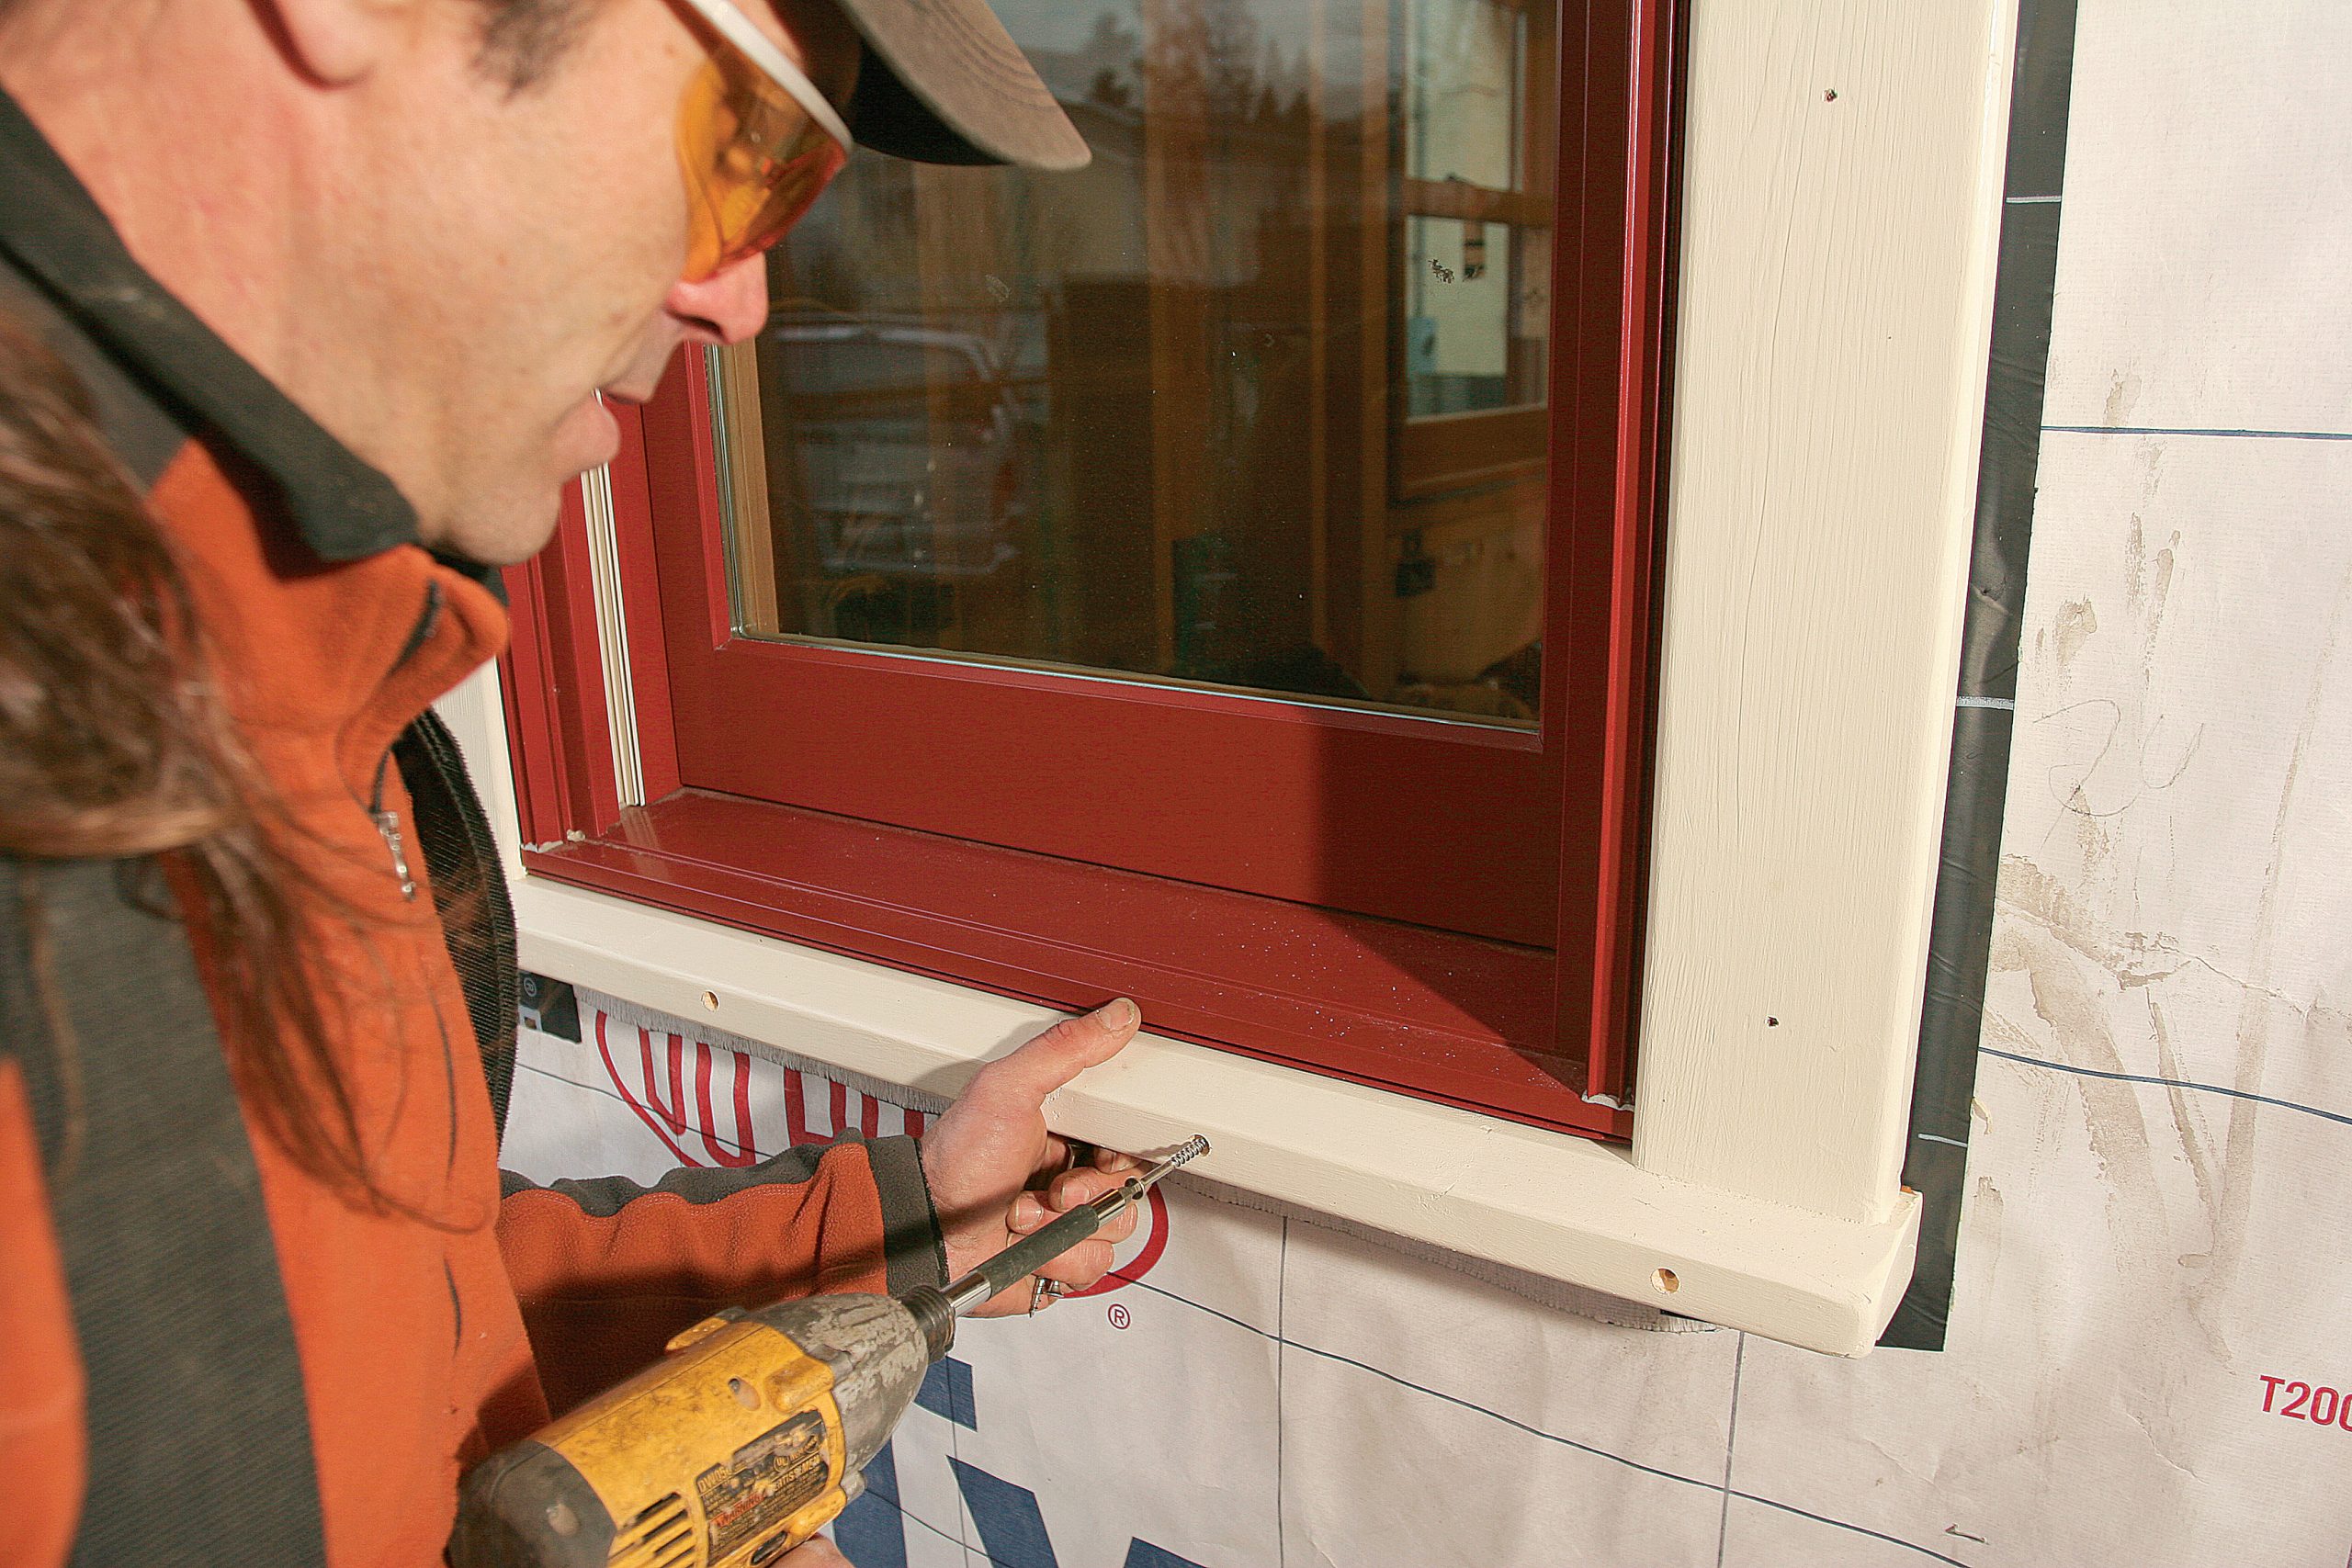
Nail the casing; screw the sill

The unit slips over the window, then is attached to the house with finish nails and screws. The legs and head are caulked between the casing and the window; later, the head casing is flashed into the housewrap.

nailing the trim exterior windows
Nailing in the window sill.

sinking the screwhead
Sink the screwhead. Nail the head and legs every 9 in. using 21⁄2-in. galvanized finish nails. Then screw the sill to the framing. Use a 3⁄8-in. countersink bit to sink the screwhead about 1⁄2 in. belowthe surface. Fill the hole with a plug made of the same material.

Photos courtesy of Chris Ermides.


RELATED LINKS

  • How to Trim an Exterior Window
  • How to Install Exterior Window Trim
View PDF
Previous: Prefabricating Exterior Window Trim Next: Installing Exterior PVC Window and Door Trim

Guide

Siding & Exterior Trim

Chapter

Installing Exterior Trim

Sign up for eletters today and get the latest how-to from Fine Homebuilding, plus special offers.

Signing you up...

This site is protected by reCAPTCHA and the Google Privacy Policy and Terms of Service apply.
See all newsletters
See all newsletters

Log in or create an account to post a comment.

Sign up Log in

Become a member and get full access to FineHomebuilding.com

Siding & Exterior Trim

Siding & Exterior Trim

Trusted, comprehensive guidance from the pros for choosing, installing, and repairing siding and exterior trim

View Project Guide

View All Project Guides »

Become a member and get unlimited site access, including the Siding & Exterior Trim Project Guide.

Start Free Trial

Choosing Siding
  • Materials
  • Design Options
Installing Siding
  • Siding Basics
  • Lap Siding
  • Shingle Siding
  • Board & Batten
  • Fiber Cement and Composite Siding
  • Vinyl Siding
  • Masonry Claddings
Choosing Exterior Trim
  • Trim Materials
  • Trim Design
Installing Exterior Trim
  • Trim Basics
  • Roof Eaves Trim
  • Corner Boards
  • Corbels & Brackets
  • Window & Door Trim
Repairing Siding & Trim
  • Trim Repairs
  • Siding Repairs

Fine Home Building

Newsletter Sign-up

  • Fine Homebuilding

    Home building tips, offers, and expert advice in your inbox.

  • Green Building Advisor

    Building science and energy efficiency advice, plus special offers, in your inbox.

  • Old House Journal

    Repair, renovation, and restoration tips, plus special offers, in your inbox.

Signing you up...

This site is protected by reCAPTCHA and the Google Privacy Policy and Terms of Service apply.
See all newsletters

Follow

  • Fine Homebuilding

    Dig into cutting-edge approaches and decades of proven solutions with total access to our experts and tradespeople.

    Start Free Trial Now
    • Facebook
    • Instagram
    • X
    • LinkedIn
  • GBA Prime

    Get instant access to the latest developments in green building, research, and reports from the field.

    Start Free Trial Now
    • Facebook
    • YouTube
  • Old House Journal

    Learn how to restore, repair, update, and decorate your home.

    Subscribe Now
    • Facebook
    • Instagram
    • X

Membership & Magazine

  • Online Archive
  • Start Free Trial
  • Magazine Subscription
  • Magazine Renewal
  • Gift a Subscription
  • Customer Support
  • Privacy Preferences
  • About
  • Contact
  • Advertise
  • Careers
  • Terms of Use
  • Site Map
  • Do not sell or share my information
  • Privacy Policy
  • Accessibility
  • California Privacy Rights

© 2025 Active Interest Media. All rights reserved.

Fine Homebuilding receives a commission for items purchased through links on this site, including Amazon Associates and other affiliate advertising programs.

  • Home Group
  • Antique Trader
  • Arts & Crafts Homes
  • Bank Note Reporter
  • Cabin Life
  • Cuisine at Home
  • Fine Gardening
  • Fine Woodworking
  • Green Building Advisor
  • Garden Gate
  • Horticulture
  • Keep Craft Alive
  • Log Home Living
  • Military Trader/Vehicles
  • Numismatic News
  • Numismaster
  • Old Cars Weekly
  • Old House Journal
  • Period Homes
  • Popular Woodworking
  • Script
  • ShopNotes
  • Sports Collectors Digest
  • Threads
  • Timber Home Living
  • Traditional Building
  • Woodsmith
  • World Coin News
  • Writer's Digest
Active Interest Media logo
X
X
This is a dialog window which overlays the main content of the page. The modal window is a 'site map' of the most critical areas of the site. Pressing the Escape (ESC) button will close the modal and bring you back to where you were on the page.

Main Menu

  • How-To
  • Design
  • Tools & Materials
  • Video
  • Blogs
  • Forum
  • Project Guides
  • Reader Projects
  • Magazine
  • Members
  • FHB House

Podcasts

  • FHB Podcast
  • ProTalk

Webinars

  • Upcoming and On-Demand

Podcasts

  • FHB Podcast
  • ProTalk

Webinars

  • Upcoming and On-Demand

Popular Topics

  • Kitchens
  • Business
  • Bedrooms
  • Roofs
  • Architecture and Design
  • Green Building
  • Decks
  • Framing
  • Safety
  • Remodeling
  • Bathrooms
  • Windows
  • Tilework
  • Ceilings
  • HVAC

Magazine

  • Current Issue
  • Past Issues
  • Magazine Index
  • Subscribe
  • Online Archive
  • Author Guidelines

All Access

  • Member Home
  • Start Free Trial
  • Gift Membership

Online Learning

  • Courses
  • Project Guides
  • Reader Projects
  • Podcast

More

  • FHB Ambassadors
  • FHB House
  • Customer Support

Account

  • Log In
  • Join

Newsletter

Get home building tips, offers, and expert advice in your inbox

Signing you up...

This site is protected by reCAPTCHA and the Google Privacy Policy and Terms of Service apply.
See all newsletters
See all newsletters

Follow

  • X
  • YouTube
  • instagram
  • facebook
  • pinterest
  • Tiktok

Join All Access

Become a member and get instant access to thousands of videos, how-tos, tool reviews, and design features.

Start Your Free Trial

Subscribe

FHB Magazine

Start your subscription today and save up to 81%

Subscribe

We hope you’ve enjoyed your free articles. To keep reading, become a member today.

Get complete site access to expert advice, how-to videos, Code Check, and more, plus the print magazine.

Start your FREE trial

Already a member? Log in

Privacy Policy Update

We use cookies, pixels, script and other tracking technologies to analyze and improve our service, to improve and personalize content, and for advertising to you. We also share information about your use of our site with third-party social media, advertising and analytics partners. You can view our Privacy Policy here and our Terms of Use here.

Cookies

Analytics

These cookies help us track site metrics to improve our sites and provide a better user experience.

Advertising/Social Media

These cookies are used to serve advertisements aligned with your interests.

Essential

These cookies are required to provide basic functions like page navigation and access to secure areas of the website.

Delete My Data

Delete all cookies and associated data