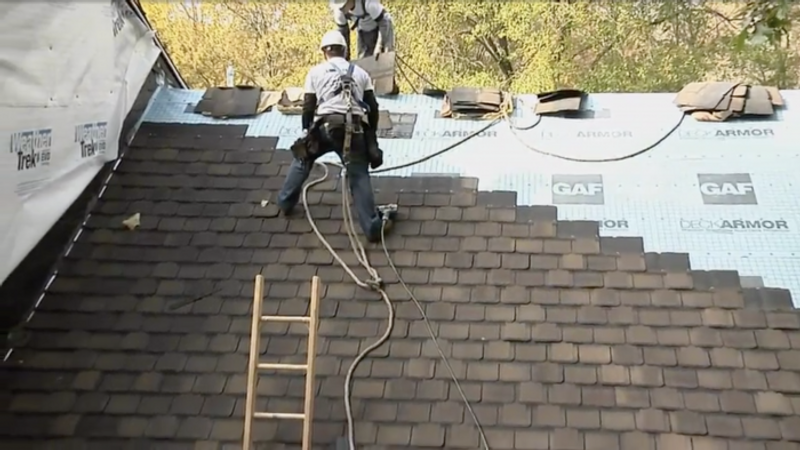
How To Install Shingles and Step Flashing
Watch as these roofers lay out materials, set a starter course, and cut and nail down flashing and shingles.

VIDEO TRANSCRIPT
Narrator: The first step in shingling is loading the roof. Despite what you commonly see, it’s bad practice to bend the bundles severely by draping them over the ridge. Instead, the roofers arrange them so they lay relatively flat.
Once the material is up on the roof, they can move on to the starter course. Shingle installation begins with starter shingles that are installed along the eave and rake edges.
Tom Melillo, residential project manager, Roof Services: The main reason for a starter course is to fill the gaps between the keys on the shingles. Without the starter course, water would run through the gaps in the shingles, eventually causing damage to the underlayment and sheathing.
Narrator: First they measure so the starter course will overhang the drip edge by 3/8-in. and snap a line. They line up the course using a complete starter shingle (not split), so it goes up the roof twice as far as normal.
Tom Melillo: We’re using a full starter in this case because of the exposure of the shingle that we’re using. It requires a full starter because the keys are so deep. On standard architectural shingle we would use a half of a starter. Starter shingles come with a perforation on the back that allows you to snap it in half.
When you’re looking at a finished roof you’ll notice a pattern. Well that pattern isn’t accidental. Shingles need to have a proper offset from each other to create that pattern.
Narrator: Because the garage roof butts into the exterior wall, we’ll need step flashing at the transition. Conventional step flashing would allow water to run down the siding and cause damage, so we’re using this kick-out flashing at the edge of the roof to direct water away from the house. Then the roofers install the first shingle on top of the starter course and kick-out flashing. Once the shingle is inlace, they will continue with traditional 4×6 aluminum step flashing that they bend by hand nailing only through the vertical leg as high up as possible.
To maintain the proper offset, they lay the next shingle upside down and use the notch on the previous shingle to locate the cut.
Working from left to right, they continue with the starter course and full shingles until they have enough coverage to continue up the roof with full shingles. The shingles in this project have yellow marks to show correct nail placement. Not all shingles have these markings, but you can find instructions for nailing on the shingle wrapper.
Again, they lay the shingles upside down to mark the next cut, and they use a knife with a hooked blade to prevent damage to underlying shingles. They are careful not to nail through the step flashing as they nail the shingles. Architectural shingles have two or three layers, so it may take several passes to cut through them.
They repeat the process over and up as they continue shingling the entire roof. Nails should be driven flush with the shingle. Over-driven nails can lead to shingle blow off in high winds. Under-driven nails can wear through the shingles on top of them leading to leaks.
Once shingling is complete, only two steps remain. They will have to cut the overhanging rake shingles and install the ridge vent.


View Comments
A few of the practices shown in the video may not meet the building code, shingle manufacturers' instructions nor the National Roofing Contractors Association manual for steep slope roofing. The starter course serves two important functions. As the installer noted the starters fill in the open shingle tab slots. The starter must also create a bond to the overlying shingle tabs to keep the leading eave edge from lifting up. The installer is shown driving nails along the top edge of the starter shingles. These nails alone will not resist wind uplift. Nails must be driven about an inch up from the bottom edge of the roof and located beneath the overlying shingle tabs so the heads aren't exposed to the weather.
The minimum step flashing size by code must have a 4 in. roof leg, a 4 in. wall leg and must be at least 2 in. taller than the exposure portion of the roof shingles. Most shingles today require a 7 5/8 in. or 8 in. tall flashing. The 6 in. height noted in the description is much too short.
And the standard roofing practice is to nail the top outside corner of the step flashing to the roof sheathing rather than the siding. I often broke this installation requirement earlier in my career. Now I understand the benefit of nailing the flashing to the roof rather than the wall. Future roofers can remove and replace step flashing much easier if it is not nailed to the wall.