Create a Curved Stair Riser
Templates and a laminated riser keep the curves fair and remove the guesswork.

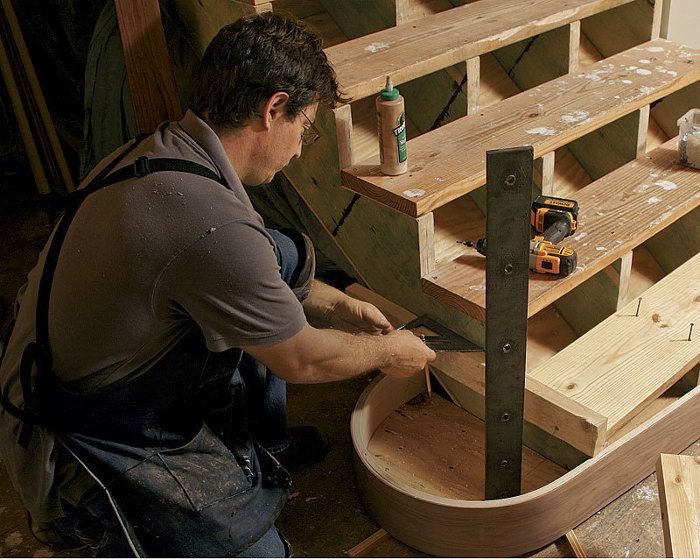
Synopsis: A finely crafted staircase is an appealing feature in any house. For carpenter Mike Belzowski, rebuilding a stairway was part of the work he undertook in his fixer-upper home. In this “Master Carpenter” article, Belzowski describes how he built a curved stair riser from thin, laminated layers of poplar and walnut. He built the curved riser using patterns, templates, and forms. The laminating form started with a pattern for half the turn; it then could be flipped over to make a symmetrical template. The template was repeated to make the layers, which were glued up to create the form. Next, Belzowski sliced laminations thin enough to mold around the riser form, glued them up, and clamped the laminated layers around the form. After the glue dried, he scraped the glue from the edges, removed it from the form, and carefully planed it to the correct width. To get the riser ready for installation, Belzowski attached blocking to the floor and bolted steel newel supports in place. This article includes a couple of tricks of the trade, one about maximizing clamp pressure and one about making a perfect roundover. Also, a tool-of-the-trade sidebar highlights a glue applicator Belzowski finds effective.
As a carpenter, I am always attracted to a finely crafted staircase. Stairs are a place where a carpenter’s work really can shine, and they make a statement about the rest of the house. In my house, I wanted to incorporate some curves in the staircase, both to add visual interest and to make the project more challenging.
I designed these stairs with a broad starting step whose curve gradually straightens out over the next two treads. The traditional way to make curved risers is to cut shallow kerfs into the back of the stock so that it will bend more easily. I’ve never liked that method, which can cause the kerfs to telegraph through to the surface and interrupt the fairness of the curve. Instead, I chose to laminate thin pieces of stock around a form. When this method is complete, the riser’s curves are exactly the way I want them. Here, I’ll break down my approach to the curved bottom riser and tread.
First, draw the plan
Templates are an important part of my stair-building process, especially when I do curved work, and they’re based on a full-size drawing. After taking measurements of the existing stair framing and checking to see that everything is level and plumb, I draw the first three risers in plan, full scale on a sheet of 1⁄4-in. plywood.
For accuracy’s sake, I draw the risers as equal rectangles, laid out from the centerlines, and then add the radiused ends and curved front. At this point, the lines I’ve drawn represent the inside of the risers. I add the thickness of the riser stock to all the layout lines and draw in the nosing projection of the treads. I also draw in the wall location and determine newel-post position and centerline on the handrail and balustrade.
The building code says that tread depths cannot vary by more than 1⁄2 in. within a staircase, but after talking to the local inspection department, I was able to have a different depth on each of the first three steps.
To create an accurate form, I made a 1⁄4-in. plywood pattern based on the full-scale drawing of the inside dimensions of the riser. I made it just over half the size of the plan view so that when I trace it onto the form stock, both sides are identical and the curve is fair across the middle.
For more photos and details, click the View PDF button below:


