FHB Logo Facebook LinkedIn Email Pinterest Twitter X Instagram Tiktok YouTube Plus Icon Close Icon Navigation Search Icon Navigation Search Icon Arrow Down Icon Video Guide Icon Article Guide Icon Modal Close Icon Guide Search Icon Skip to content
Subscribe
Log In
  • How-To
  • Design
  • Tools & Materials
  • Restoration
  • Videos
  • Blogs
  • Forum
  • Magazine
  • Members
  • FHB House
  • Podcast
Log In

Fine Homebuilding Project Guides

Kitchens

Guide Home
  • Kitchen Planning & Design
  • Featured Kitchen Projects
  • Cabinets, Built-Ins, & Pantries
  • Kitchen Islands
  • Countertops & Flooring
  • Appliances, Fixtures, & Lighting
How-To

How to Cut a Laminate Countertop for a Sink

Old-school carpenter Andy Engel shares some tips on laying out and cutting a ready-made laminate countertop for a sink.

By Andy Engel Issue 242 - April/May 2014
  • X
  • facebook
  • linkedin
  • pinterest
  • email
  • add to favorites Log in or Sign up to save your favorite articles

When you’re building or remodeling a kitchen, you can save time and money by using a ready-made laminate countertop. These tops, which generally have an integral backsplash and wraparound front edge, are durable and easy to find at home centers and lumberyards. Even if you have a laminate top custom-fabricated or you make it yourself, you can still use the sink-cutting methods described here.

Many sinks come with a layout template that makes marking the cut easy; you just trace the template with a pencil and cut out the hole with a jigsaw. If you don’t have a template, trace around the sink rim with a pencil, and then adjust the line inward to get the proper fit. On dark tops like this one, I make the layout marks on light-colored masking tape so they’re easier to see.

I cut most of the opening with a jigsaw equipped with a laminate-cutting blade. These blades cut on the downstroke to prevent chipping. If the countertop has an integral backsplash, there’s usually not enough room for a jigsaw when making the rear cut (adjacent to the backsplash). I make this cut with an oscillating multitool.

After making the rear cut, I attach a cleat to the cutout with a single screw. The cleat supports the cutout in place to prevent the countertop from breaking as the cut is finished. I use one screw so I can rotate the cleat out of the blade’s path while cutting.

To make less mess, you might be tempted to cut the top outdoors or in your shop and then move the prepared top to the sink base. I generally don’t do this because with a large hole in the center, it’s very easy to break the countertop while moving it.

1. Center the sink. Use a combination square lined up between the cabinet doors to establish the side-to-side location of the sink. Make sure the front cut won’t hit the cabinet rail below. Center the sink
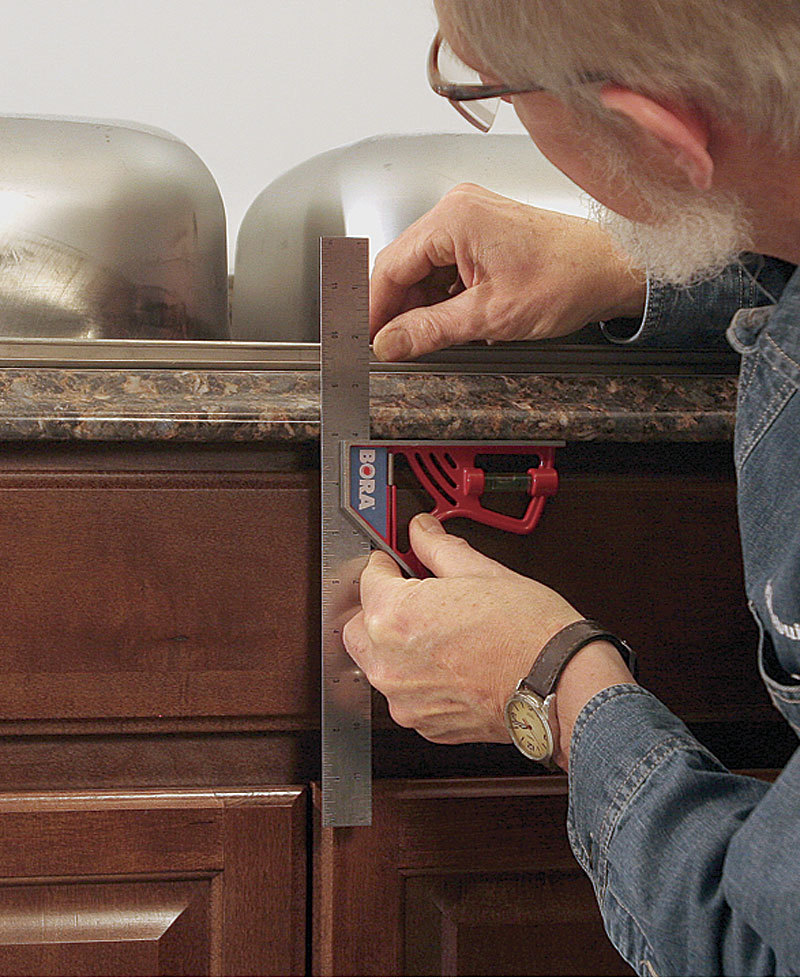
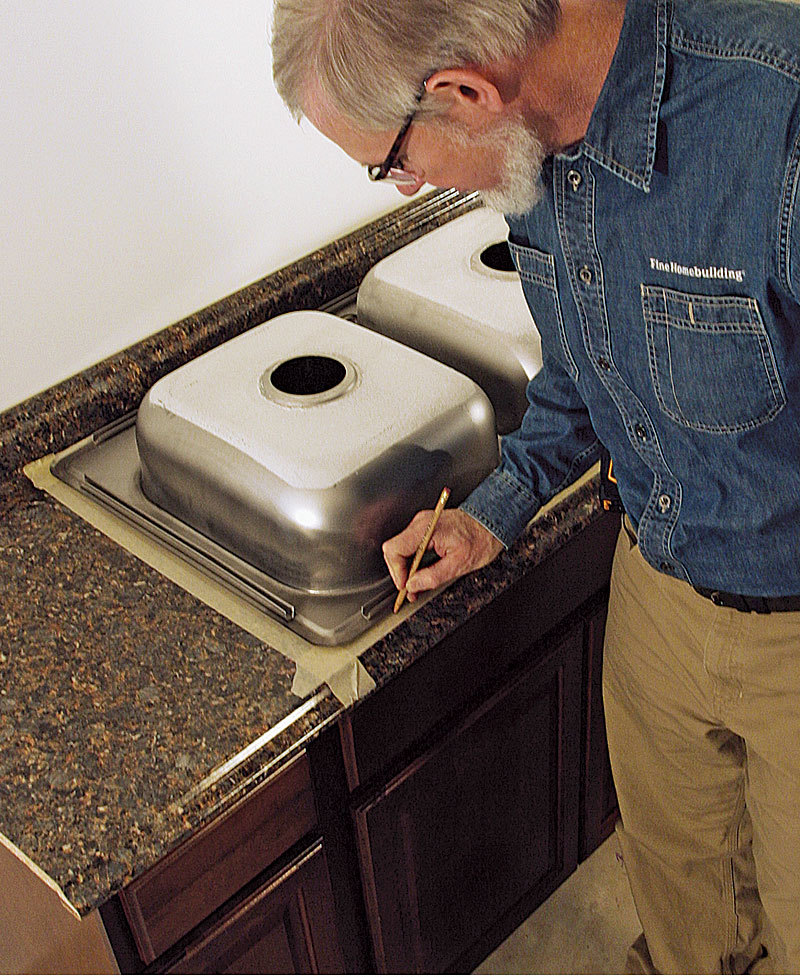
2. Trace the line. Trace the template or the sink rim as the starting point for layout lines. A layer of tape helps you see the pencil lines.


Trace the line
3. Move the line inward. Without a template, the layout line must be moved inward so it will be covered by the sink rim. The margins vary by sink, but the minimum is about 1/4 in. Make a mark at both ends of all four sides. more the line inward
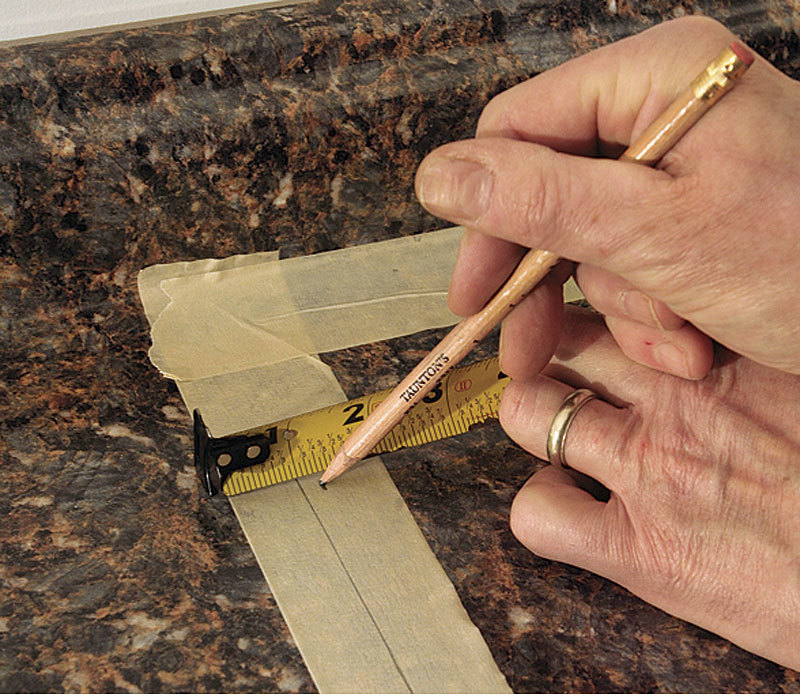
4. Connect the dots. Use a straightedge to connect the marks that correspond with the actual cutline. Connect the corners at an angle for an easier cut and better sink support. connect the dots

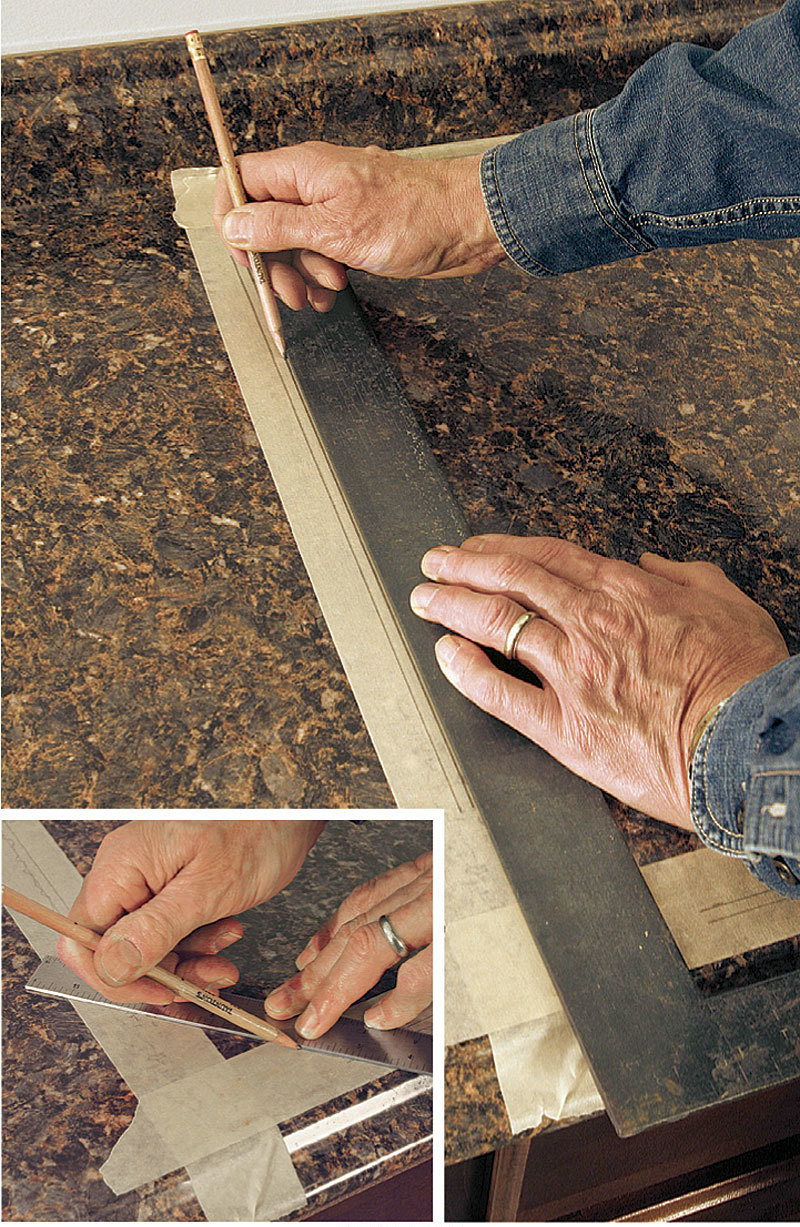
5. Double-check the layout. Confirm that the cuts will be covered fully by the sink rim, then cross out the original lines to prevent cutting on the wrong line. double check the layout
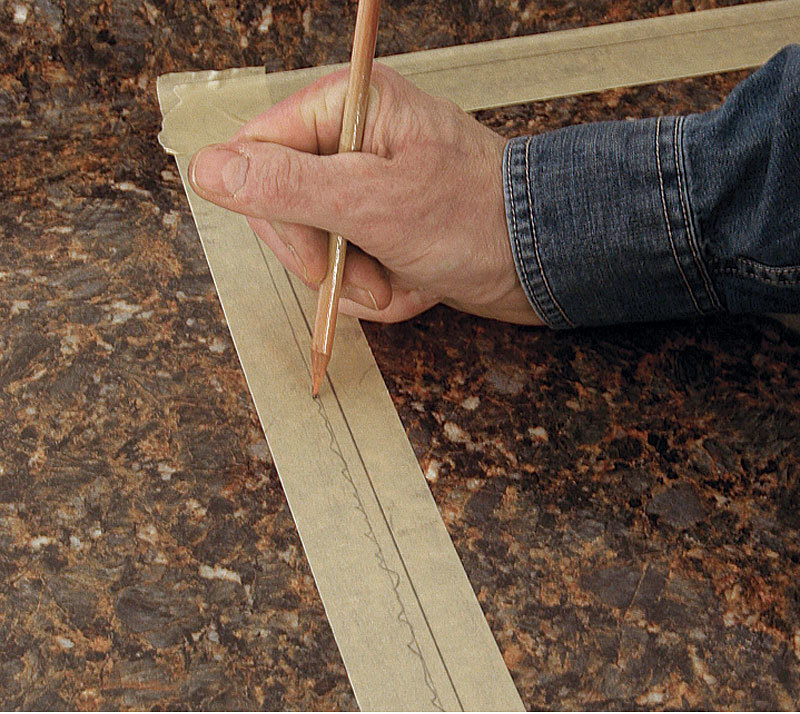
6. Drill the corners. Drill the insides of every corner with a 3⁄8-in. spade bit. Make sure the holes are fully within the lines that mark the actual sink cutout. drill the corners
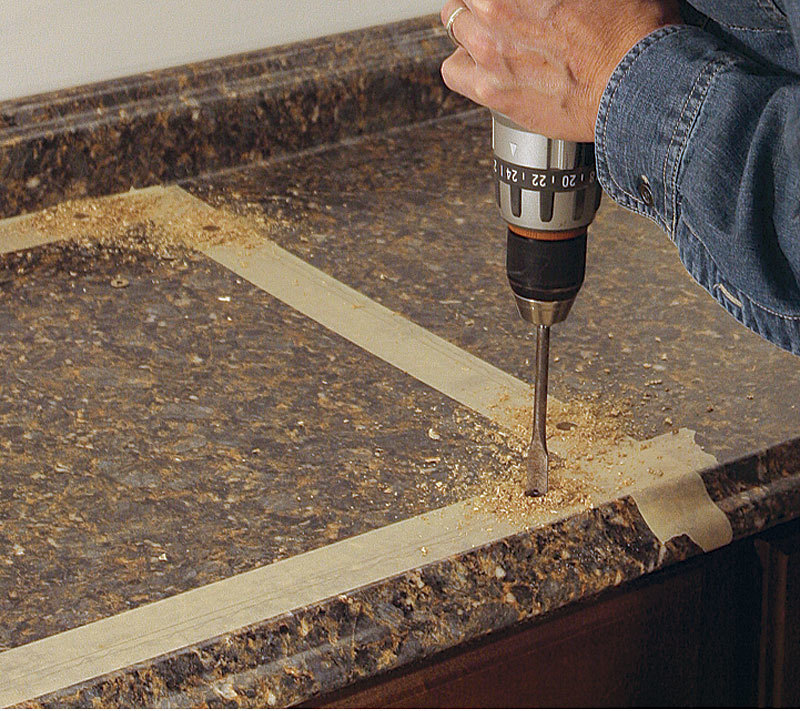
7. Cut the back. Because of the backsplash, there’s generally not enough room to cut the back side with a jigsaw. Instead, use a fine-tooth blade in an oscillating multitool.
cut the back
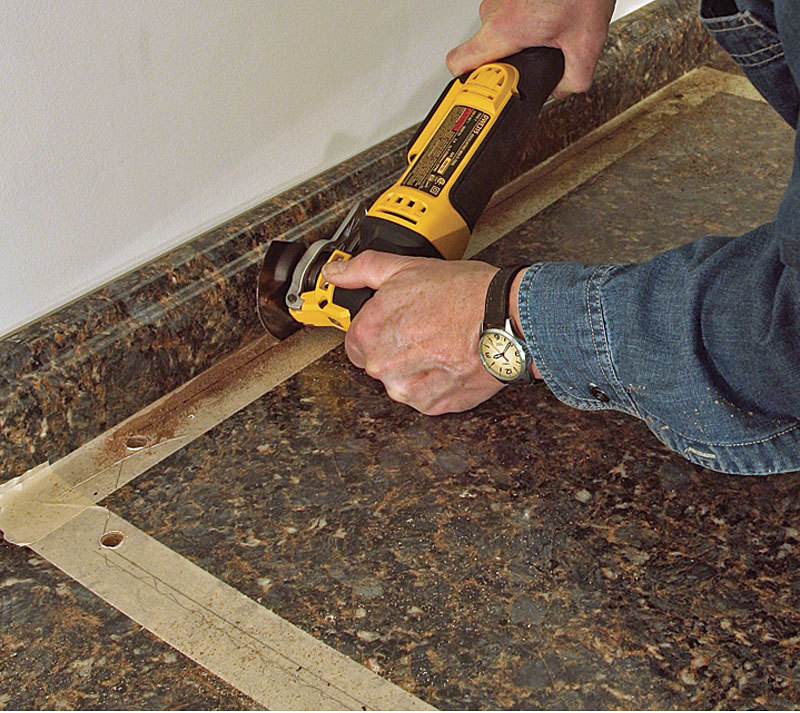
8. Attach a cleat. To prevent the top from breaking as you finish the cut, secure a cleat to the top. A single screw in the center allows you to rotate the cleat out of the way while cutting.
attach a cleat

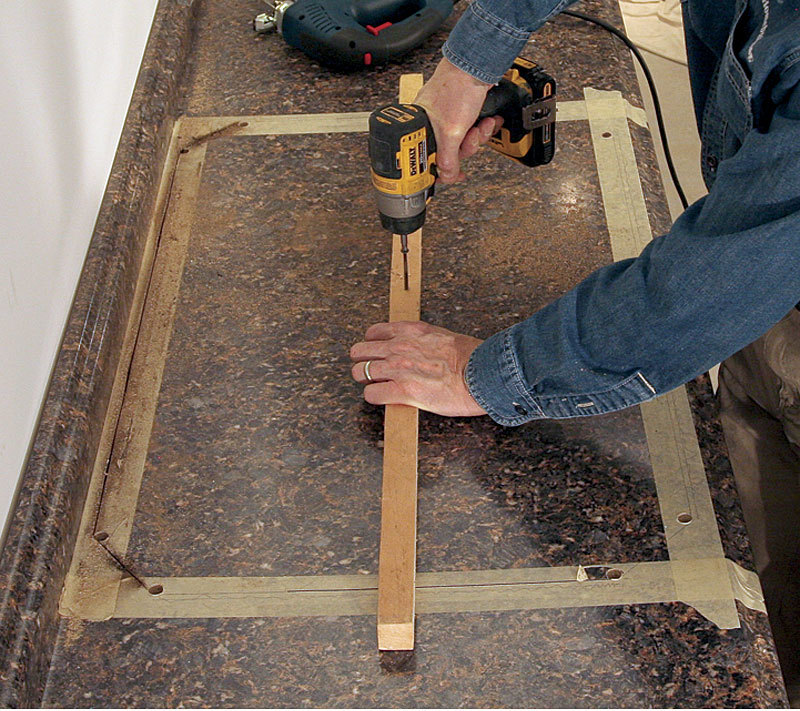
9. Finish up with a jigsaw. Use a jigsaw with a reverse-cutting blade to finish the sink cutout. Maintain downward pressure to keep the saw from bouncing as it cuts.
finish up with jigsaw
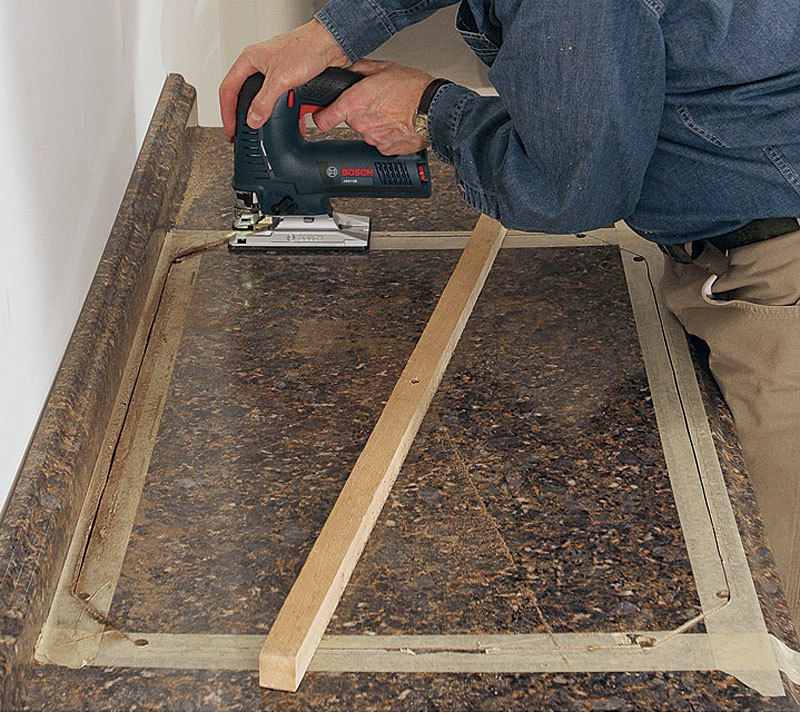
10. Test the fit. After checking that the sink fits inside the cutout, clean all dust from the countertop, run a bead of silicone sealant around the rim, and install the clips that secure the sink.
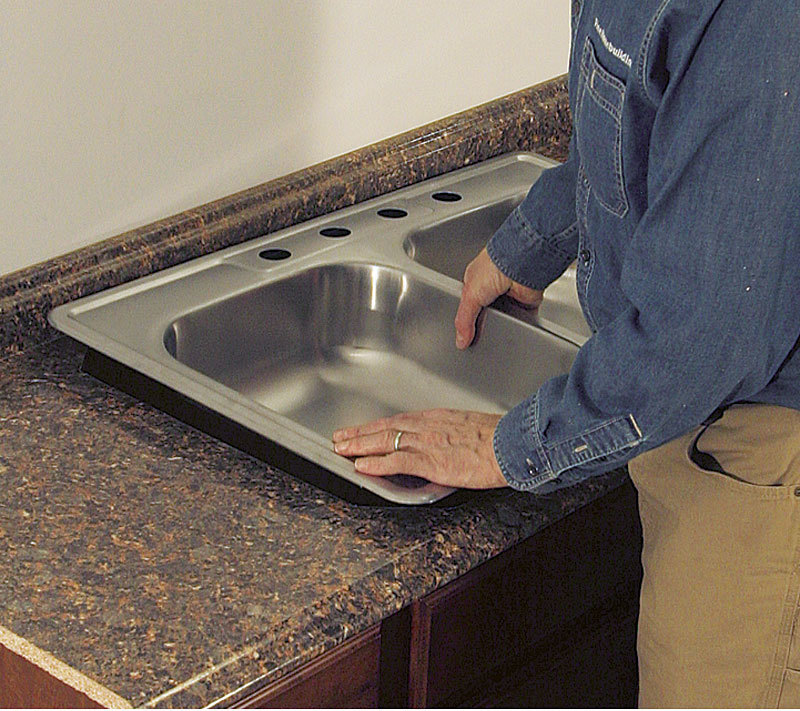
test the fit

Make the cut

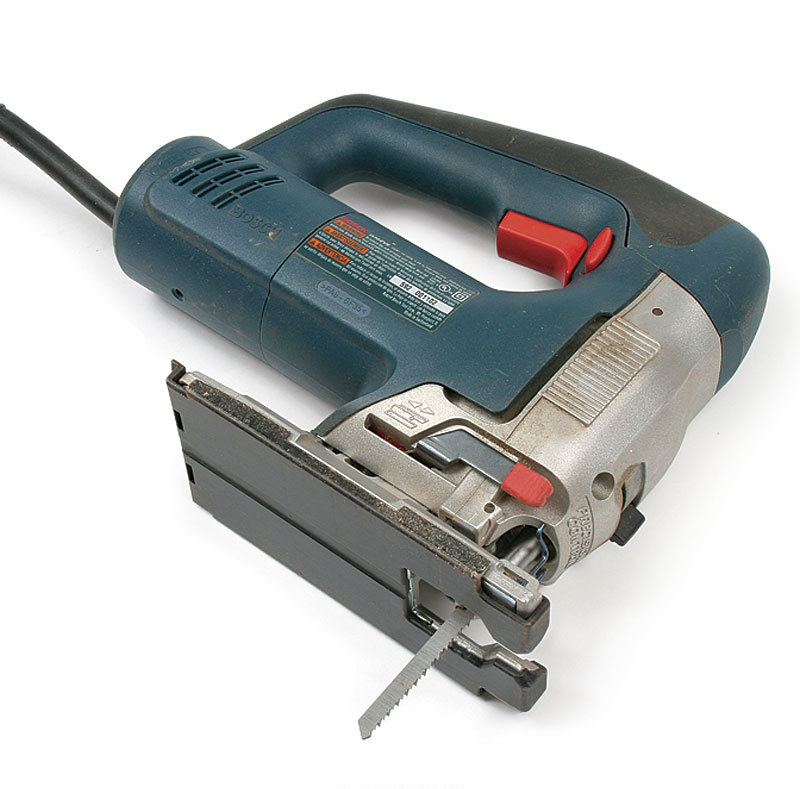
To prevent damaging the laminate countertop, use a reverse-cutting jigsaw blade. These blades have teeth that cut on the downstroke instead of the upstroke. Go slowly, and apply steady downward pressure so that the saw doesn’t bounce while cutting.

There’s often not enough room to fit a jigsaw between the back of the sink and the backsplash. In these instances, use a fine-tooth blade in an oscillating multitool. Make the cut in several passes so you don’t overheat the blade, which slows cutting and dulls the teeth.

jigsaw
jigsaw blade T101 BR

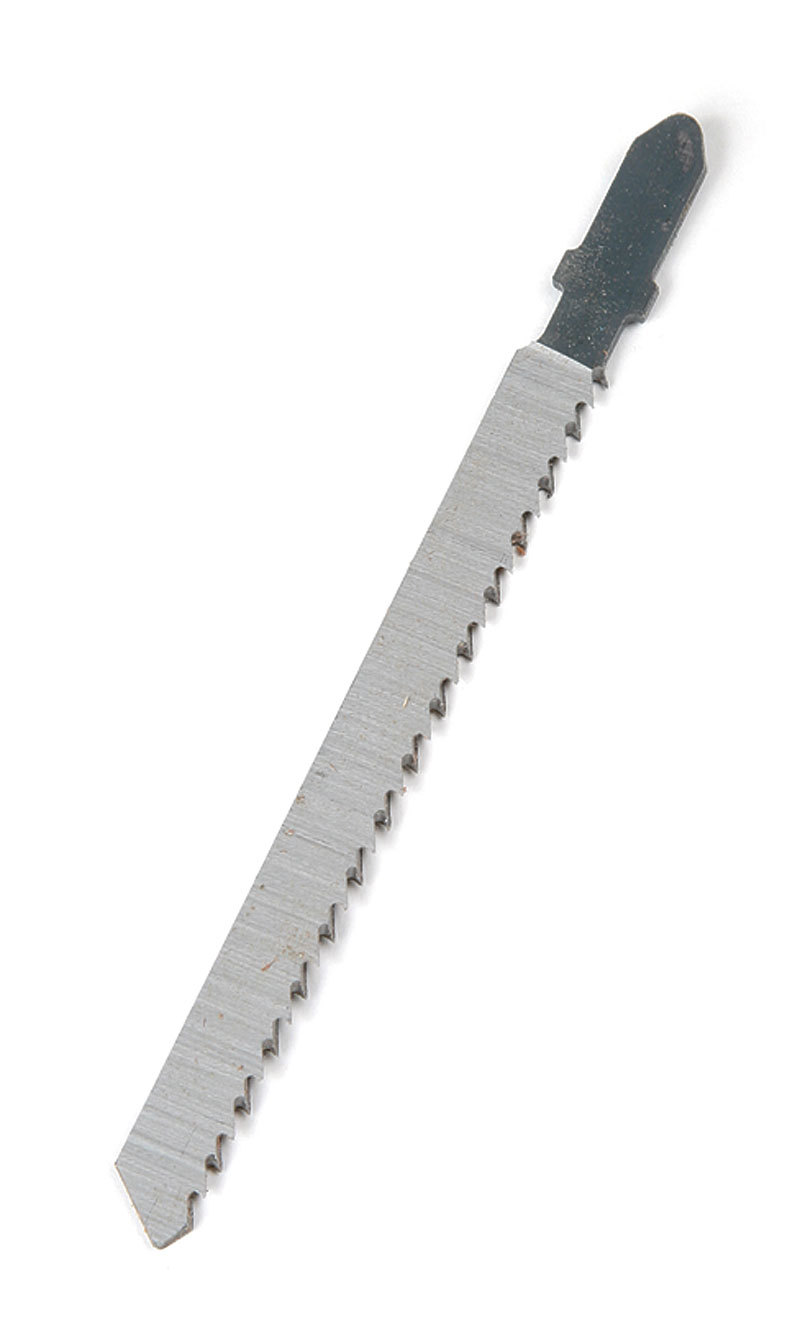
Bosch laminate cutting jigsaw blade T101 BR ($9, pack of 5)

DeWalt DWA 4210 multitool blade
DeWalt DWA 4210 multitool

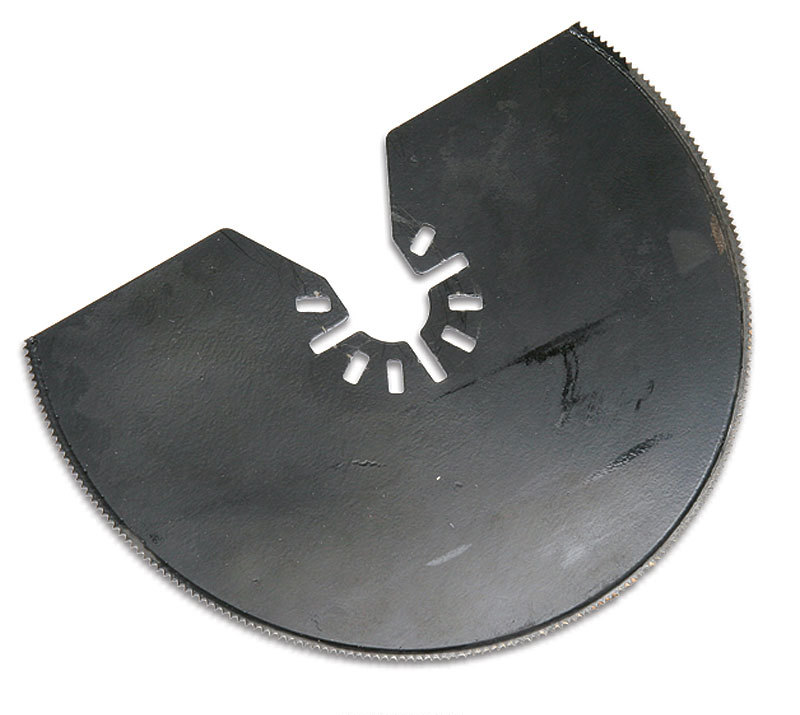
 DeWalt DWA 4210 multitool blade $20 

Photos: Patrick McCombe, except product photos by Dan Thornton

Previous: Making Wood Countertops Next: A Bolder Backsplash

Guide

Kitchens

Chapter

Countertops & Flooring

Sign up for eletters today and get the latest how-to from Fine Homebuilding, plus special offers.

Signing you up...

This site is protected by reCAPTCHA and the Google Privacy Policy and Terms of Service apply.
See all newsletters
See all newsletters

Log in or create an account to post a comment.

Sign up Log in

Become a member and get full access to FineHomebuilding.com

Kitchens

Kitchens

A complete resource for designing, building, or remodeling the kitchen of your dreams

View Project Guide

View All Project Guides »

Become a member and get unlimited site access, including the Kitchens Project Guide.

Start Free Trial

Kitchen Planning & Design
Featured Kitchen Projects
  • Kitchen Remodels
Cabinets, Built-Ins, & Pantries
  • Choosing Kitchen Cabinets
  • Installing Kitchen Cabinets
  • Cabinet Hardware
  • Breakfast Nooks
  • Pantries
Kitchen Islands
Countertops & Flooring
  • Countertops 101
  • Concrete Countertops
  • Kitchen Flooring
Appliances, Fixtures, & Lighting
  • Appliances
  • Range Hoods
  • Sinks & Faucets
  • Kitchen Lighting

Fine Home Building

Newsletter Sign-up

  • Fine Homebuilding

    Home building tips, offers, and expert advice in your inbox.

  • Green Building Advisor

    Building science and energy efficiency advice, plus special offers, in your inbox.

  • Old House Journal

    Repair, renovation, and restoration tips, plus special offers, in your inbox.

Signing you up...

This site is protected by reCAPTCHA and the Google Privacy Policy and Terms of Service apply.
See all newsletters

Follow

  • Fine Homebuilding

    Dig into cutting-edge approaches and decades of proven solutions with total access to our experts and tradespeople.

    Start Free Trial Now
    • Facebook
    • Instagram
    • X
    • LinkedIn
  • GBA Prime

    Get instant access to the latest developments in green building, research, and reports from the field.

    Start Free Trial Now
    • Facebook
    • YouTube
  • Old House Journal

    Learn how to restore, repair, update, and decorate your home.

    Subscribe Now
    • Facebook
    • Instagram
    • X

Membership & Magazine

  • Online Archive
  • Start Free Trial
  • Magazine Subscription
  • Magazine Renewal
  • Gift a Subscription
  • Customer Support
  • Privacy Preferences
  • About
  • Contact
  • Advertise
  • Careers
  • Terms of Use
  • Site Map
  • Do not sell or share my information
  • Privacy Policy
  • Accessibility
  • California Privacy Rights

© 2025 Active Interest Media. All rights reserved.

Fine Homebuilding receives a commission for items purchased through links on this site, including Amazon Associates and other affiliate advertising programs.

  • Home Group
  • Antique Trader
  • Arts & Crafts Homes
  • Bank Note Reporter
  • Cabin Life
  • Cuisine at Home
  • Fine Gardening
  • Fine Woodworking
  • Green Building Advisor
  • Garden Gate
  • Horticulture
  • Keep Craft Alive
  • Log Home Living
  • Military Trader/Vehicles
  • Numismatic News
  • Numismaster
  • Old Cars Weekly
  • Old House Journal
  • Period Homes
  • Popular Woodworking
  • Script
  • ShopNotes
  • Sports Collectors Digest
  • Threads
  • Timber Home Living
  • Traditional Building
  • Woodsmith
  • World Coin News
  • Writer's Digest
Active Interest Media logo
X
X
This is a dialog window which overlays the main content of the page. The modal window is a 'site map' of the most critical areas of the site. Pressing the Escape (ESC) button will close the modal and bring you back to where you were on the page.

Main Menu

  • How-To
  • Design
  • Tools & Materials
  • Video
  • Blogs
  • Forum
  • Project Guides
  • Reader Projects
  • Magazine
  • Members
  • FHB House

Podcasts

  • FHB Podcast
  • ProTalk

Webinars

  • Upcoming and On-Demand

Podcasts

  • FHB Podcast
  • ProTalk

Webinars

  • Upcoming and On-Demand

Popular Topics

  • Kitchens
  • Business
  • Bedrooms
  • Roofs
  • Architecture and Design
  • Green Building
  • Decks
  • Framing
  • Safety
  • Remodeling
  • Bathrooms
  • Windows
  • Tilework
  • Ceilings
  • HVAC

Magazine

  • Current Issue
  • Past Issues
  • Magazine Index
  • Subscribe
  • Online Archive
  • Author Guidelines

All Access

  • Member Home
  • Start Free Trial
  • Gift Membership

Online Learning

  • Courses
  • Project Guides
  • Reader Projects
  • Podcast

More

  • FHB Ambassadors
  • FHB House
  • Customer Support

Account

  • Log In
  • Join

Newsletter

Get home building tips, offers, and expert advice in your inbox

Signing you up...

This site is protected by reCAPTCHA and the Google Privacy Policy and Terms of Service apply.
See all newsletters
See all newsletters

Follow

  • X
  • YouTube
  • instagram
  • facebook
  • pinterest
  • Tiktok

Join All Access

Become a member and get instant access to thousands of videos, how-tos, tool reviews, and design features.

Start Your Free Trial

Subscribe

FHB Magazine

Start your subscription today and save up to 81%

Subscribe

We hope you’ve enjoyed your free articles. To keep reading, become a member today.

Get complete site access to expert advice, how-to videos, Code Check, and more, plus the print magazine.

Start your FREE trial

Already a member? Log in

Privacy Policy Update

We use cookies, pixels, script and other tracking technologies to analyze and improve our service, to improve and personalize content, and for advertising to you. We also share information about your use of our site with third-party social media, advertising and analytics partners. You can view our Privacy Policy here and our Terms of Use here.

Cookies

Analytics

These cookies help us track site metrics to improve our sites and provide a better user experience.

Advertising/Social Media

These cookies are used to serve advertisements aligned with your interests.

Essential

These cookies are required to provide basic functions like page navigation and access to secure areas of the website.

Delete My Data

Delete all cookies and associated data