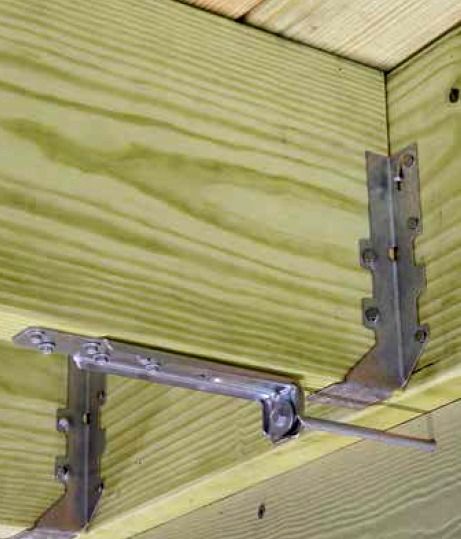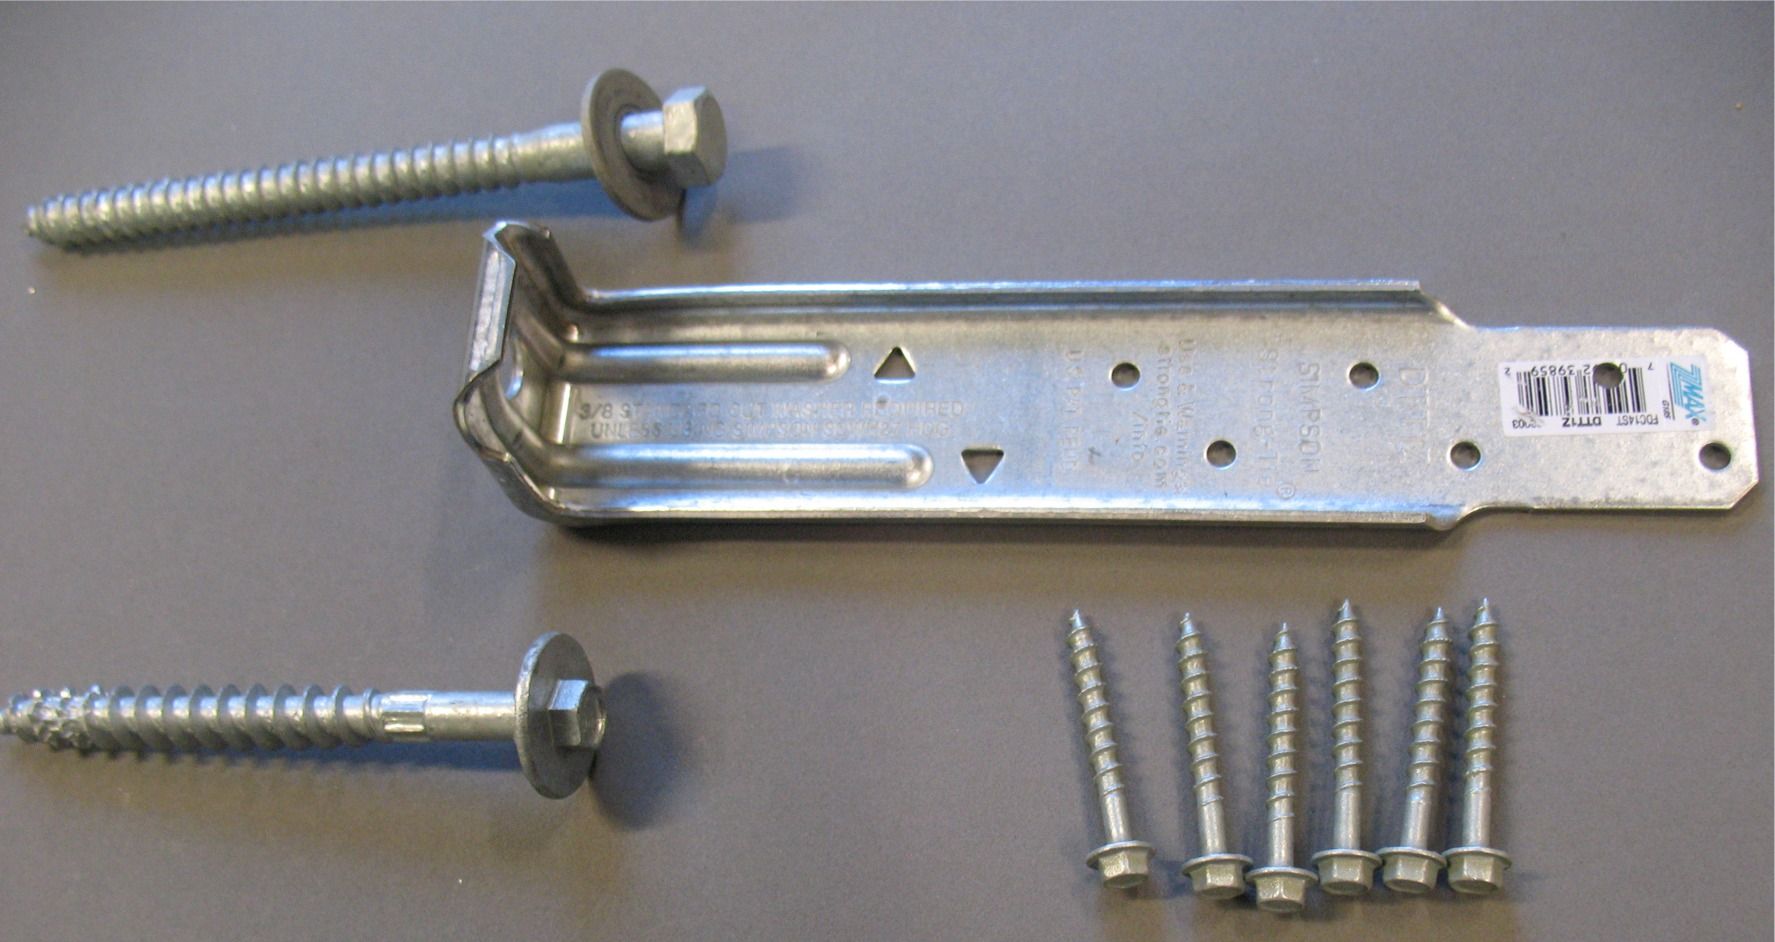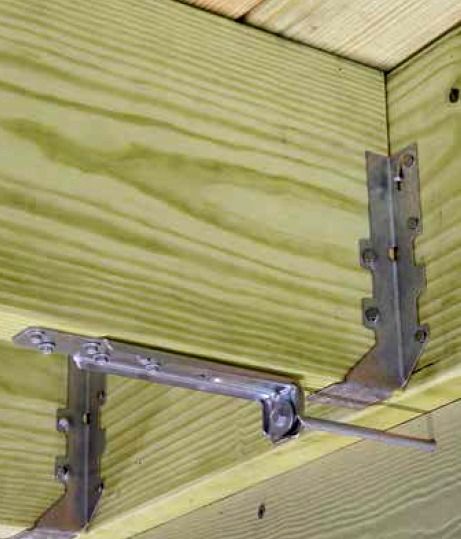

The 7 in. x 1-1/2 in. DTT1Z Deck Tension Tie from Simpson Strongtie meets the 750 lb. requirement listed in the new 2015 IRC Figure R507.2.3(2). It can be installed just as shown in the IRC figure and in a number of other configurations. Individual pieces will cost about $2 and 4 piece kits that include Simpson’s Timber-Hex HDG screws will be available too.
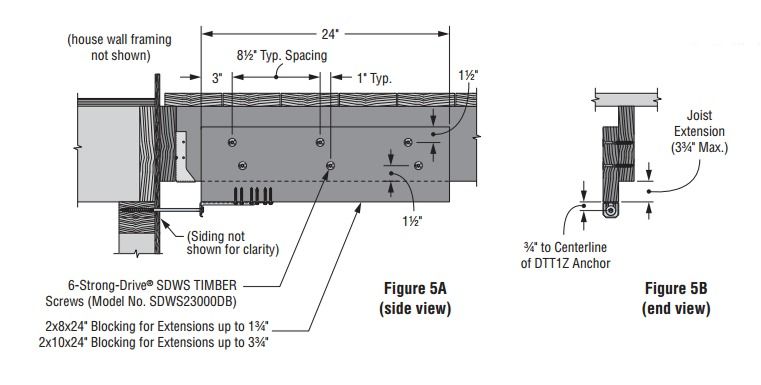
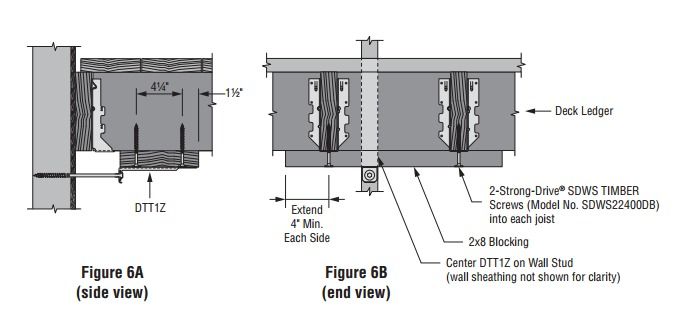
You’ll need to make 4 lateral load connections using the new 750 lb. connector according to the code. Two of them within 24 in. of the ends of the deck and the others spaced evenly along the ledger.

One standout feature of the DTT1Z – the end of the hardware that screws into the wall does not have to be in direct contact with the face of the wall, siding or ledger. This may not seem significant at first but it permits you to use a long screw that would ordinarily be too long and penetrate through the inside of the wall framing. The code requires that the mounting screw penetrate at least 3 in. into solid framing (plate, mudsill). If the hardware had to contact the wall surface you’d have to make sure you picked up the perfect length screw [hardware thickness + siding thickness + sheathing thickness +3 in. penetration]. Instead, with the DTT1Z you can use, say a 6 in. screw; drive it deep enough through the wall covering and into the framing. Then snug the DTT1Z up to the screw head and fasten it to the side of the joist. And because the DTT1Z doesn’t have to be in contact with the wall, you can use it over vinyl siding.
Strongtie also gives deck builders more attachment configurations than the plain-vanilla IRC figure. A deck lateral-load connection technical bulletin details how to mount the hardware on the bottom and side of a joist, to a block attached to the side of a joist, and to a block installed across the bottom of two joists. And you can secure the DTT1Z into a mudsill, wall plate, header or stud – more options than the IRC detail.


You’ll need to fasten the DTT1Z to a deck joist or block using either 10d x 1 1/2 in. galvanized metal hardware nails or Simpson Strongtie’s #9 x 1 1/2 in. Strong Drive SD Connector Screws. There are 6 round holes used for standard installation and two additional triangle holes for additional fasteners when needed.
The Allowable Tension Loads table shows three options for fasteners and dry and wet service columns with subcolumns for joist species type. It’s important to note that if you’re using the DTT1Z with pressure treated SPF or HF joists you will have to install either 6 of the #9 SD connector screws or 8 – 10d x 1 1/2 in. nails. Six nails won’t meet the 750lb. load requirement in these softer woods (this is where the two triangle holes come in handy).
Check out the DTT1 information flier and technical bulletin for additional info:
http://www.strongtie.com/products/connectors/dtt2.asp
http://www.strongtie.com/ftp/bulletins/T-C-DECKLAT15.pdf
Fine Homebuilding Recommended Products
Fine Homebuilding receives a commission for items purchased through links on this site, including Amazon Associates and other affiliate advertising programs.

8067 All-Weather Flashing Tape

Handy Heat Gun

Affordable IR Camera
