Remodeling a Staircase
Rebuilding these stairs in place preserved a finished ceiling below but added other challenges.

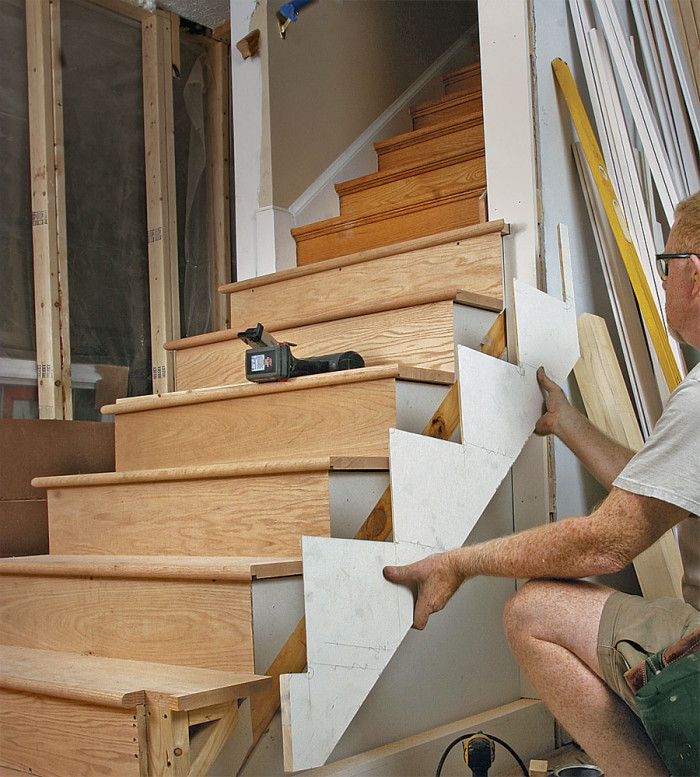
Synopsis: As part of a kitchen remodel, Michael Patterson needed to remove a wall on one side of a stair and then rebuild the stair’s lower half. Because the upper half needed no alterations, and because there was a finished ceiling below the stair, Patterson decided to rebuild the stair in place. Here, he demonstrates each step of the process: fixing the existing stair’s rough stringers, building new treads and risers, making a template for cutting skirtboards, and finishing up with the skirtboard, tread returns, tread brackets, and tread molding.
I recently remodeled a kitchen, which included opening it to an adjacent family room to improve traffic flow and sight-lines. The views and traffic had been blocked by a stairway with a full wall on one side. The architect for this remodel, Amy Stacy, called for the wall to be removed and the lower half of the staircase to receive new balustrades, returned treads, mitered risers, and decorative skirtboards.
Because only the lower half of the stairway needed to be altered and no work was being done on the second floor or in the finished basement stairwell below, I decided it would be far less disruptive to rebuild the lower half of the stair in place rather than to remove the entire staircase and install a new unit.
Fortunately, houses from this era (mid-1940s) typically have site-built staircases rather than the shop-built units common in modern construction, so there were rough stringers I could reuse. A modern stair, even if it were open on one side, would have a housed stringer (where the treads and risers fit in mortises cut in the stringer and are secured with glue and wedges) on the other side and no stringer in the middle, making it difficult to rebuild the stair without tearing into the finished stairwell below.
Code was another issue. Because no work was being done to the upper half of the stairs, the building department didn’t require that section to be brought up to code. However, the parts I touched did have to meet code, and the riser heights on the lower section varied by more than code allows. That had to be fixed. Another potential problem was that the existing stringers were cut from 2x10s rather than 2x12s as code calls for, but because the stringers were each supported by a wall below, their 2×10 construction wasn’t an issue. The final touches to the stairs themselves were installing manufactured decorative scrolled brackets on the skirts and adding trim below the treads.
Fix the old stringer
To check the consistency of the riser height, a laser level was used to find the elevation of each tread. The variations exceeded the 3⁄8 in. allowed by the IRC, so they needed to be corrected. To find the right riser height, the elevation difference between the finished floor and the first remaining tread was divided by six, the number of risers on the lower stair. A story pole was marked with the correct elevations of the tread cuts and used to gauge which treads would need shimming and which would need to be lowered to make the riser heights identical.
For more photos, illustrations, and details, click the View PDF button below:
Fine Homebuilding Recommended Products
Fine Homebuilding receives a commission for items purchased through links on this site, including Amazon Associates and other affiliate advertising programs.

Graphic Guide to Frame Construction

Pretty Good House

A Field Guide to American Houses


