Rake-Wall Framing
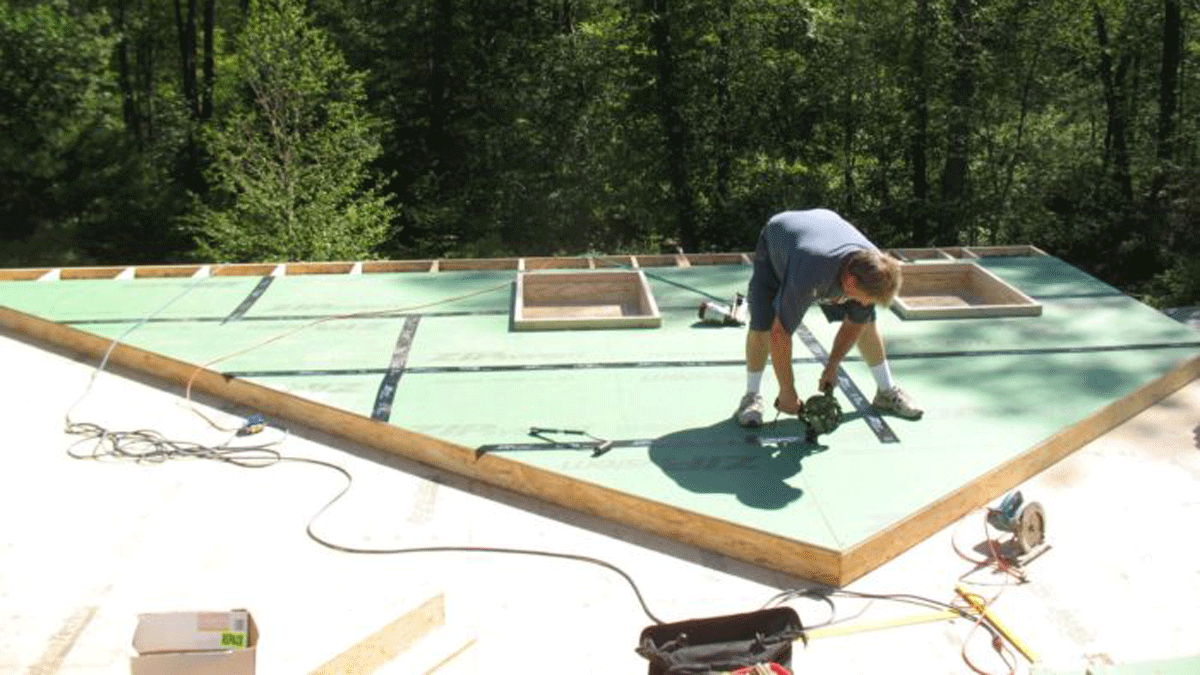
Framing the second-floor gable walls on the second-floor deck from bottom plate to ridge simplifies the steps.
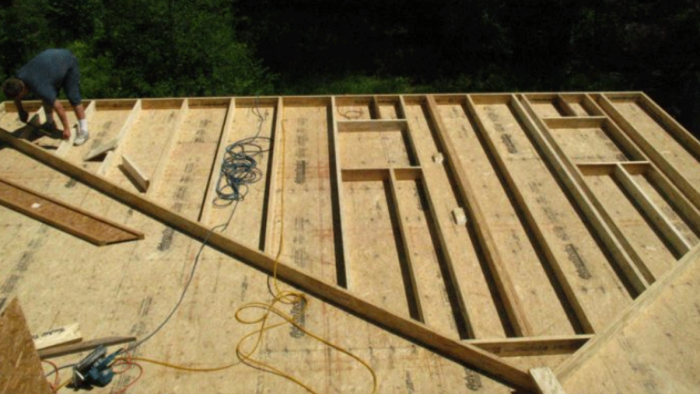
The second-floor deck became a canvas for a full-scale roof framing layout. A few of the fine details like precise beam hanger positions and ridge height were hard to pinpoint from the plans. So we snapped chalklines on the floor deck to orient all of the major framing elements.
From the layout we could build the gable-end rake walls. There are a couple of methods for rake-wall framing I’ve used over the years. One is to position rafters at the rake wall and frame infill studs beneath. It’s effective but leaves a hinge line where the wall plate meets the underside of the rafter; plus you end up needing a couple of rafters. The alternative is to position the top plates with the top of the rafters and stud up to the plate. No hinge point and the rafters just need to be a few inches longer.
Rake-wall framing made sense for this house since the north (front) wall is only a couple of feet tall and the rear wall is 8 ft. tall—in the fashion of a saltbox. We started by tacking the bottom plate to a line snapped 5-1/2 in. inside of the gable end and tacking top plates along the roof plane lines. We marked the layout on the plates then measured, cut and installed studs. Since the wall is non-supporting we didn’t need structural headers for the windows. The only structural element is a 3-1/2 x 5-1/2 PSL post from plate to peak needed to support the structural ridge.
Air-Sealing Built Into the Framing
The IRC calls for blocking between studs on any walls taller than 10 ft. So we blocked the wall at 8 ft. These blocks not only stiffen the wall but also become part of our air sealing process. The Zip System wall sheathing is our primary wall air barrier and we have to transition to a ceiling air barrier at the attic floor line. The top plates on the north and south walls provide that transition at bearing walls but at the rake walls the blocking will do the job. So we cut tight blocks fit in a straight line to match the ceiling line. As the wall sheathing was placed, we ran a bead of TiteBond acoustical sealant on the edge of the blocks and across the studs. Later we’ll seal the blocks to the studs so the MemBrain vapor retarder and drywall can be sealed around the ceiling perimeter to complete the air barrier.
Fine Homebuilding Recommended Products
Fine Homebuilding receives a commission for items purchased through links on this site, including Amazon Associates and other affiliate advertising programs.
Protective Eyewear
Short Blade Chisel
Stabila Classic Level Set

