Laying Large Tile
Large-format tiles have their own set of rules — install them like standard tiles and watch the job fail.
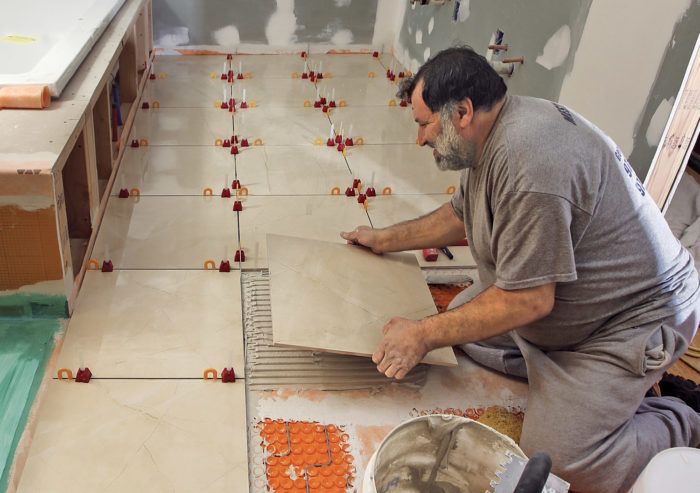
As a second-generation remodeling contractor, I’ve seen a lot of design trends. One that seems to have staying power is large-format tile — that is, any tile with at least one edge more than 15 in. long. Whether they’re 16×16, 18×18, or plank style, open any home-design magazine and chances are you will see large-format tiles.
Most of the techniques used to install larger tile will be familiar to anyone who’s ever set smaller tile. Laying out the tile is similar, cutting it is the same except that you need a bigger saw (which can be rented), and grouting it is no different. However, some normal procedures used for installing smaller tile take on heightened importance when working with large-format tile, and there are several differences that are crucial to both the final look and to the longevity of the floor.
Flaws in the substrate can cause any tile floor to fail, but their effect is greater with large-format tile. Also, regular thinset mortar can’t support the size and weight of large-format tile. Large tile exaggerates lippage (variations in the height of adjoining tiles). While inconsistent mortar application and setting pressure are the leading causes of lippage, tile warpage plays a role. Most tile will be warped to some degree, but the size of large-format tile exaggerates warpage. Especially when laying tile in a running bond pattern, where the end of one row aligns with the centers of neighboring rows, installers need to rely on grout joints wide enough to disguise the problem, and even then it can be impossible to achieve an acceptable level of lippage without using a clamping system.
The good news is that although large-format tiles have their own rulebook, manufacturers and the Tile Council of North America (tcnatile.com) offer helpful solutions. Address the above concerns, and you’re well on your way to creating a durable and stylish floor.
Prep the substrate
The substrate is the most important part of any tile floor, but according to the Tile Council of North America (TCNA), “As tile size increases, the effect of substrate irregularities is compounded.” Larger tiles can be more prone to cracking from subfloor flex, and because of the length of their sides, a substrate that isn’t flat makes it much harder to avoid lippage. Getting to flat may mean sanding high spots or using floor-leveling compound. Installing an uncoupling membrane or backerboard is also a good way to isolate the tile from movement in the framing, which helps prevent cracking. The National Tile Contractors Association and the TCNA each specify deflection, flatness, and subfloor thickness in their manuals, and also provide specifications for mortars and other details.
Four steps to mortar application
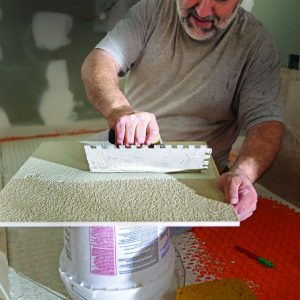
When setting large-format tile, correct mortar selection is extremely important. use lHt (large, heavy tile) mortar, which is also called medium-bed mortar, because it will not sink down under the weight of the tile. regular mortar will compress as it sets and cause lippage between the tile edges. With a cement-board underlayment, you must use a latex-modified lHt mortar, but setting tile over plastic underlayment usually calls for non-modified mortar. Here i used mapei’s Kerabond t mortar, but laticrete, custom Building products, and tec all manufacture non-modified mortars I’ve used successfully.
Clamp the tile edges to avoid lippage
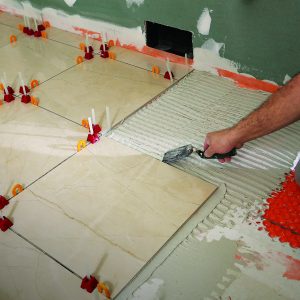
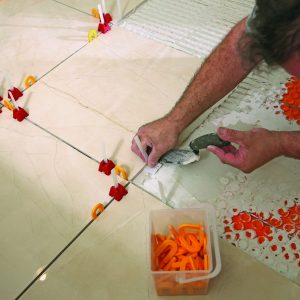
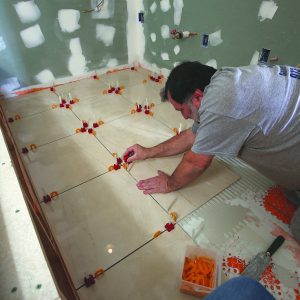
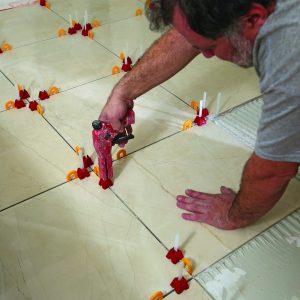
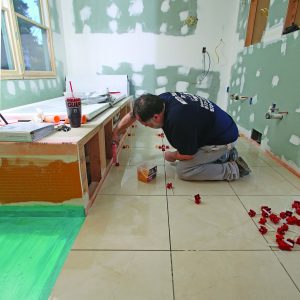
Any warpage in large-format tile is magnified by its size and made more apparent by narrow grout lines. (Plus, if you’re using square-edged tile, there’s no roundover that might disguise lippage.) Mortar shrinks as it dries, so a floor that may have been perfectly flat after installation at 4 p.m. won’t be flat by 7 a.m. the next day. To help avoid lippage, various manufacturers make leveling systems that ensure your tile achieves a flat finish by holding it in plane as the mortar sets. All of the systems have some kind of base that is slipped below the tile into the fresh mortar, and some way of pulling against that base with a strap. I like the Tuscan Leveling System, which uses a clamping tool to pull the clamp tight, similar to how a nylon cable tie works. Other systems work by driving a wedge through the strap and against the tile or by threading a plastic nut down the strap, but I’ve found that those systems can scratch softer tile. All of the systems have some means of breaking the strap off below the tile after the mortar has dried, leaving the base in place to be hidden by grout.
From Fine Homebuilding #268
For more photos, illustrations, and details, click the View PDF button below:



View Comments
Tile isn't flat (duh!) so let's assume it's curved and that a 12" tile and a 24" tile have the same curvature- that is, if you put a 12" ruler against the concave side, you'll get the same lippage, say 1/16". The ruler imitates a flat substrate (yeah, sure.) Now if you put a 24" ruler on the 24" tile, you'll get FOUR times the lippage, 1/4".
It's a bit surprising, but you can prove it to yourself with a garage floor, a string and a pencil. Draw a large arc, say 60" radius. Now, starting from the same point on the arc, strike 2 more arcs, one with 12" of string, the next with a 24" radius. Draw the 2 straight lines from the original point on the arc to the two points at 12" and 24". Now measure the maximum distance from each straight line to the original arc- you'll get about 5/16" on the 12" line, about 1-1/4 on the 24" line. That is, 4 times the lippage.