
Get Your Deck Joists Right
Learn how to calculate cantilevers and determine simple spans–plus find a series of installation tips for creating robust joist connections, weatherizing, and more.
Synopsis: In this article, Mike Guertin takes an in-depth look at prescriptive deck-building codes when it comes to one of the deck’s most basic components: joists. He describes how joist spans and cantilevers are determined in both the IRC and Residential Wood Deck Construction Guide (DCA), and includes a joist-span table from the 2018 IRC to help explain how to calculate cantilevers and determine simple spans. He also includes a series of installation tips for creating robust joist connections, weatherizing, and more.
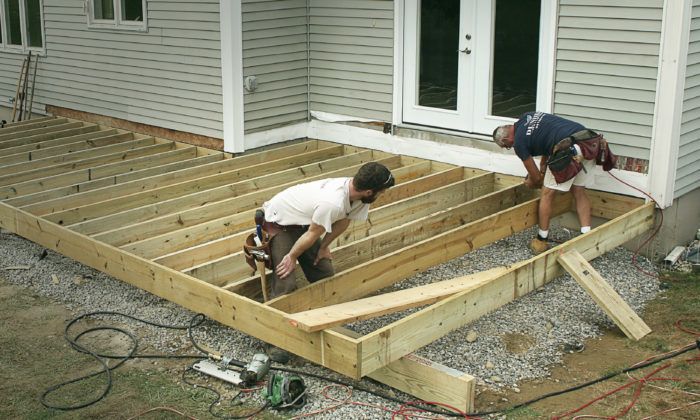
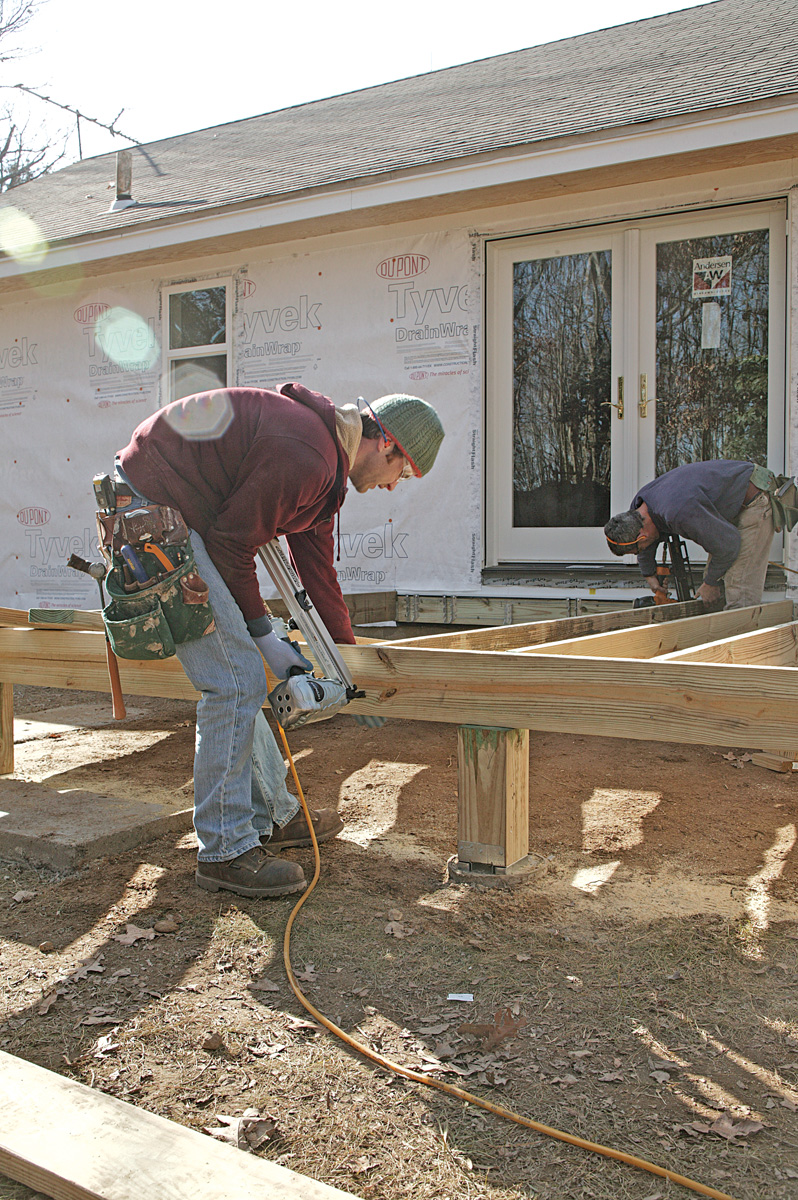
Old decks are time capsules. It’s interesting to ponder, “What were they thinking?” whenever I replace or upgrade them. I see built-up beams with unsupported joints, ledgers attached with seemingly any fastener that was in the truck, and joists of every size without regard for span.
Thankfully, prescriptive deck-building codes have largely squashed most bad practices. But while deck footings, ledger and lateral connections, and various other aspects of deck building get a lot of ink, one of the deck’s most basic components often gets dismissed: joists.
There are a couple of solid resources to reference to get deck joists right: the 2018 International Residential Code (IRC), and the American Wood Council’s Prescriptive Residential Wood Deck Construction Guide (DCA 6), which is based on the 2015 IRC. These resources give guidance on spans and cantilevers, connecting joists to beams, treating cuts, and many other important details. Check with your local building inspector to see which best applies to your area.
Needless to say, there’s a lot more to joists than simply choosing the right lumber. But that’s still the best place to start.
Dried lumber makes building easier
Most decks are framed with pressure-treated dimensional lumber. The pressure-treating process leaves lumber wet; the moisture content may exceed 50%. As the wood dries, it shrinks and often changes shape. If this movement happens before the lumber is used, you’ll have fewer problems down the road. Lumber that dries in place is more likely to move, leaving the decking looking wavy.
One way to reduce wood movement is to use wood that is kiln-dried after treatment (KDAT) or air-dried after treatment (ADAT). Drying after treatment brings the moisture content below 19%, stabilizing the wood somewhat so it is less likely to warp or shrink beyond what you’d expect from seasonal swelling and shrinking. I recommend using KDAT lumber for all ledgers, beams, and joists to minimize movement and keep the deck looking better longer. Dry wood is a good start, but there’s a lot to know about span, species, size, and spacing, too.
Many factors influence span
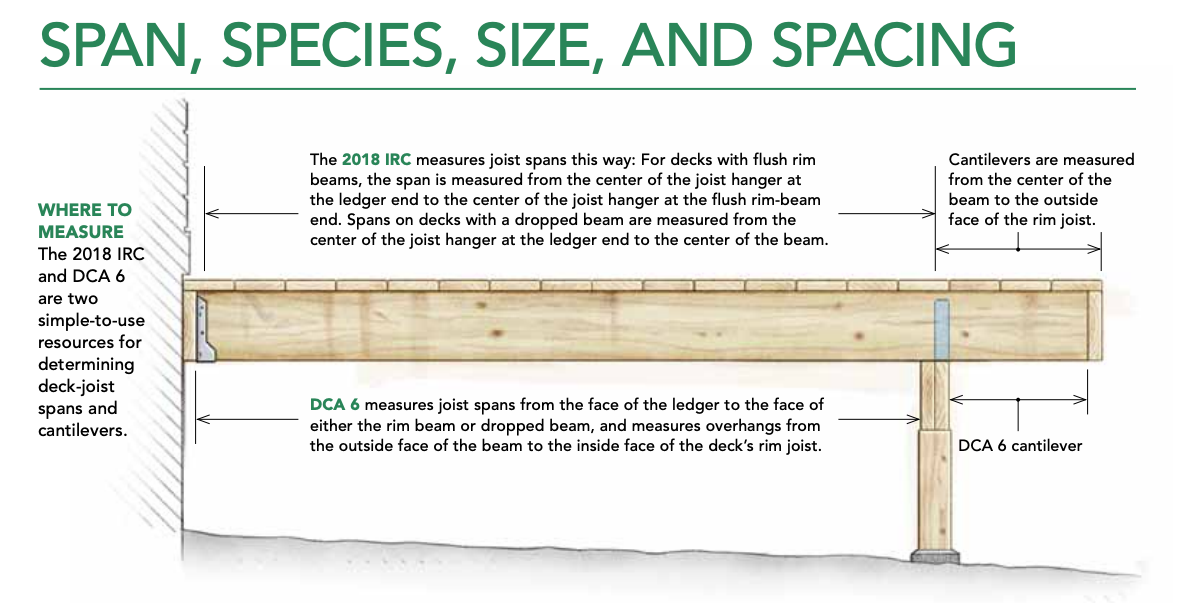
The DCA 6 and IRC span tables differ on where to measure to and from for joist spans and cantilevers. Because of the differences in measuring points, and in the allowable spans and cantilevers between the DCA 6 and IRC span tables, you’ll get slightly different maximum deck spans from the house to the outside face for any given joist-depth/joist-spacing combination.
These two resources, while valuable for most builders, have limitations. The span tables in the 2018 and earlier editions of the IRC and DCA 6 are limited to decks with a maximum of 40 psf (lb. per sq. ft.) live load and 10 psf dead load. The tables won’t work where ground snow loads exceed 40 psf, or for decks with heavy decking. For those, you can refer to the just-released 2021 IRC, which you can use with your code official’s approval. For decks with concentrated loads like a hot tub or heavy fireplace, you’ll have to consult an engineer.
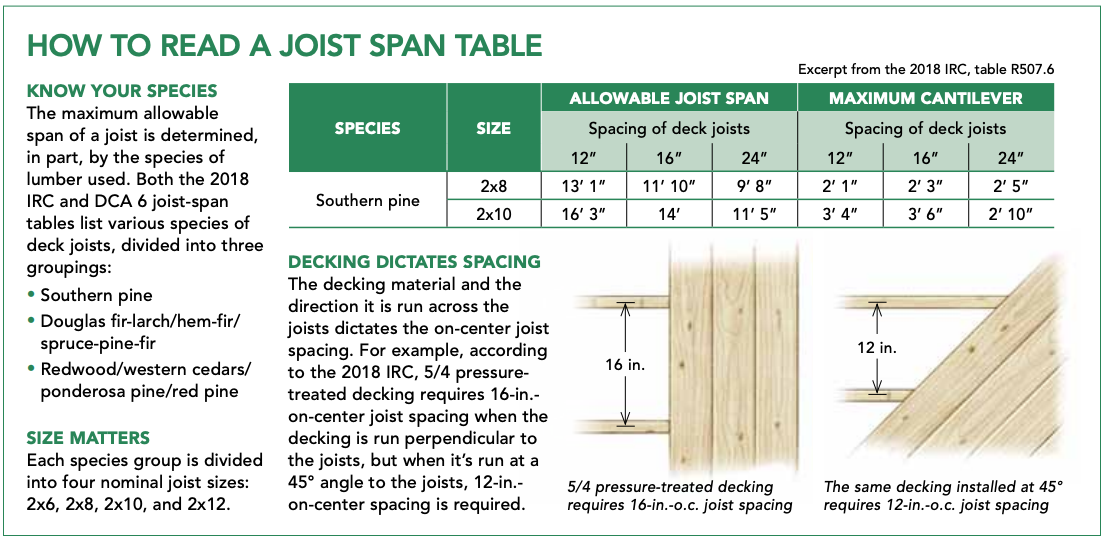
Species and size
Both the IRC and DCA 6 joist-span tables list various wood species divided into three groupings. The tables use #2 grade lumber for all species, and a wet-service factor has been applied. Because deck joists are exposed to weather, they can’t span as far as interior floor joists of the same size. The spans for dense wood species also include an incising factor, which accounts for a slight reduction in strength caused by the small slices that are made to allow chemical preservatives to penetrate. Wherever you’re building, the species of treated lumber available locally is likely covered in the tables.
Keep in mind that both tables already account for appropriate safety factors, so there is no need to upsize a joist or reduce the on-center spacing from what the tables provide. I’ve maxed out the spans and joist spacings on decks built with 2x8s and 2x10s using the tables, and the decks don’t feel bouncy. There’s no harm in upsizing, of course—other than the extra cost. If you’re using #1 grade or select structural lumber, the maximum allowable spans will be greater—however, you’ll need to consult an engineer or another resource to size joists precisely.
Decking dictates joist spacing
While your joist species and size may be limited by local availability, on-center spacing is dictated by the decking material and the direction it runs across the joists.
Table R507.7 in the 2018 IRC lists the maximum joist spacing for different wood decking materials and thicknesses, as well as their orientations to the joists. For composite decking, check the manufacturer’s requirements for on-center spacing.
Reading simple span tables
Both the IRC and DCA 6 span tables tell us the maximum distance a joist can span from the ledger to the rim beam or drop beam. To find this distance, just follow the row representing your joist’s species and size to the right, and the box where that row intersects with the column for the required on-center spacing (dictated by type of decking) provides the maximum joist span for your combination of species, size, and on-center spacing.
You can work backward, as well, when sizing a joist for a known span (up to 18 ft.). Search the field of spans for the length you need (if yours doesn’t exist, pick the closest longer span), and follow that entry up and over to find the on-center spacing, and the species and size of lumber you need. In this case, you’d need to select decking and an installation pattern that’s compatible with the on-center spacing, or you can limit your search to your decking’s required on-center spacing.
Cantilevers are more complicated
If you’re maxing out a joist span, figuring out the allowable cantilever is easy—just follow the table over from your chosen joist species and size to the right, and the maximum cantilever (referred to as “overhang” in DCA 6) for each on-center spacing is right there. If your joist span is shorter than the maximum allowed, you’ll have to do some math.
Both references limit cantilevers to the lesser of one-quarter of the actual joist span or the length listed on their joist-span tables. To find the actual maximum allowable cantilever for a backspan (the span from the beam to the ledger), you need to do two checks. First, see what the maximum cantilever is on the table, and second, divide the backspan by four. The lower number is the maximum cantilever you can use.
You’ll notice that some of the allowable overhangs/maximum cantilevers listed are less than one-quarter of the allowable span. This is because all cantilevers are limited by the allowable deflection, and that calculation (accounted for in the table) sometimes results in shorter cantilevers than you get from simply dividing the span by four.
Free-standing deck joists can also cantilever beyond drop beams at each end, extending the reach of a joist. For example, using DCA 6, 2×10 southern-pine joists at 16 in. on center have an allowable span of 14 ft. between beam faces. With 3-ft. 5-in. overhangs allowed on either side of the beam, the joist length can total more than 20 ft.
| Finding simple spans
Three components go into determining how far a joist can span: the species of lumber, the size of the joist, and the on-center spacing between joists. If you have lumber and want to know how far it can span, read the span table from the resource you’re following (see sample below), following the row representing the species and size of your joists. If you have a span in mind, scan the table for your span, and then trace back to find the appropriate joist size, species, and on-center spacing.
|
Calculating cantilevers
To determine the maximum allowable cantilever for a backspan (the span from the beam to the ledger), you need to do two checks. First, find the maximum cantilever on the table; second, divide the backspan by four. The lower number is the maximum cantilever you can use. Example: A deck with a beam located 12 ft. 6 in. from the ledger, framed with 2×10 joists at 16 in. on center. Check 1: The allowable overhang/maximum cantilever is 3 ft 5 in. per the DCA 6 table and 3 ft. 6 in. per the 2018 IRC table. Check 2: 12 ft. 6 in. / 4 = 3 ft. 1 in. So the maximum overhang you can have in this instance is 3 ft. 1 in. |
Crown your lumber
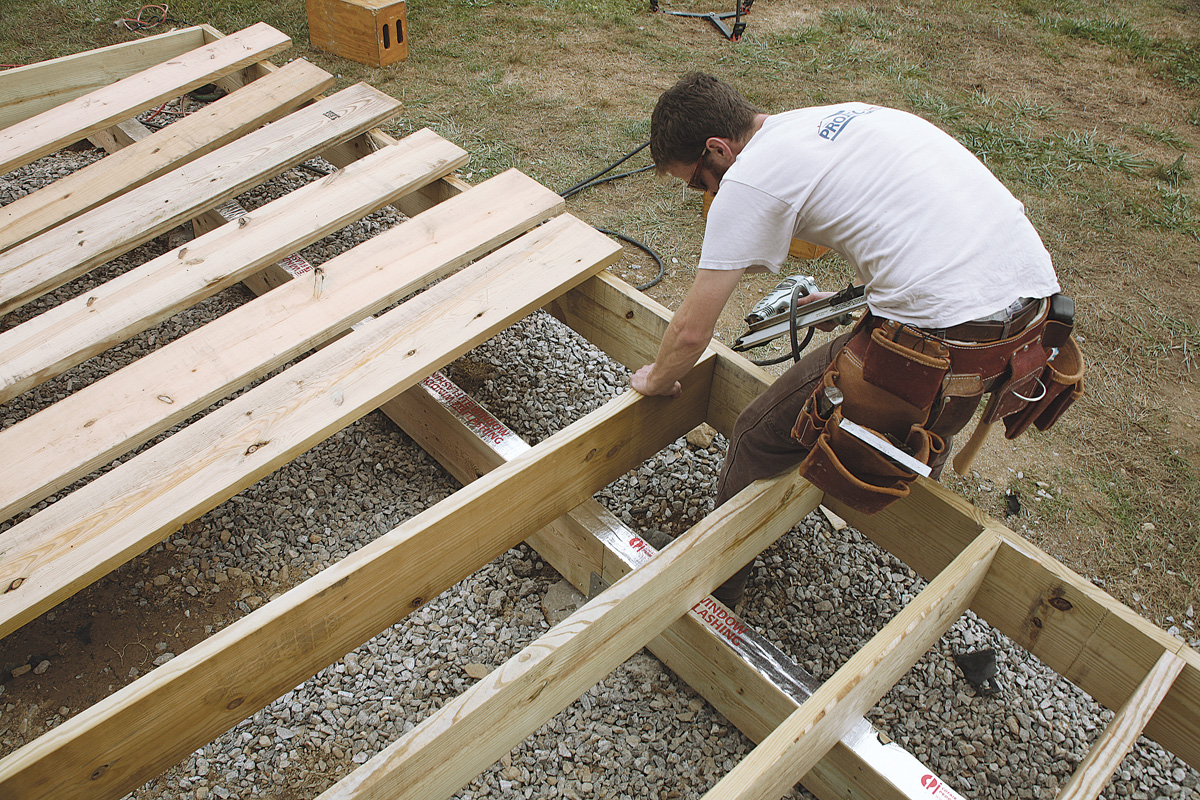
Joists often have crowns—slight arches that you can see when sighting down the edge of each piece. Always place joists with the crown up. This helps keep the joists in plane—albeit slightly curved upward. When the deck is loaded with decking, people, and other objects, the joists will tend to flatten out.
I typically eyeball each joist and group them into a handful of piles based on how pronounced the crowns are—flat joists, up to 1⁄8-in. crown, up to 1⁄4-in. crown, and up to 3⁄8-in. crown.
Decide what your tolerance is for the maximum crown. You may draw the line at 1⁄8 in., 3⁄8 in., or more. A greater crown is usually more acceptable on long-length joists (16 ft. to 20 ft.) than on midlength and short joists.
I set aside any joists that are twisted or have crowns beyond 3⁄8 in. to be cut up and used for blocking, short header joists, and short tail joists. Then I install the crown-grouped joists next to one another when framing the deck. This reduces the crown-height difference between one joist and the next so the decking appears flat and even when installed.
You can either start on one side of the deck, installing the flat joists first and moving up through the successive groups, leaving the highest-crown joists at the opposite end of the deck, or you can split the crown groups in half and start with flat joists at opposite ends of the deck, then install successively higher crown joists toward the center from both ends. This installation technique will result in progressively higher crowns from one joist to the next from each end of the deck, with the peak in the center.

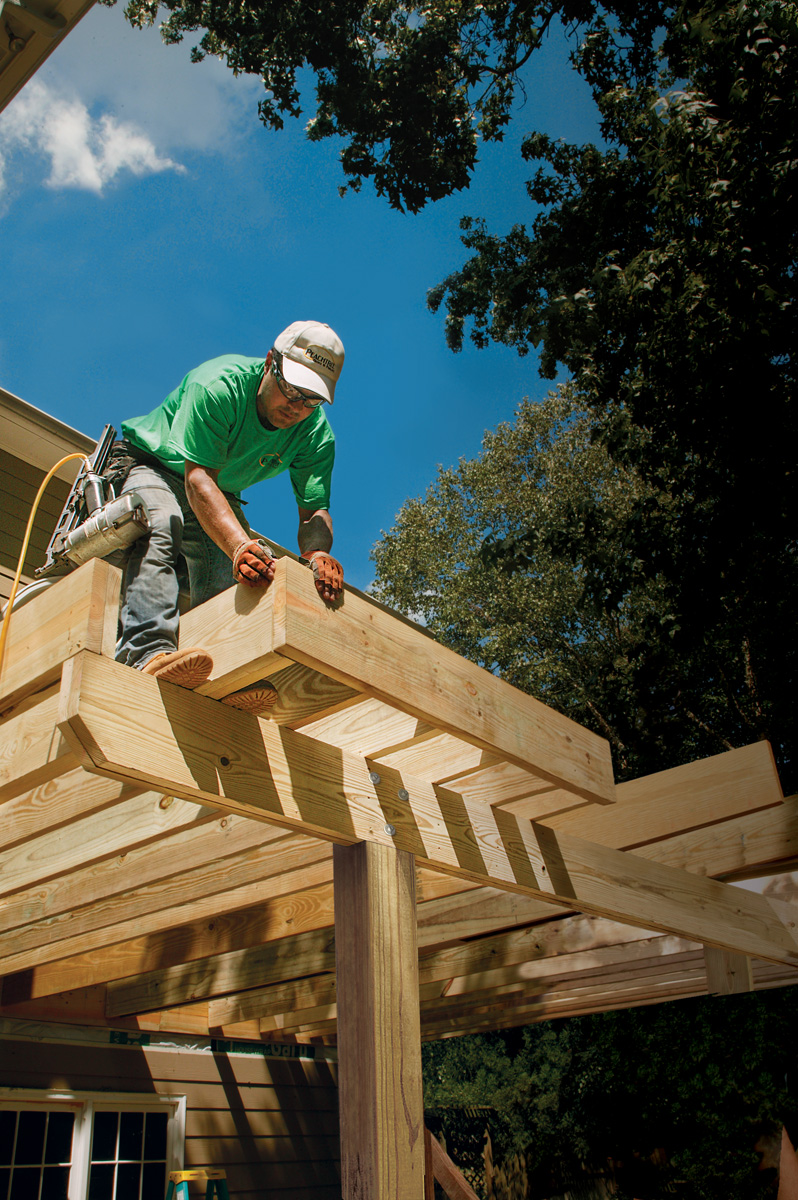
Flush, flash, and weatherize
The top surface of the joists should be in plane at all bearing points as well as at their ends. This can be challenging when the depths (the distance from top to bottom edges) vary, and they often do.
One way to install flush joists in plane is to toenail them in place first, and then install the hangers around them. Another approach, which is a bit more time-consuming, is to measure the depth of each joist, and install the hangers at a matching height. To align joist tops along drop beams, you can use shims ripped from the same stock as the joists to raise short-depth joists to match the plane of the taller joists. Building inspectors may frown on notching deck joists to get them in plane.
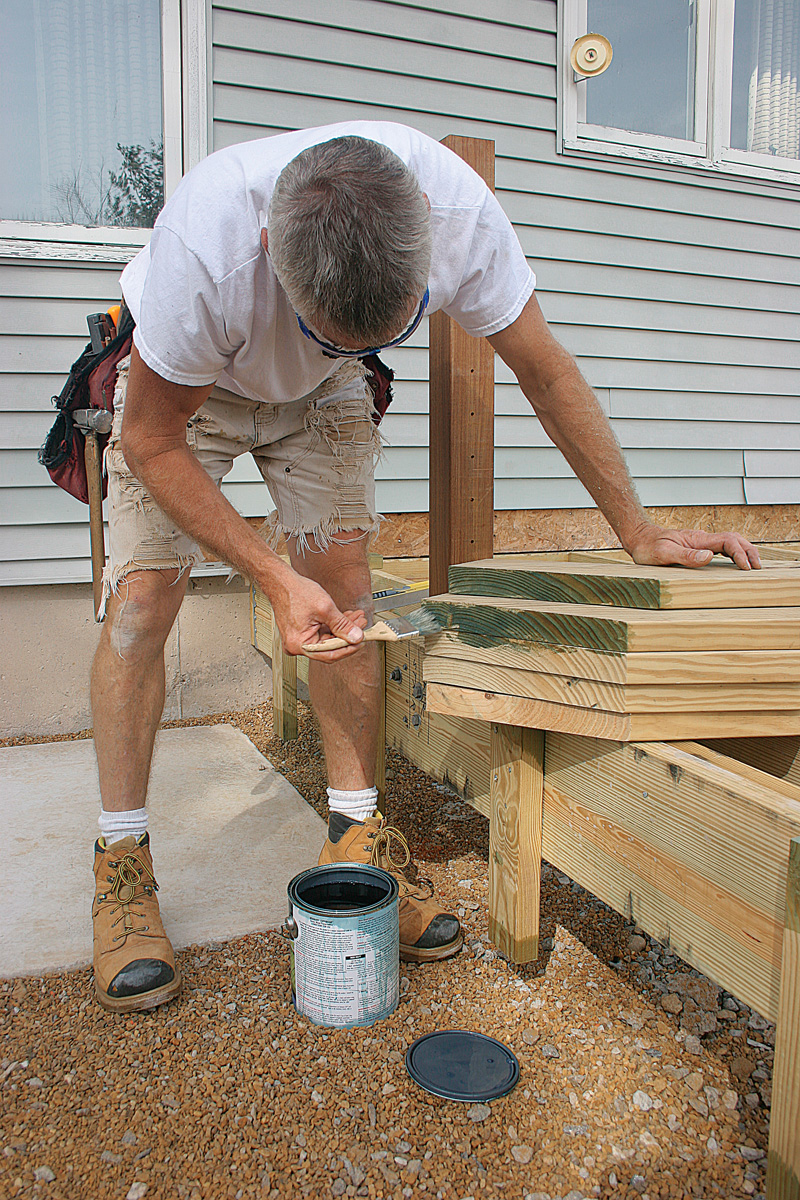
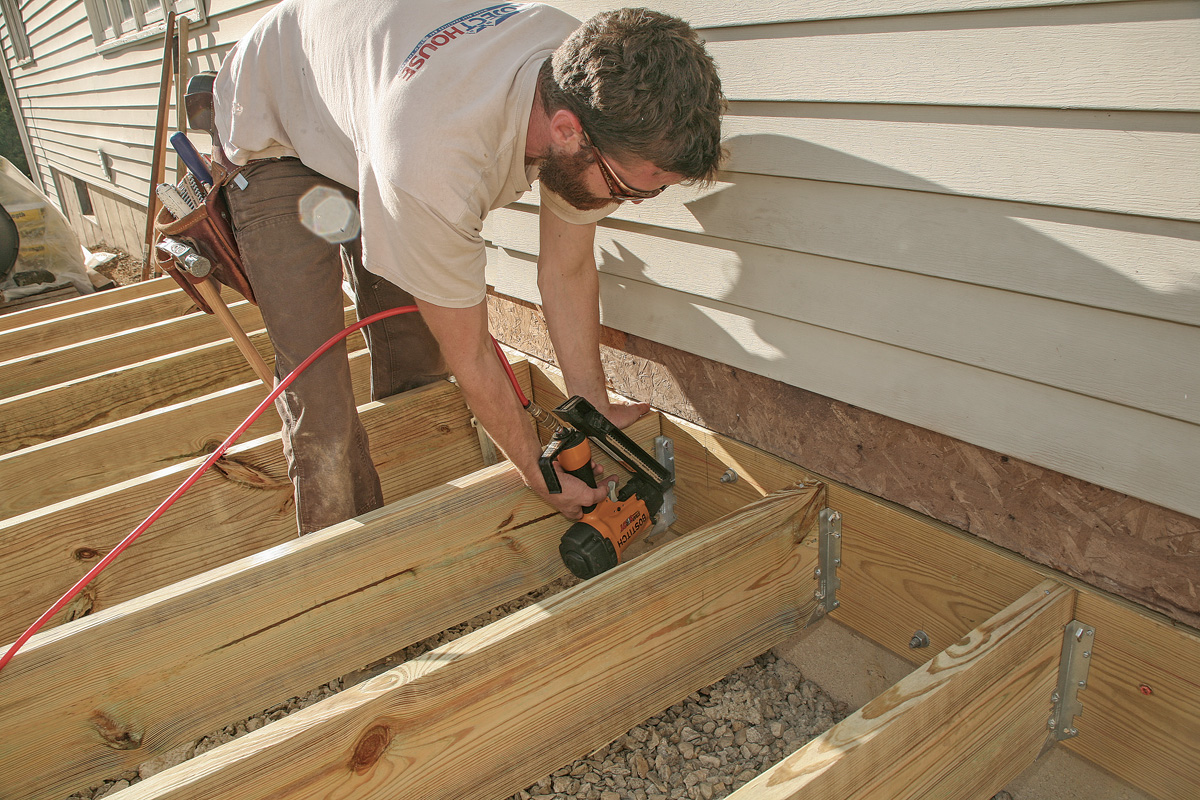
Before and after installing joists, I take a couple steps to help extend the deck’s life. Before any joist goes in, all cuts are treated with a decay-resisting chemical like 2% copper naphthenate. The IRC requires this kind of treatment for all cuts, notches, and drilled holes in pressure-treated lumber.
After the joists are in, I apply staple-on or self-adhering membrane or rigid plastic caps over the joists before installing the decking. Decking fasteners can act as wedges and lead to splits in the joists, either initially when the decking is installed, or over time as wet wood dries and splits develop. These splits are avenues for water to penetrate into the core of the joists, and can lead to wood decay and fastener corrosion.
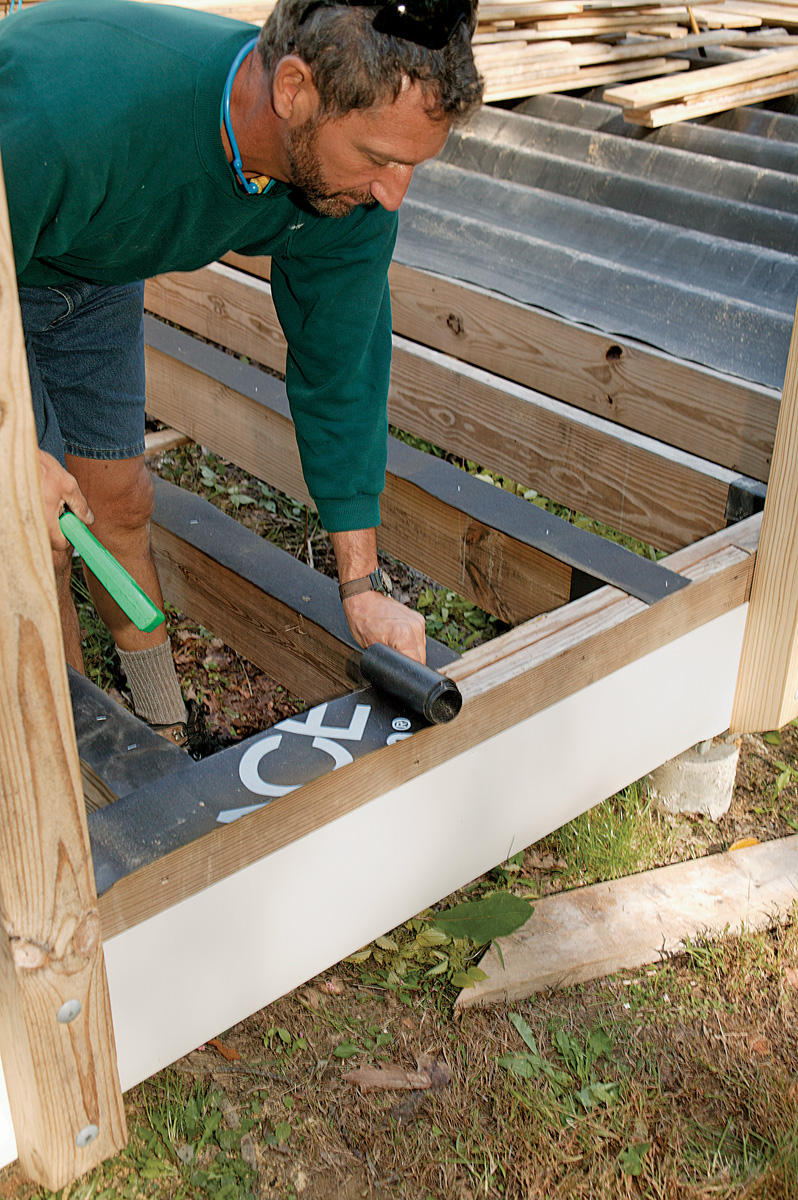
Similarly, applying a wide membrane or cap over built-up beams, doubled-up joists, and any blocking prevents water and debris from collecting in the joints between layers, where it’s difficult to dry out or remove. It’s important to use membrane and caps that are designed for use on decks because these products have UV stabilizers to prevent degradation of the exposed areas between deck boards.
Lateral restraint required
Lateral restraints keep joists from rolling over, and both DCA 6 and the IRC require that joists be restrained laterally at each end and where they cross over bearing beams. These restraints are different from the lateral load connectors required to keep a deck from separating from the house.
Joist hangers, which are required where joists butt into beams or ledgers, serve a dual function as lateral restraints. To meet code requirements, hangers need to be at least 60% of the depth of the joists. Hangers designed for a given joist’s depth should automatically meet this requirement.
Where joists bear on a drop beam or a ledger, solid blocking between the joists (directly over the beam or ledger) serves as lateral restraint. These blocks can be full depth, but must be at least 60% of the joist depth, which leaves enough space above the blocks for underdeck drainage systems. The blocks can be installed either in line or staggered, and through-nailed using two #10d hot-dipped galvanized (HDG) common nails, or toe-nailed using two #10d HDG box or two #8d HDG common nails on each end.
In addition to blocking over the beam, cantilevered joists get additional lateral restraint from a rim joist, which must be nailed or screwed to the joist ends with at least three #10d HDG nails or three #10 by 3-in. HDG (or other code-approved) wood screws.
Robust joint connections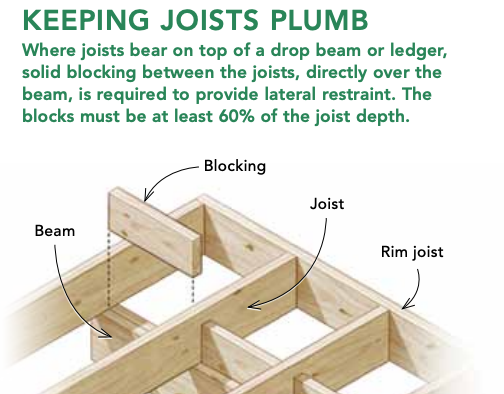
The ends of deck joists and where joists rest on a beam must have adequate bearing area and attachment. IRC 2018 section R507.6.1 outlines the requirements: The ends of the joists must bear a minimum of 11/2 in. on wood or metal, or a minimum of 3 in. on concrete or masonry, for the full width of the joist. Attachment and lateral restraint requirements keep joists from detaching or tipping over.
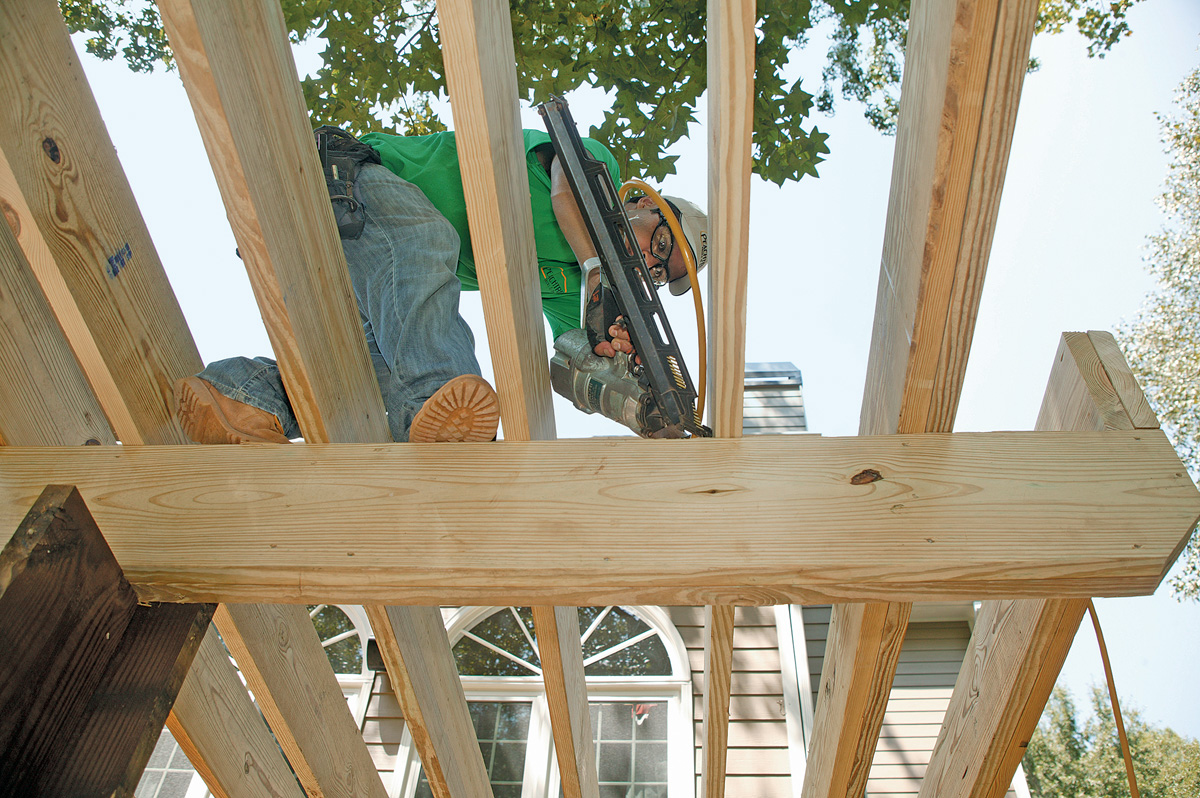
Joists butted to rim joists – Joist ends that cantilever over a drop beam must be restrained laterally by nailing or screwing a rim joist to the joist ends using a code-minimum of three 10d hot-dipped galvanized (HDG) nails or three #10 by 3-in. HDG (or other code approved) wood screws (fasteners prescribed by IRC 2018 section R507.6.2).
Click here for more on how online calculators can help cover deck-load requirements.
RELATED STORIES
- Installing Deck Joists
- Build a Grade-Level Deck: Joists and Hardware
- Critical Deck-Framing Connects, Part 3: Joists
To view the entire article, please click the View PDF button below.
Fine Homebuilding Recommended Products
Fine Homebuilding receives a commission for items purchased through links on this site, including Amazon Associates and other affiliate advertising programs.

N95 Respirator

Metal Connector Nailer

4-Gallon Piston Backpack Sprayer

View Comments
I am having a problem making single page copies for your
article entitled—Get Your Deck Joists Right.
When I use the View PDF to copy the article I am only able
to copy two magazine pages (example-page 68 and page 69,
page 70 and page 71, page 72 and page 73) per 8 ½ x 11 sheet of copy paper. I use the landscape mode to make the copies barely readable.
When I go to your article entitled—Building to Survive in the Wildfire Country—I can copy one magazine page per 8 ½ x 11 sheet of copy paper. This the way that I have seen your articles in the past show-up to make copies.
I am using Windows 10 and IE and Chrome. IE and Chrome both give me the same two magazine page per copy page for the Joists article.
Please advise me on how to remedy the problem.
Thank you.
I loved this article and appreciate the attention to lumber selection. I build about 3-4 decks per year and appreciate the quality of hand-picked lumber.
That said, I was confused by the raw OSB exposed above the ledger on pages 68 and 72 of the magazine. In Boston, climate zone 5, we always flash our wall-to-ledger connection in butyl tape before the joists are set. Then, we shingle our fully-adhered WRB over the tape, which fully protects the OSB and ledger. This detail provides protection at all critical joints and easily surpasses the single course clapboard method shown.