
How to Install a Sliding Barn Door
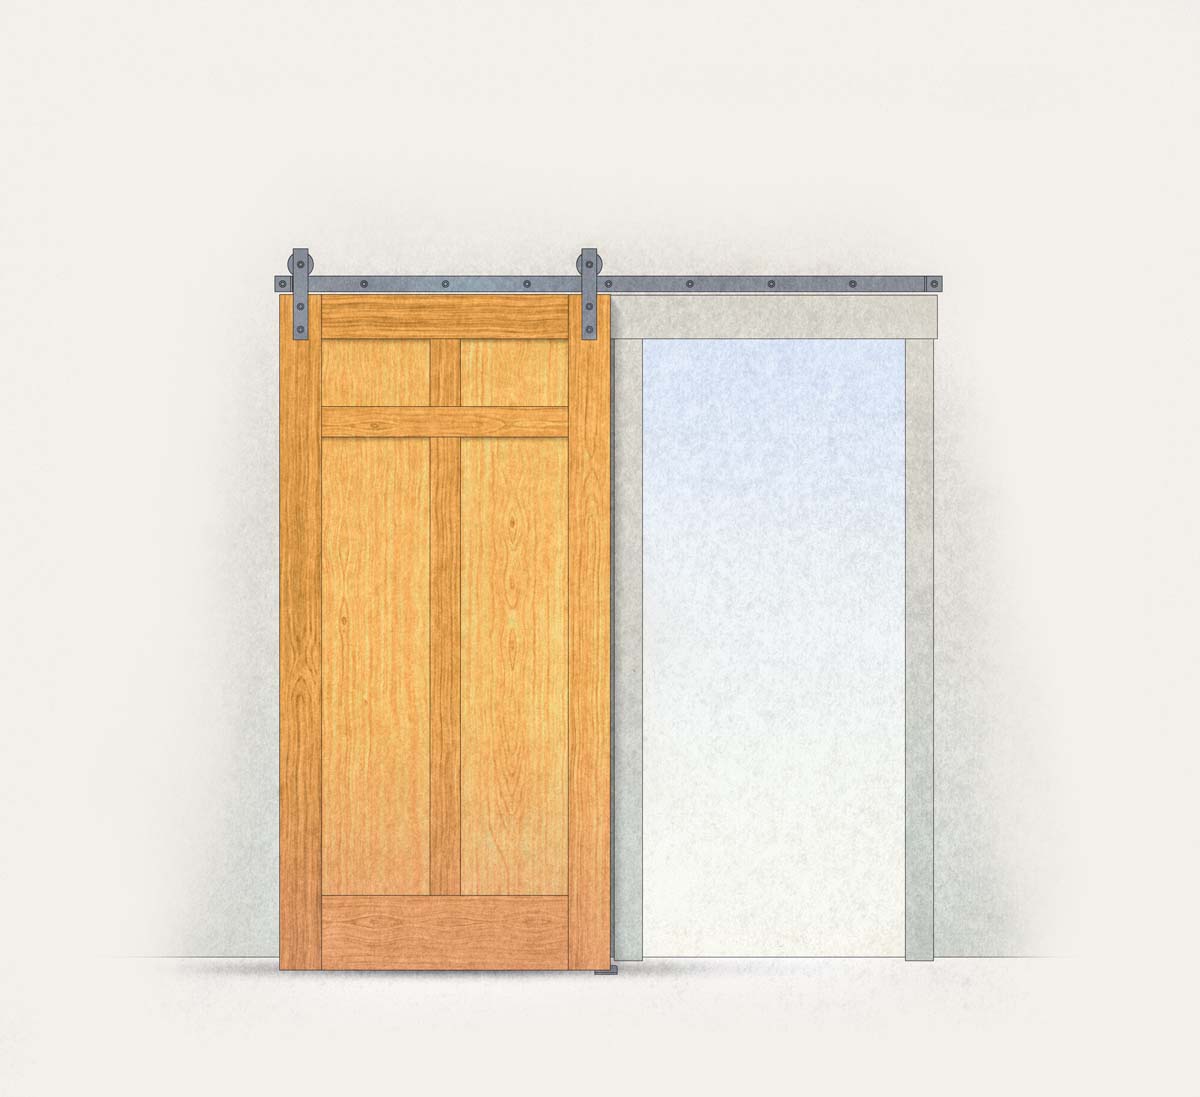
Surface-mounted interior sliders are a stylish and functional alternative to pocket doors.
Sliding doors aren’t just for barns anymore. When there’s not enough space for a traditional swinging door or when a pocket door isn’t a good option, you may want to consider a stylish interior slider. In this article, contributing editor Gary M. Katz describes the hardware and door installation for this project.
To start, determine the location of the casing and mount the track, which is attached in one of three ways: to solid 2x blocking behind the finished wall; to a length of solid stock attached to the finished wall; or to the wall studs, with the track mounted directly on the finished wall. Next, install standoffs that space the door away from the wall so that it can slide without hitting the casing. Then, install the bottom guide, which prevents the door from swinging on the track and makes it easy to remove the door. With the track mounted, it’s time to install the door.
If the door is being installed in a room under construction, be sure to account for the height of the finished floor if it’s not in place yet. With the door cut to size, install the rollers on top of the door, then make a groove in the bottom for the floor guide. Then, you can finish the job by installing the door and attaching the casing. This article includes a list of sources for sliding-door hardware.
I’ve installed hundreds of interior pocket doors—everything from off-the-shelf hollow-core versions to custom hardwood doors 10 ft. tall—but they have always made me a little uneasy. My biggest problem is that the hardware is inaccessible for repairs. I don’t like the thought of having to tear into walls to replace a worn roller or a broken track.
When I needed a space-saving door on the utility room in my new shop, I decided instead on a sliding barn-style door with an exposed track. Like pocket doors, sliding doors work great in tight locations. Unlike pocket doors, though, sliding doors have exposed hardware, so they’re easy to fix when something breaks.
Barn-door hardware is available from several sources and in a variety of styles.
Picking a style and finish is only the first step in getting the right hardware. You also need to know the dimensions of the door, the thickness of the jamb, and the width and the thickness of the casing. You also need to know whether the door track should be drilled. You must decide all of these things before ordering hardware.
Mount The Track
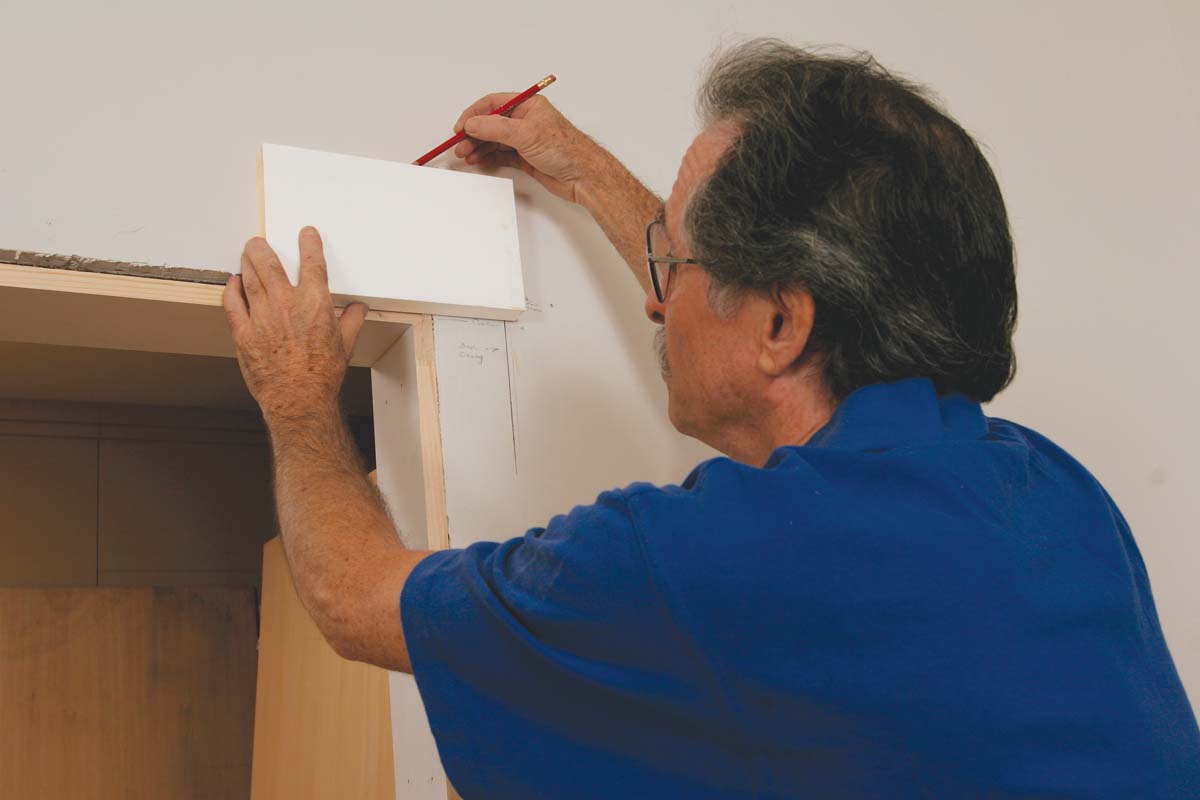
When it comes time to hang a barn door, the most important factor is mounting the track in the right spot. I install the jambs first so that I can establish the location of the casing. The casing location determines where to mount the track.
Because sliding doors don’t need a stop on the jambs, the jambs are made from primed 1x stock. It’s important that the jamb legs be plumb and the head jamb level. This ensures that the casing also is plumb and level. If the casing isn’t straight, the door edge won’t line up with the casing when the door is closed, which will look terrible.
Once the jambs are installed, I lay out the side casing on the wall using a scrap of casing stock. I put another mark 1⁄2 in. beyond the casing that corresponds to the length of the track. I also lay out the 5-1⁄2-in.-tall head casing and place another mark 1⁄4 in. above the casing that corresponds to the track bottom. The marks show where to put the track, but I still need to mark the track’s mounting holes.
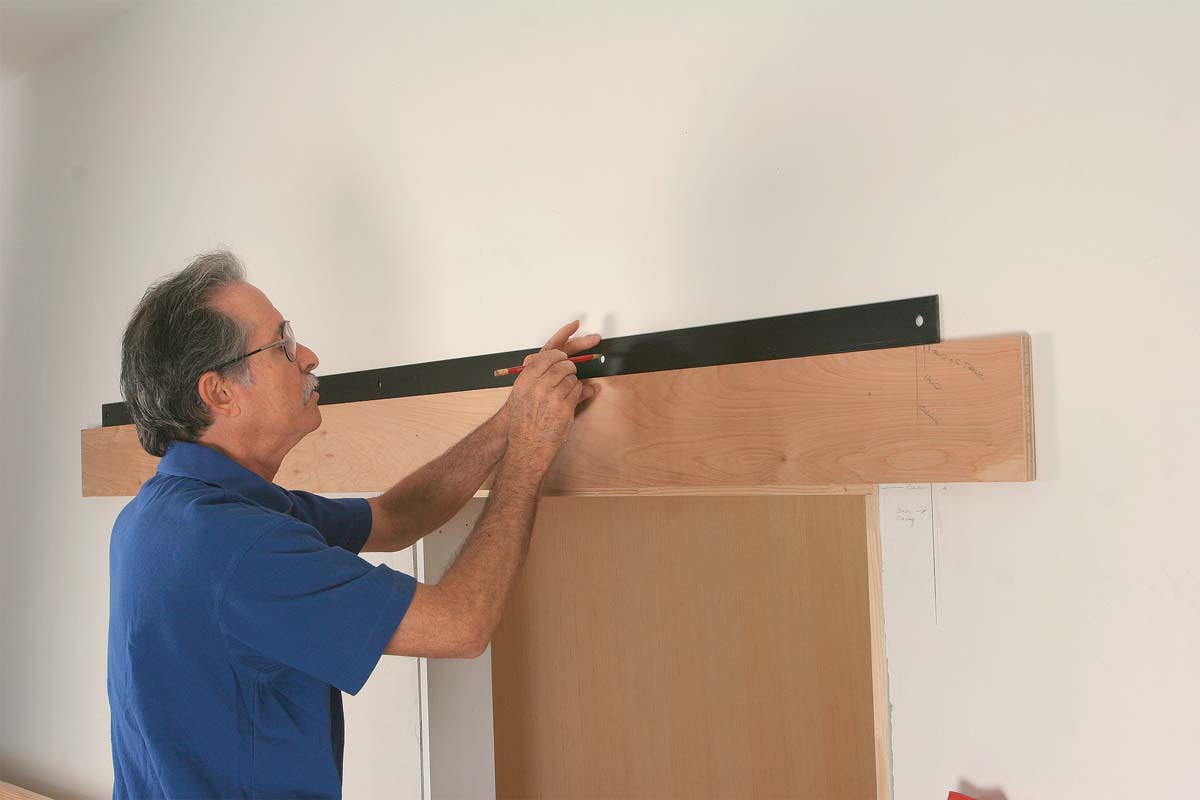
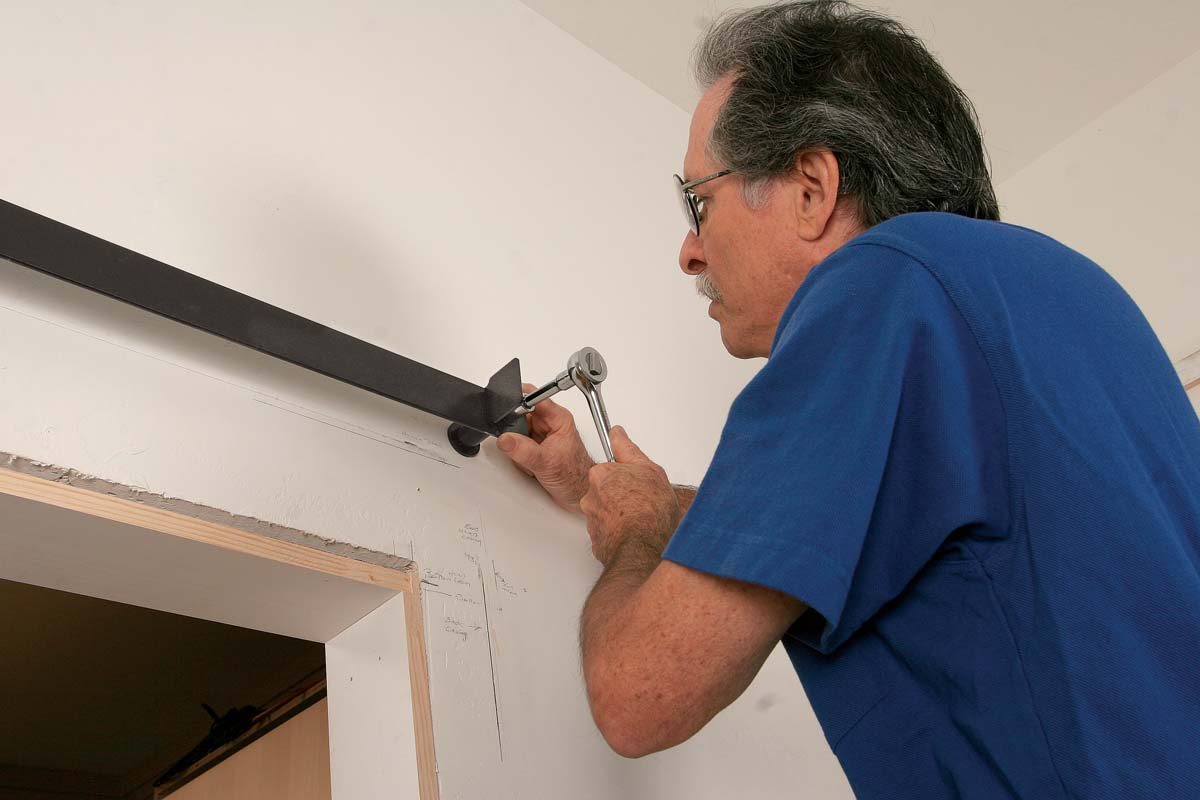
To make marking the holes easier and more accurate, I install a temporary ledger that lines up with the bottom of the track. After placing the track on top of the ledger and aligning the ends with the marks I made earlier, I mark the screw locations. I remove the track and drill pilot holes with a 5⁄16-in. twist bit. I arrange the washers and standoffs as described in the instructions, and then fasten the track, starting with the center screw.
Cut The Door
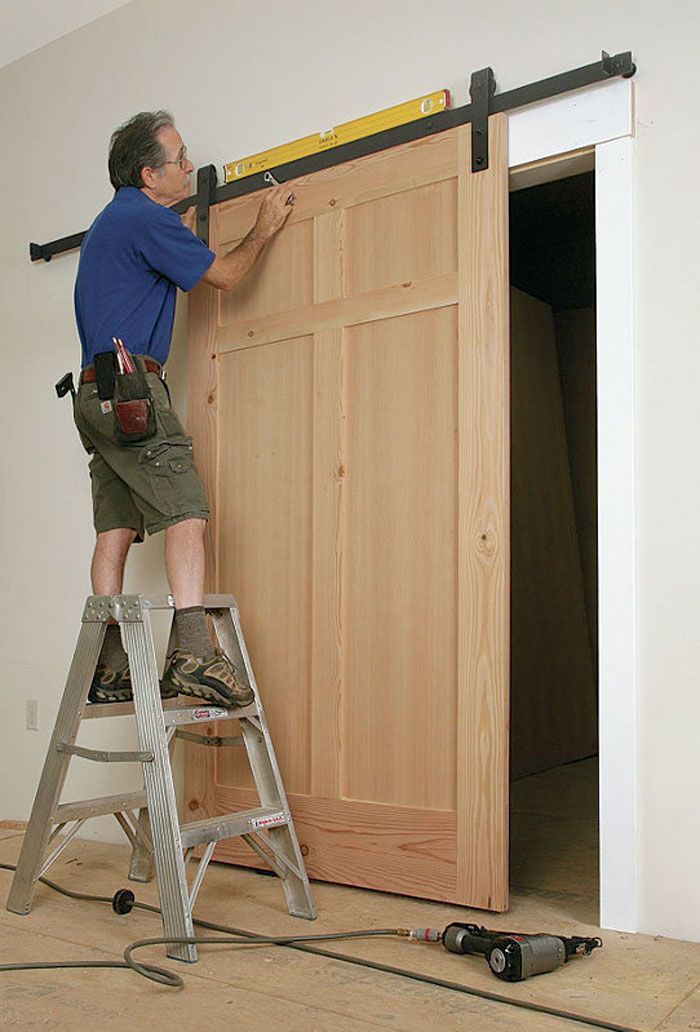
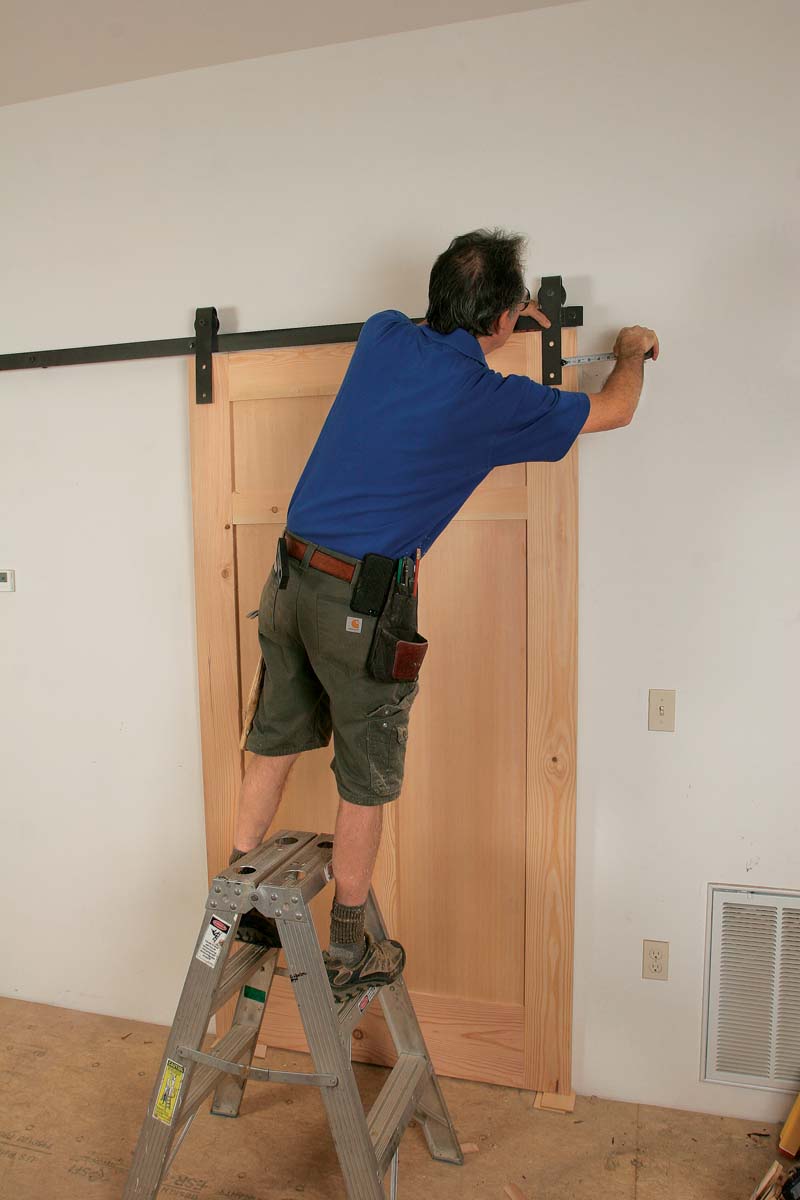
Once the track is mounted on the wall, I turn my attention to the door. Like most custom doors, the door here was made a little tall so that it could be trimmed to size.
My first step is to stand up the door temporarily in the opening. For the bottom guide to work, the door needs to be 1⁄2 in. above the finished floor. I shim it by this amount, adding an additional thin shim if necessary to make the door plumb before marking the cut. It’s better to cut the door twice than to make it too short.
The OSB subfloor in the photos is my workshop’s finished floor, but if you haven’t installed a finished floor under the door yet, you’ll want to shim up the door the thickness of the finished floor before marking and cutting. This door is made of Douglas fir, which is beautiful but splintery, so I ease the edges with a sanding block. Don’t use a loose piece of sandpaper, or you may send a long splinter into the palm of your hand, a lesson I once learned the hard way.
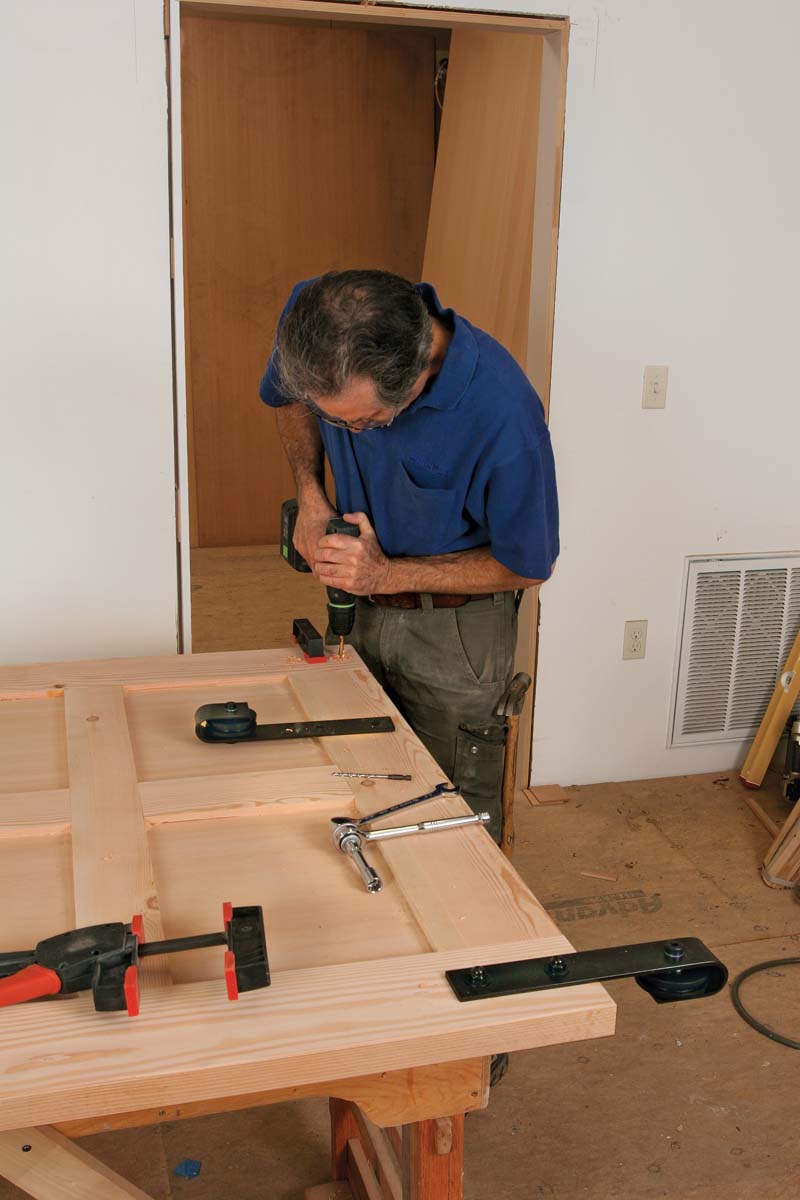
Mount The Rollers
With the door plumb and lined up with the casing marks I made earlier, I make sure that the rollers’ mounting brackets are parallel to the door edge and as close as possible to the center of the stiles. I then mark the pilot-hole locations with a pencil and return the door to my bench, where I mount the rollers and make a groove in the bottom for the floor guide.
Install The Floor Guide And The Casing
With the door on the track, I mark the location of the floor guide and then space the floor guide from the wall so that it’s lined up with the track above.
The guide is positioned so that one of its two screws is accessible when the door is fully open and the other is accessible when the door is fully closed. This allows the guide to be installed and removed with the door in place. It also makes it easier to remove the door for painting or for replacing worn hardware.
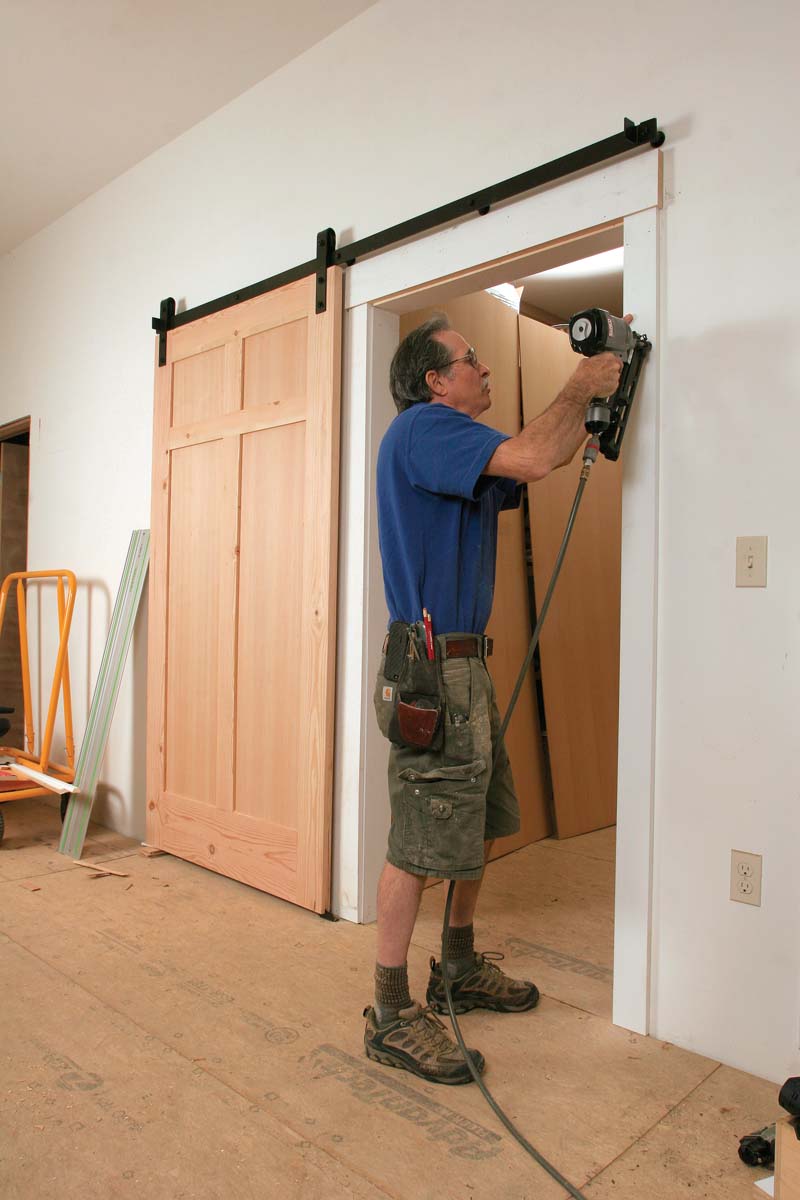
The final step is to install the casing. I first use an 18-ga. brad nailer to fasten the casings to the jambs. After I’m certain that the reveals look good and the joints are tight, I secure the casing to the jack studs and the header with 15-ga. 2-1⁄2-in. nails spaced about every 16 in. I’m really pleased with how the door looks and how well it muffles the sound of my air compressor behind it.
Barn-Door Basics
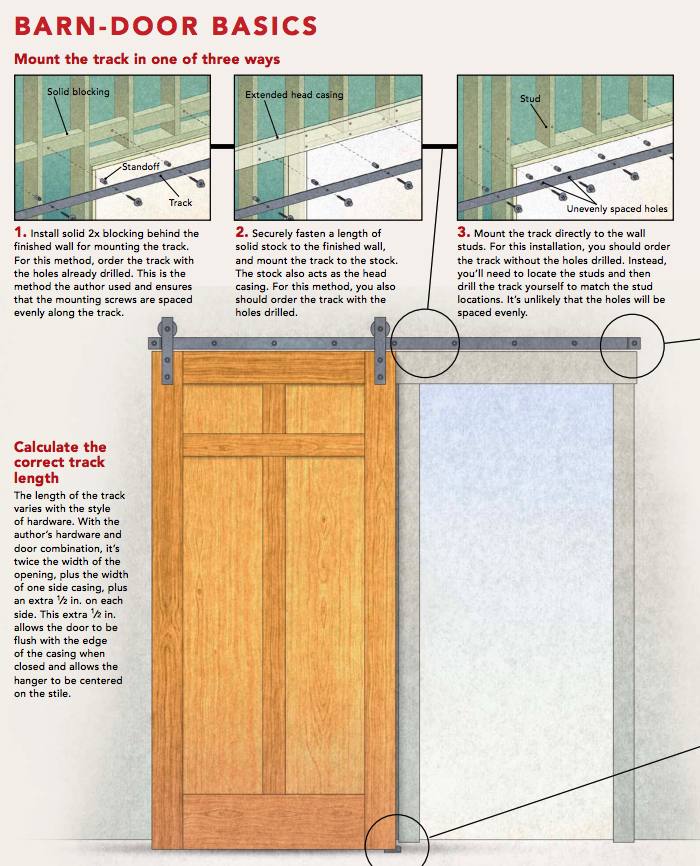
Mount The Track In One Of Three Ways
|
1. Install solid 2x blocking behind the finished wall for mounting the track. For this method, order the track with the holes already drilled. This is the method the author used and ensures that the mounting screws are spaced evenly along the track. |
 |
|
2. Securely fasten a length of solid stock to the finished wall, and mount the track to the stock. The stock also acts as the head casing. For this method, you also should order the track with the holes drilled. |
 |
|
3. Mount the track directly to the wall studs. For this installation, you should order the track without the holes drilled. Instead, you’ll need to locate the studs and then drill the track yourself to match the stud locations. It’s unlikely that the holes will be spaced evenly. |
 |
|
Calculate The Correct Track Length The length of the track varies with the style of hardware. With the author’s hardware and door combination, it’s twice the width of the opening, plus the width of one side casing, plus an extra 1⁄2 in. on each side. This extra 1⁄2 in. allows the door to be flush with the edge of the casing when closed and allows the hanger to be centered on the stile. |
 |
|
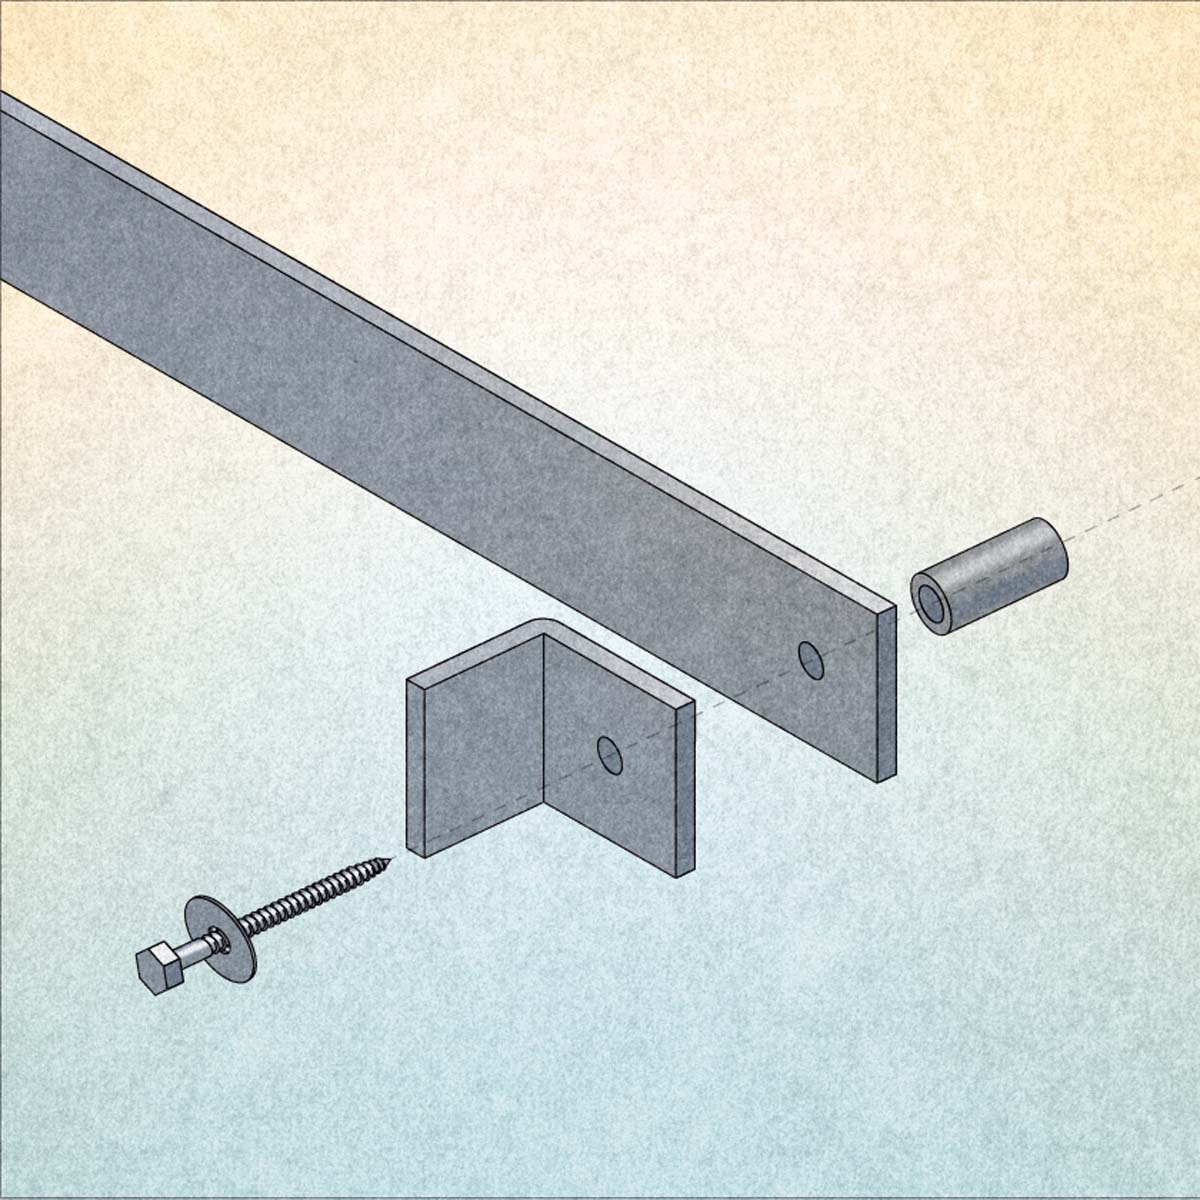
Match The Standoffs To The Casing The standoffs included with the hardware package space the door away from the wall so that it can slide without hitting the casing. The standoff length is specified when you order the hardware. Here, the author chose 2-in.-long standoffs, a common length because it works well with a 1-3⁄4-in.-thick door and 5/4-in.-thick casing. Lag screws mount the track to the wall through the standoffs and are finished to match the track. The hardware manufacturer matches the screw length to the length of the standoffs, but thick wall coverings or unusually constructed walls may require longer screws. |
 |
|
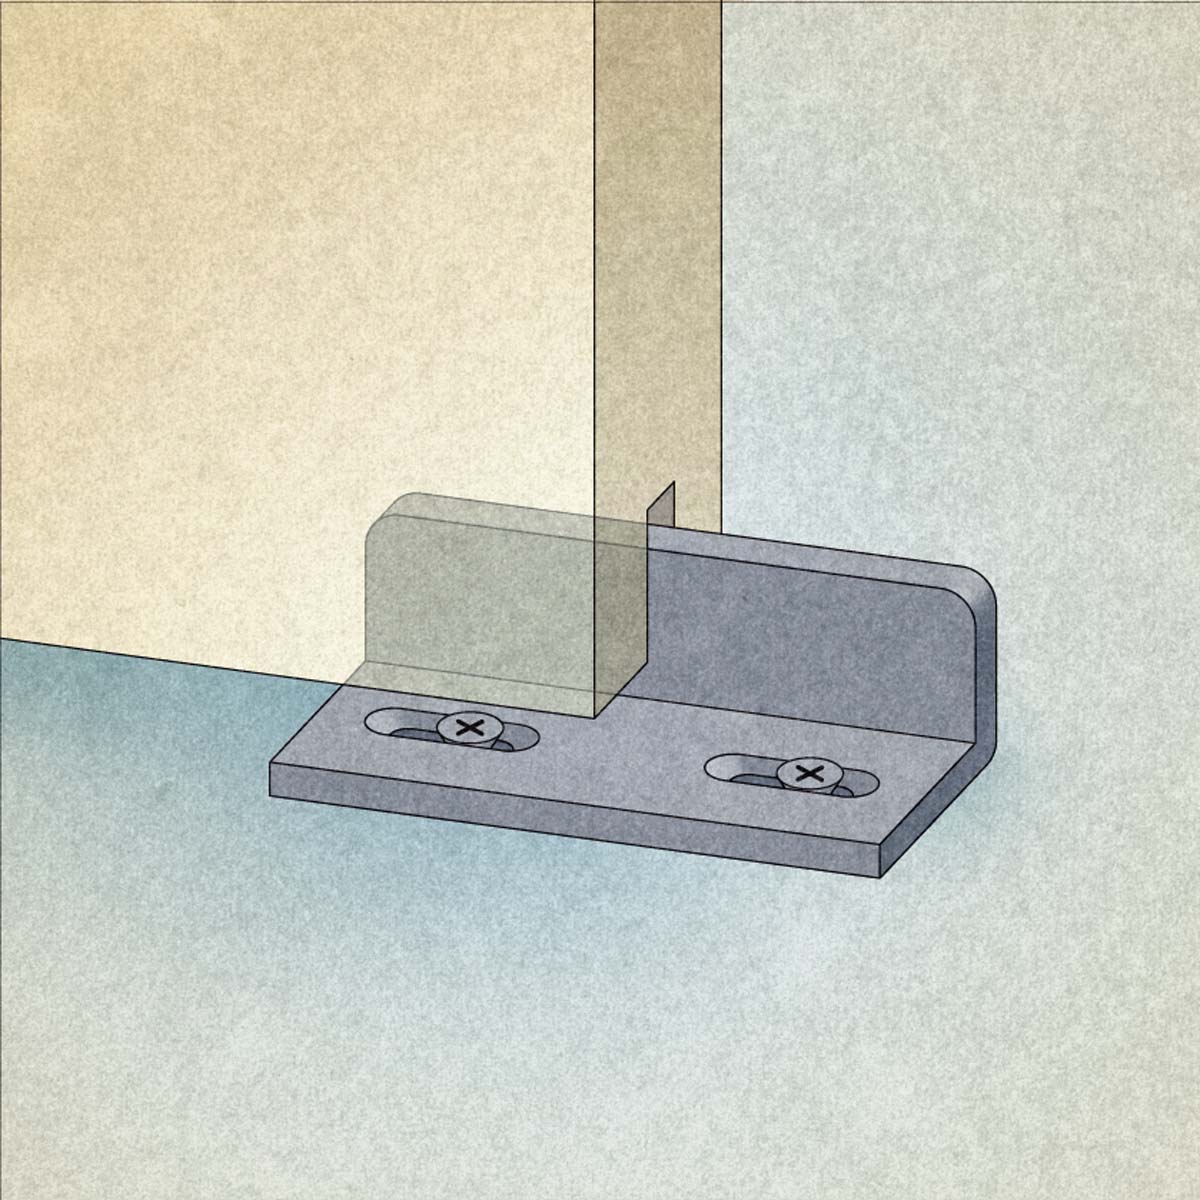
Properly Position The Bottom Guide The bottom guide is included with the hardware. When it’s in the right spot, half of the guide’s length is exposed when the door is fully open or fully closed. This prevents the door from swinging on the track and makes it easy to remove the door. |
 |
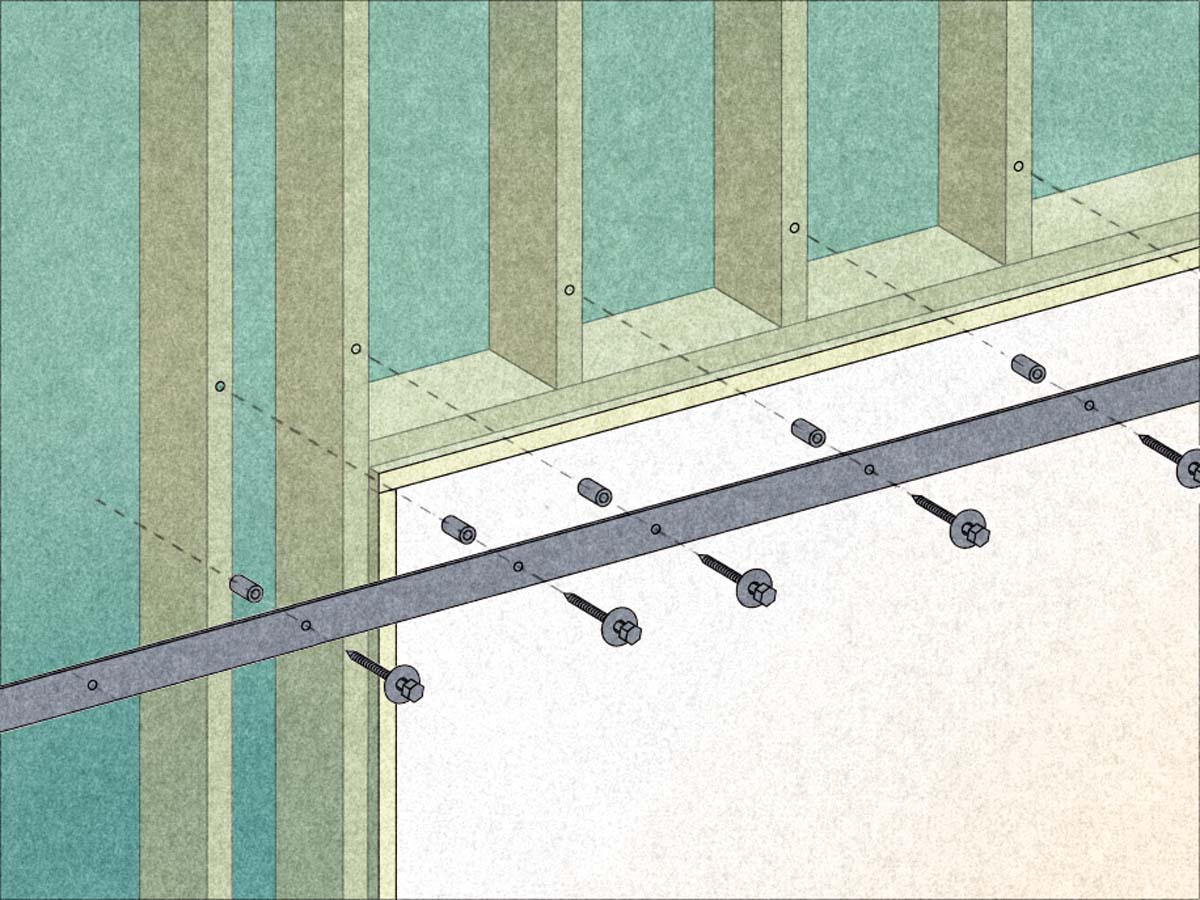
Install The Track With A Ledger
|
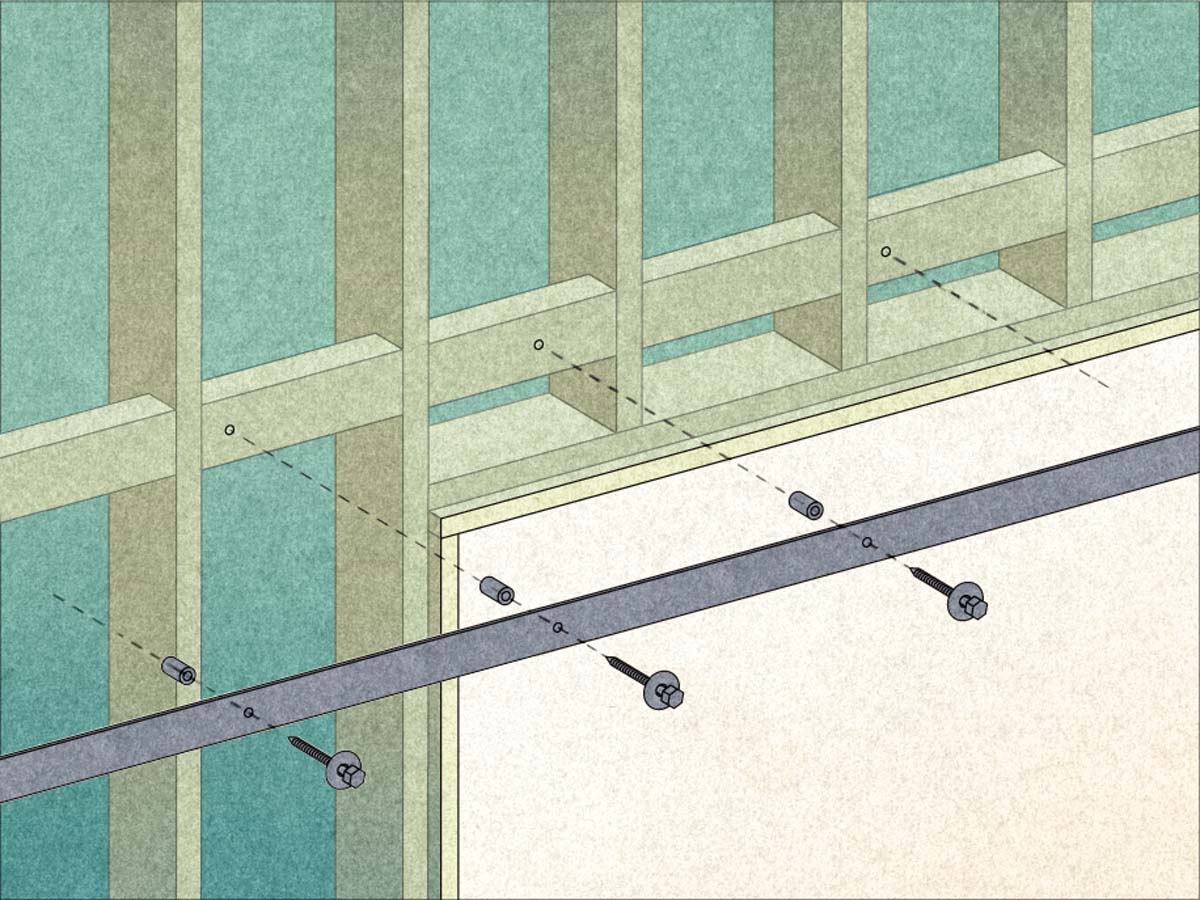
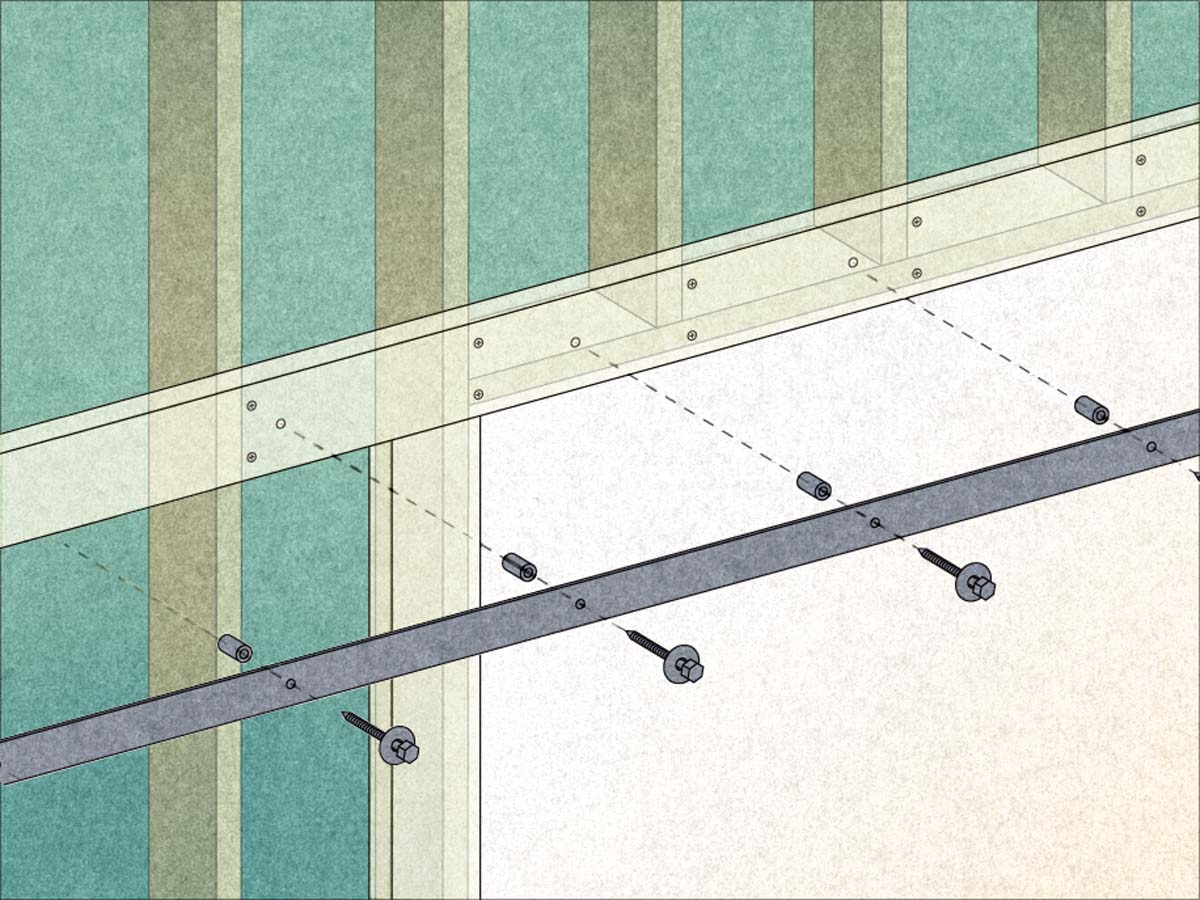
Locate the track. Once the jambs are installed plumb and level, use scrap stock for guidance to mark the locations of the head and side casings. In this case, the track must be at least 1⁄4 in. above the top of the head casing. |
 |
|
Mark the holes. A scrap-plywood ledger holds the track while the screw holes are transferred to the wall. The ledger is the width of the head casing plus 1⁄4 in. The end is positioned so that it’s 1⁄2 in. beyond the outside edge of the side casing, which accounts for the wheel stop. |
 |
|
Fasten the track. After drilling the holes with a twist bit, fasten the track to the wall with the supplied hardware. Starting at the center, work toward the ends, where the L-shaped wheel stops are located. |
 |
Locate The Hardware
 |
 |
|
Stand up the door. First, cut the door to length so that it’s 1⁄4 in. below the track and 1⁄2 in. above the finished floor. Next, shim it plumb, and place the rollers on the track. Center the mounting brackets in the door’s stiles, and trace the screw holes for drilling. |
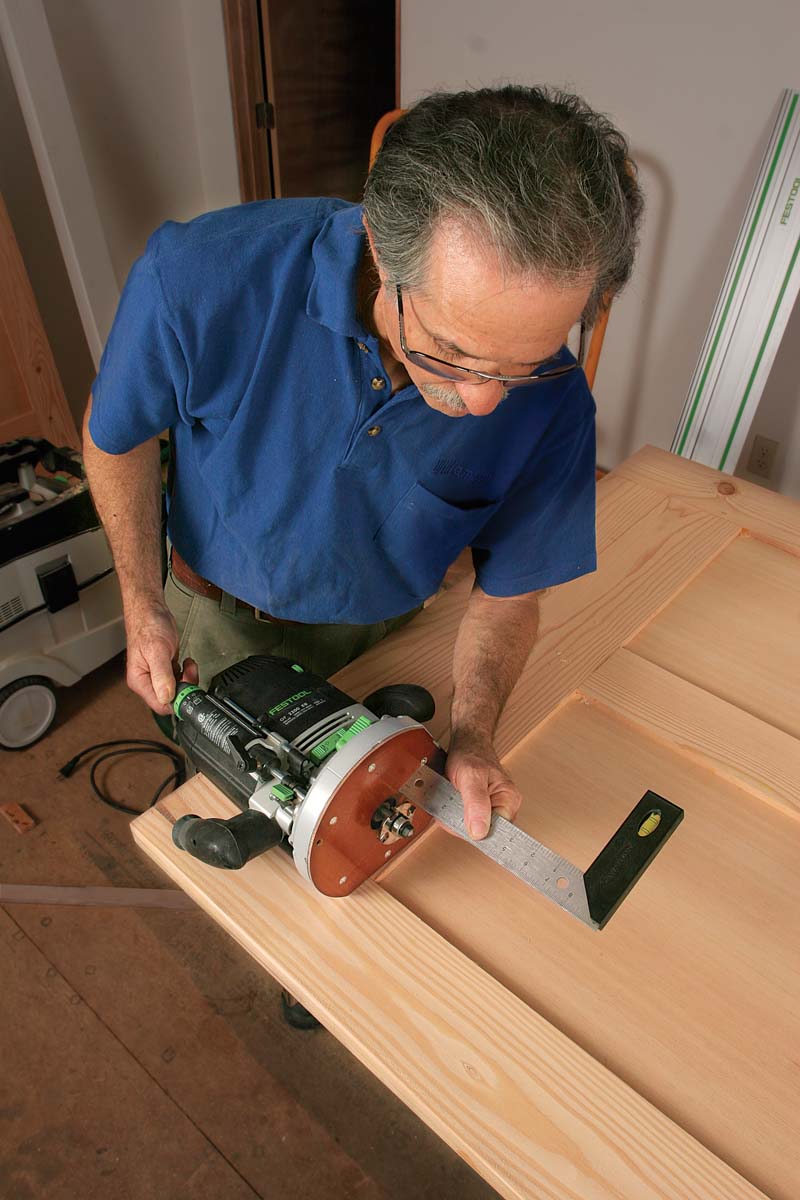
Guide Bit For The Guide Groove
 |
 |
|
Cut the slot. An L-shaped guide mounted to the floor prevents the door from swinging and hitting the wall or the casing as it’s opened and closed. The guide aligns with a groove made with a slot cutter in the door bottom. |
The Final Details
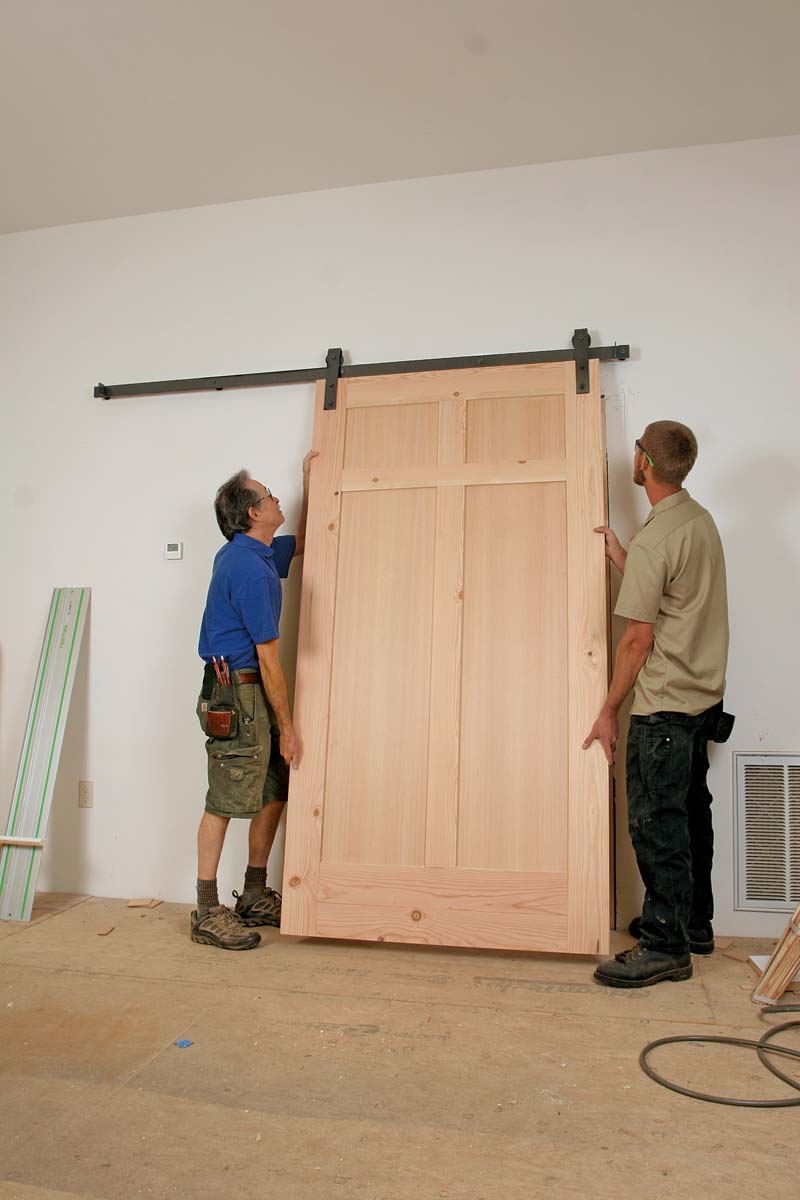
|
Hang the door. Aided by a helper, put the heavy door on the track. Unlike swinging doors, which are partially supported by their jambs, barn doors rely solely on their hardware and its connection to the framing. It’s important to correct any weak framing before hanging heavy doors like this one. |
 |
|
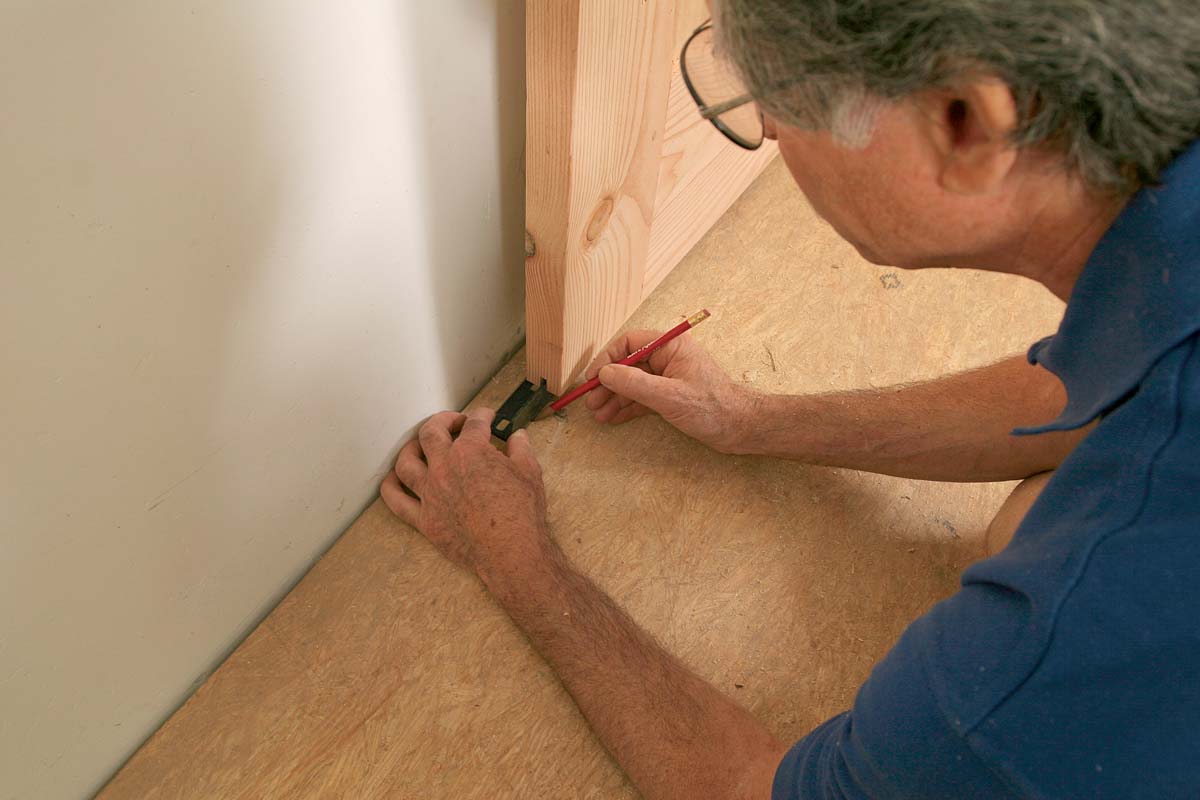
Mount the guide. Space the bottom guide from the wall so that it aligns with the track above. One of its two mounting screws is accessible with the door fully open, and the other is accessible when the door is fully closed. This ensures that the door can be removed in the future. |
 |
|
Finish up with casing. Barn-style doors are cased like conventional swinging doors. Secure the inside edge of the casing with 18-ga. brads, then fasten the outside edge with 15-ga. finish nails. |
 |
Tracks And Hardware For All Tastes
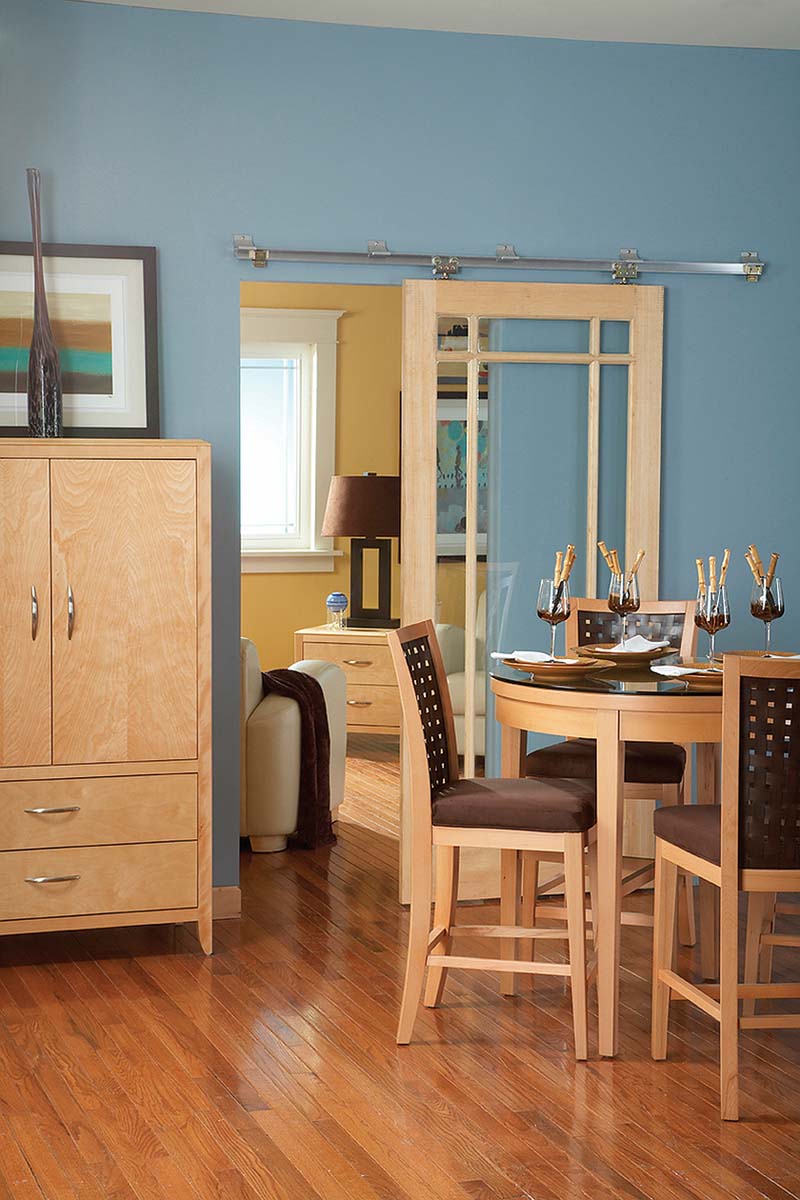
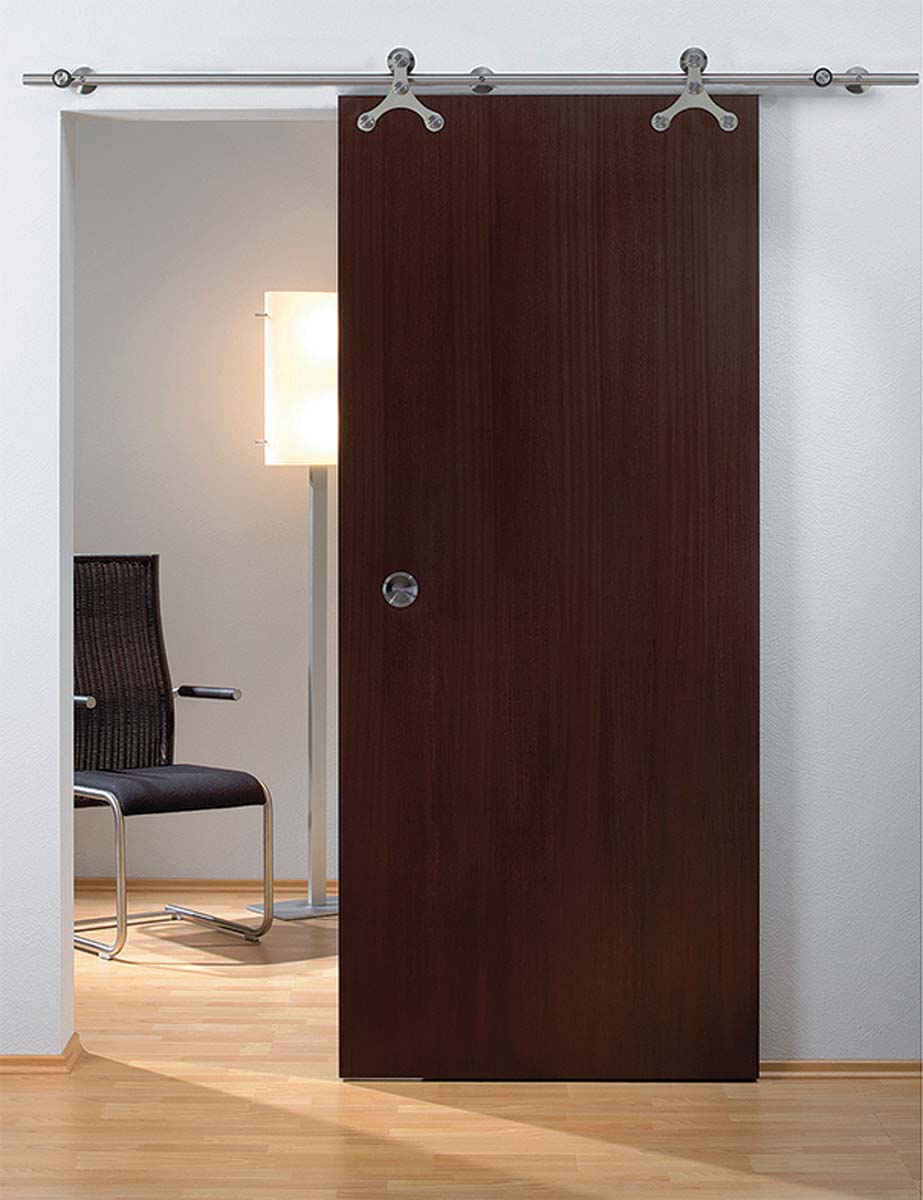
Sliding-door hardware has its origins in rustic architecture, but high-style, ultramodern hardware is also available. Hiding the track with a valance also can change the look or help a new sliding door to fit in with existing decor.
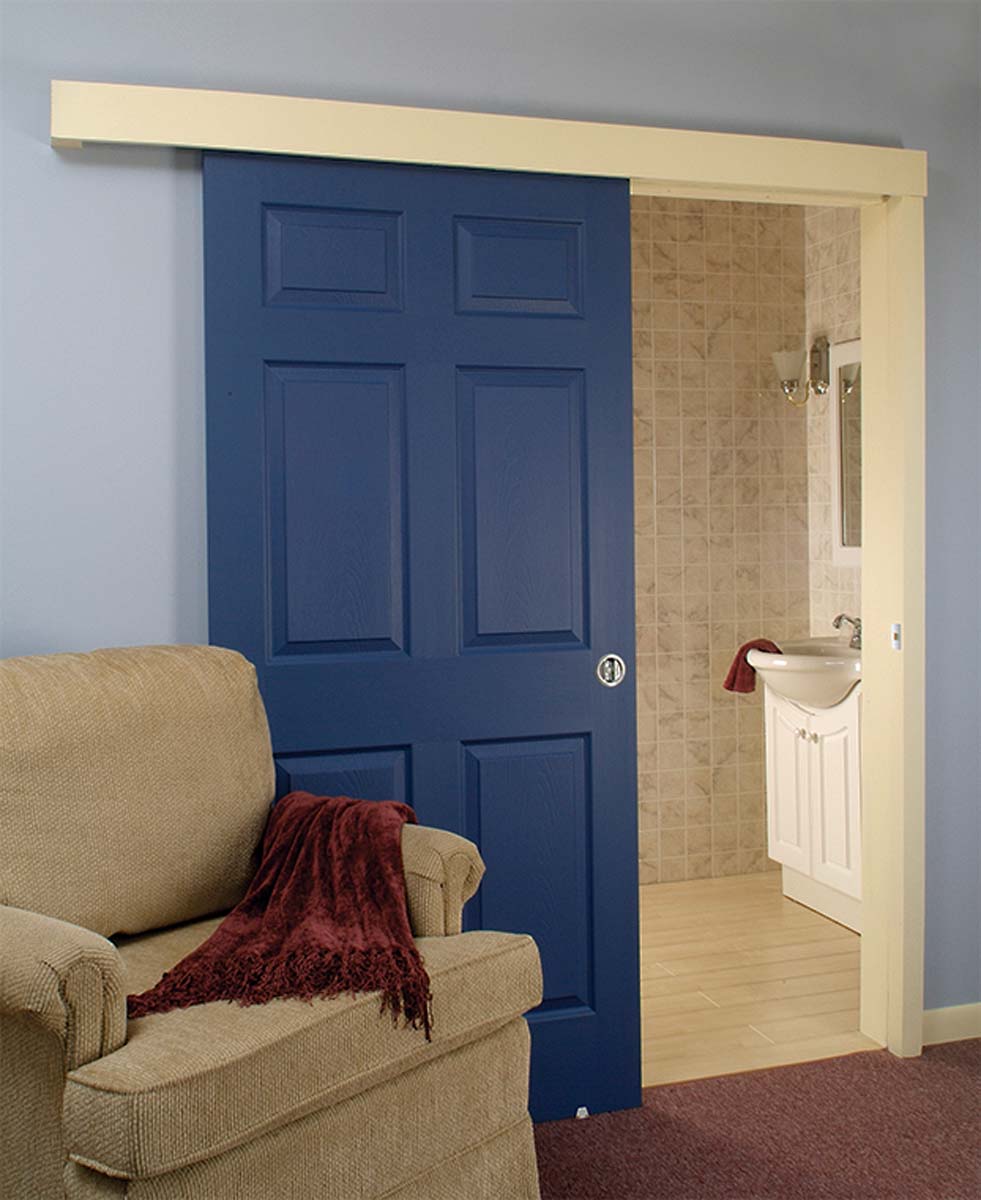 |
Hidden |
|
Unobtrusive |
 |
|
Ultramodern |
 |
Click the View PDF button below to read the full article.
