FHB Logo Facebook LinkedIn Email Pinterest Twitter X Instagram Tiktok YouTube Plus Icon Close Icon Navigation Search Icon Navigation Search Icon Arrow Down Icon Video Guide Icon Article Guide Icon Modal Close Icon Guide Search Icon Skip to content
Subscribe
Log In
  • How-To
  • Design
  • Tools & Materials
  • Restoration
  • Videos
  • Blogs
  • Forum
  • Magazine
  • Members
  • FHB House
  • Podcast
Log In

Fine Homebuilding Project Guides

Finish & Trim Carpentry

Guide Home
  • Trim Design
  • Tools and Materials
  • Interior Trim Basics
  • Window and Door Casings
  • Baseboard and Crown Molding
  • Wainscot and Paneling
  • Mantels and Fireplace Surrounds
  • Coffered Ceilings
How-To

Case a Door with Mitered Trim

The key to success in this relatively simple trim project is for your door jamb corners to start off square and your miters to fit "right and tight."

By Tom O'Brien Issue 169
  • X
  • facebook
  • linkedin
  • pinterest
  • email
  • add to favorites Log in or Sign up to save your favorite articles

There are almost as many ways to case a doorway (or a window frame) as there are carpenters. (to learn about a production approach to casing, read the article Perfect Miter Joints Every Time). But in all cases, the keys to success are making sure that the corners of the jamb are perfectly square, that your miter saw is cutting accurately, and that you assemble the miters carefully (get them right and tight) before nailing the rest of the casing.

To permit the casing to lie flat, the jambs should be flush with, or slightly proud of, the wall surface. Plane the jambs if they’re too far out; extend them with thin strips of wood if they’re too far in. If the drywall is proud of the jamb by 1/8 in. or less, knock it back with a hammer.

If you have only one or two doors to case, a 16-oz. hammer and a nailset will get the job done just as quickly as an air nailer.

Prep the jambs and precut the miters

laying out reveal

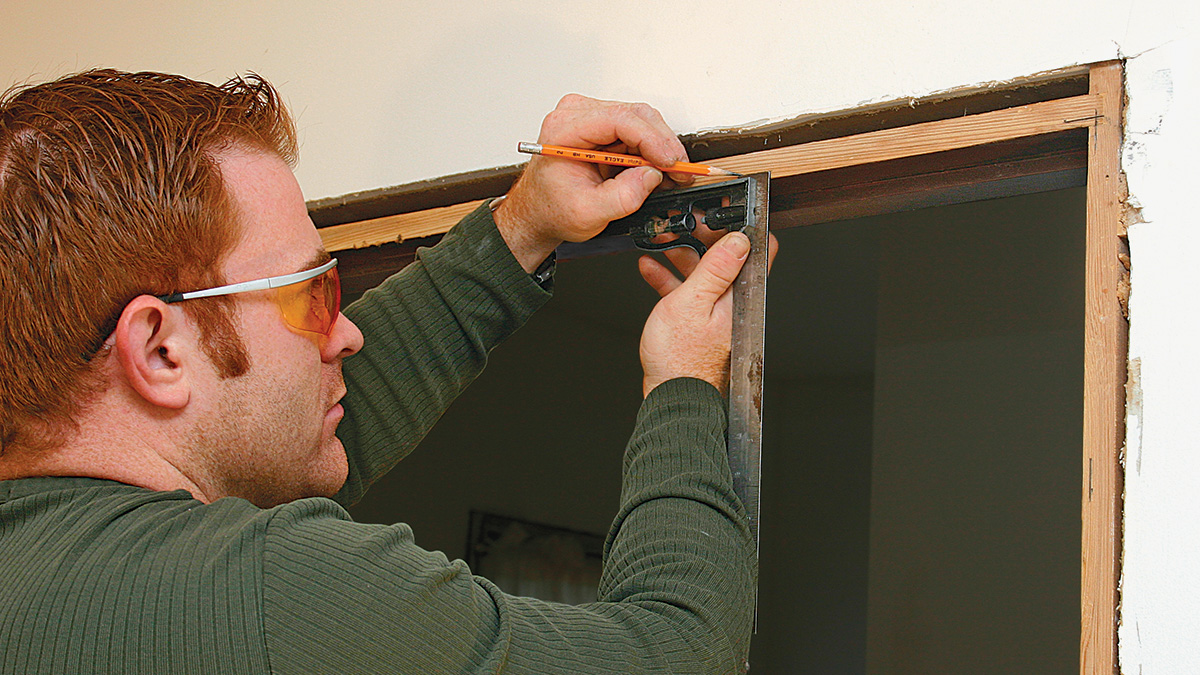
Step 1: Lay out for the reveal. Use a combination square and a sharp pencil to scribe the reveal, the distance (typically 3/16 in.) between the edge of the jamb and the casing. There’s no need for a continuous line; simply scribe a dash every foot or two, making sure that the dashes meet in the corners.

squaring jambs

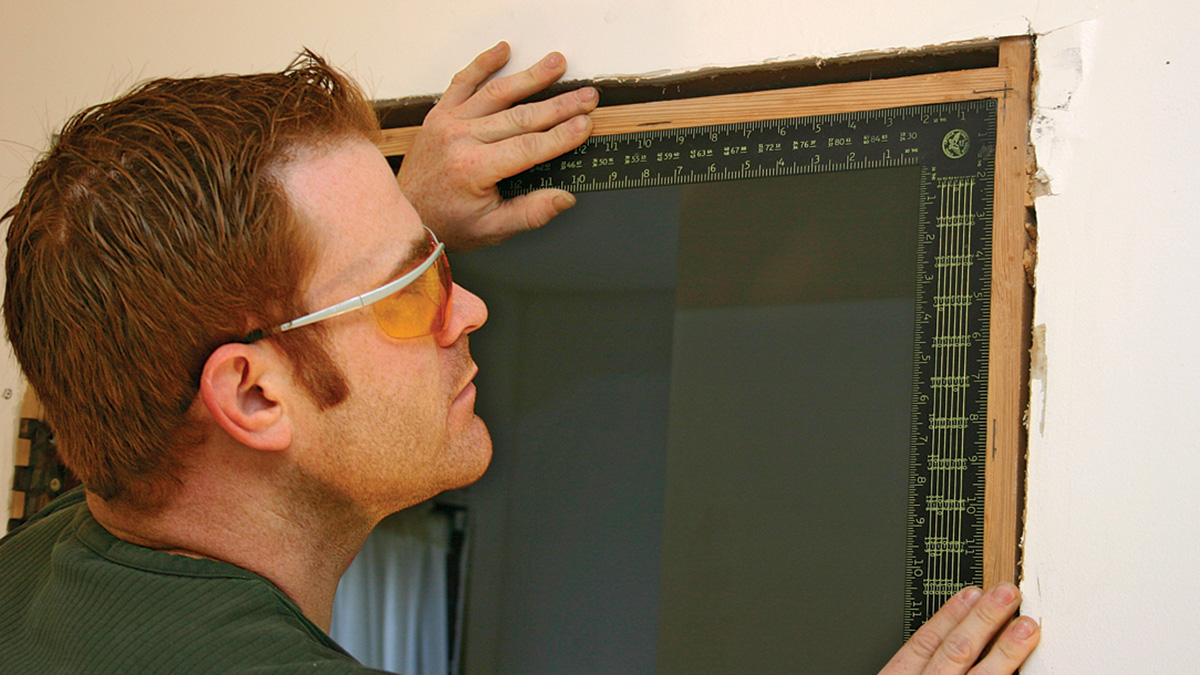
Step 2: Start square to stay square. Check the jambs for square, and shim them if they’re not. Otherwise, you may have to custom-fit the miter. Also, check the miter saw to verify that the blade is square to the table and to the fence; if so, the miter settings should be dead on. Refer to the owner’s manual if adjustments are necessary.

cutting miters

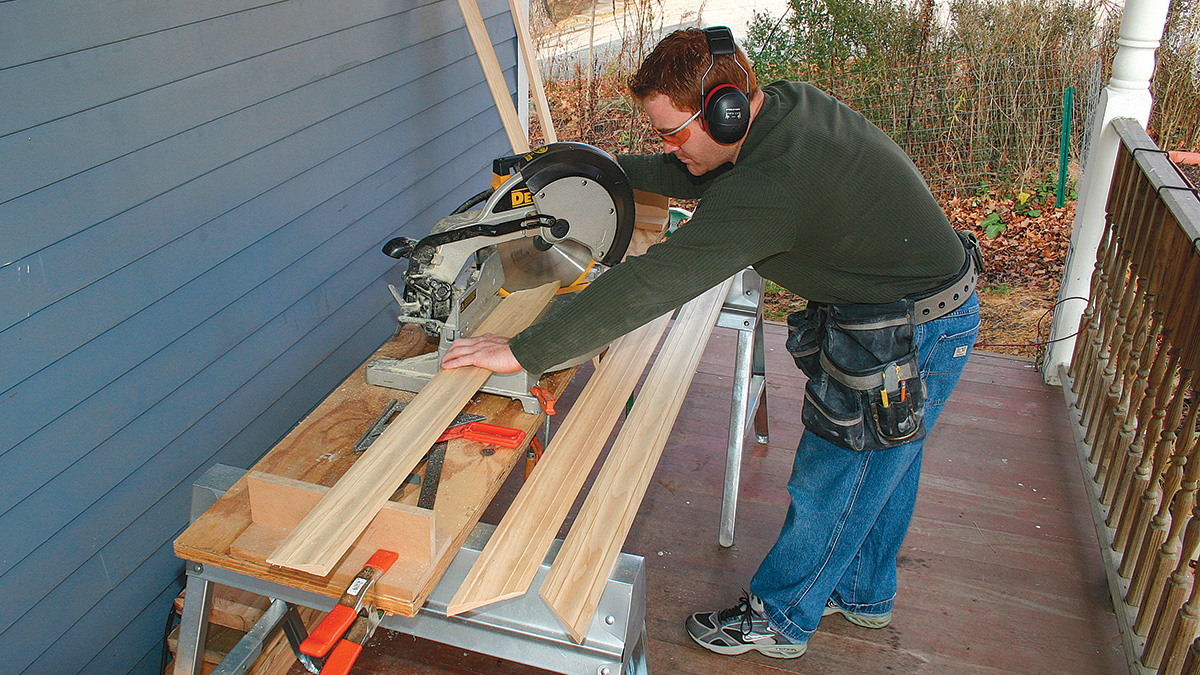
Step 3: Cut miters in advance. Miter the side casings and one end of the head casing. Leave enough extra to cut these pieces to length later.

A jig for measuring and marking casing

Trim-Loc casementinstallation tool

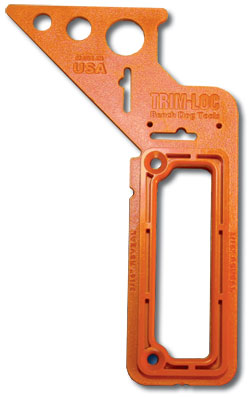
The Trim-Loc casement installation tool is essentially a triangle square that has been designed for casing. Its compact shape fits easily in a nail pouch. Like a Speed Square, the tool has legs for marking 45° and 90° angles, but it includes extra features such as a gauge for scribing a 3/16-in. reveal. It also can be fastened to a workbench for use as a jig to transfer measurements accurately from the inside of a miter.

Mark in place, then install with glue and finishing nails

installing head casing

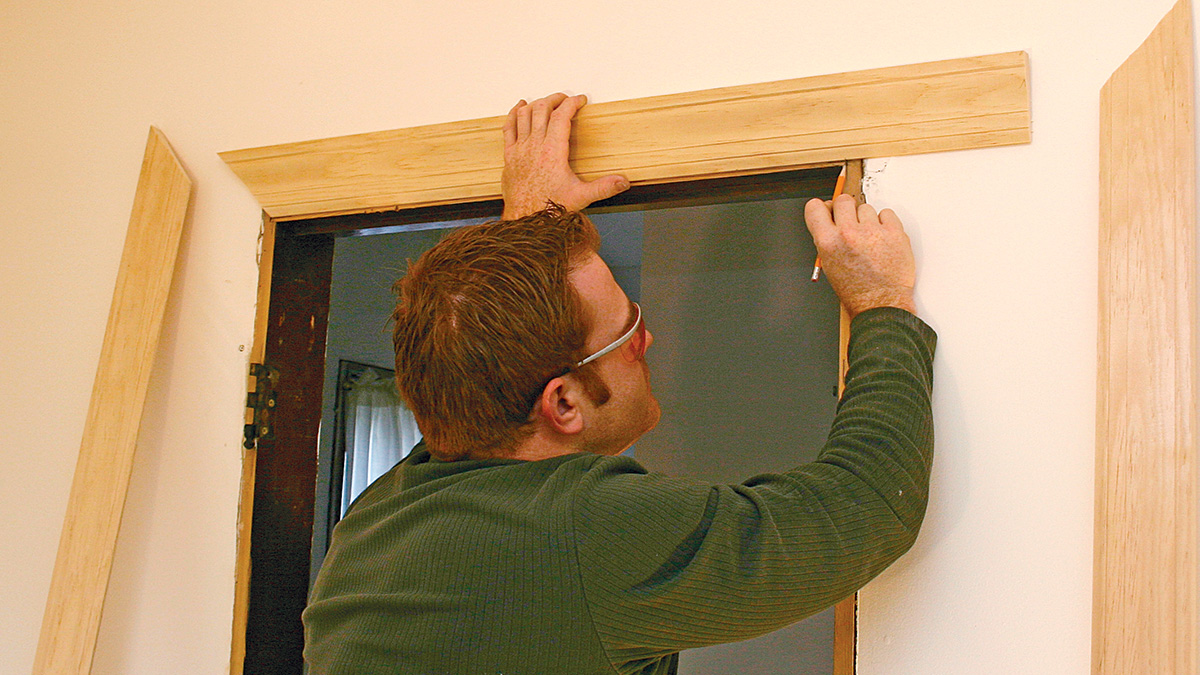
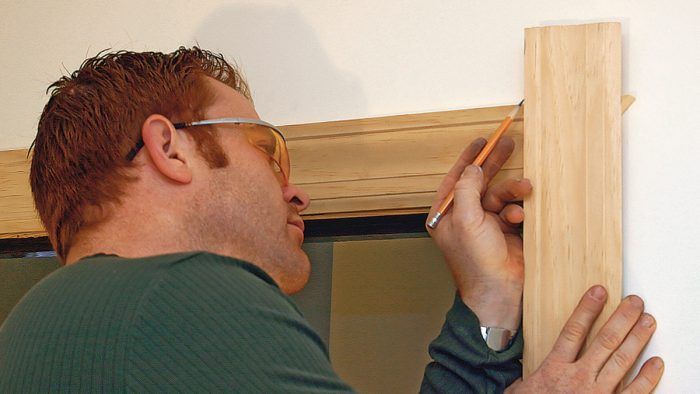
Step 1: Install head casing first. Align the mitered end of the head casing with the corner of the reveal, and mark the point where the far end meets the reveal. After cutting the miter, position the casing carefully, and tack it to the jamb with 4d nails; leave nail heads about 1/4 in. proud in case adjustments are necessary.

hammering in nail into casing

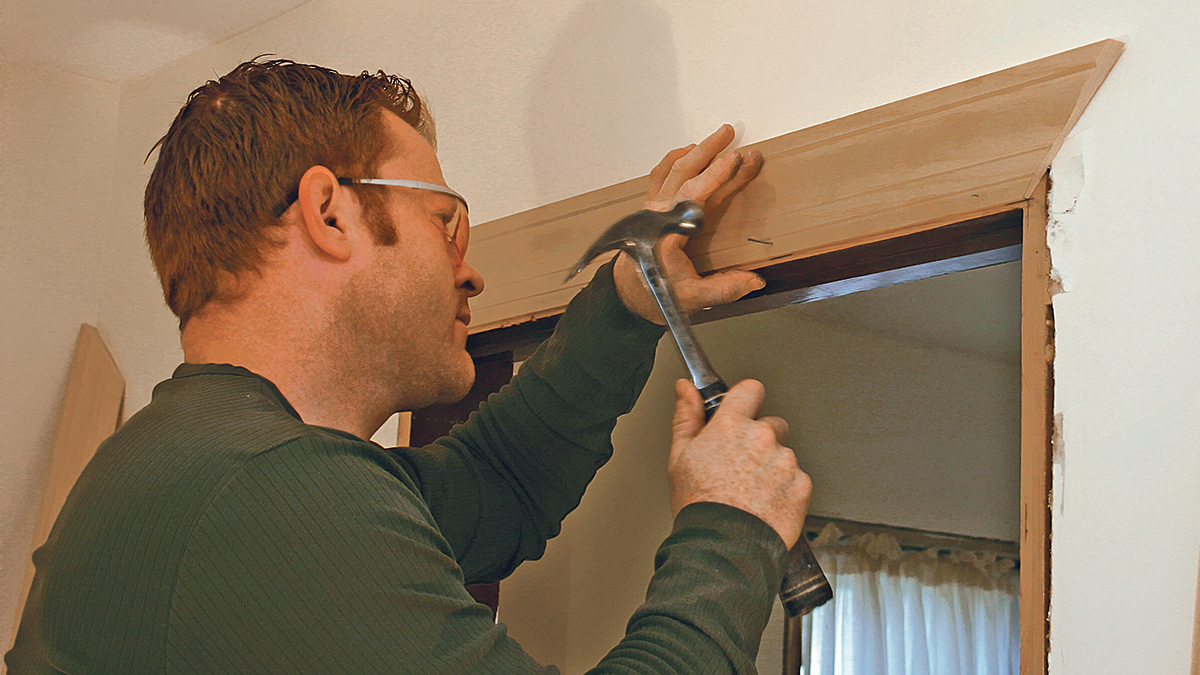
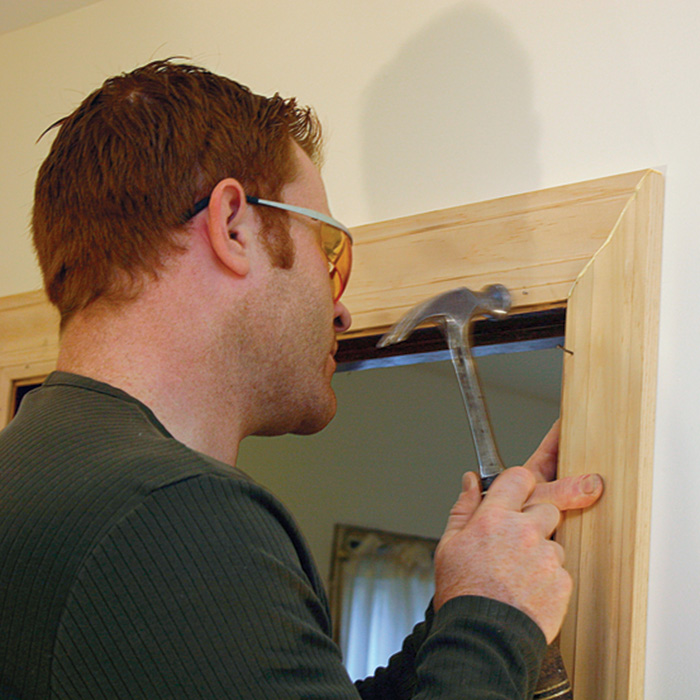
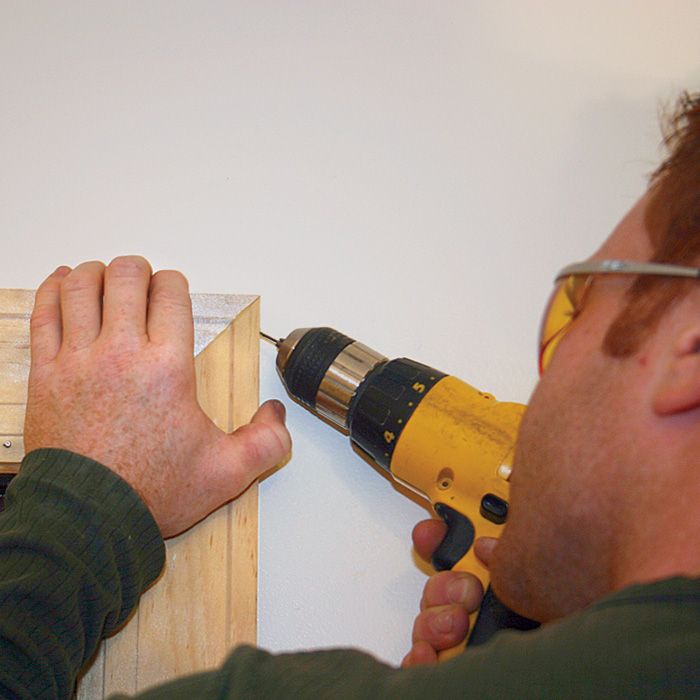
Step 2: Glue and nail the corner. Apply a generous amount of carpenter’s glue to the end grain. Then carefully align the miter joint, and tack the side casing to the jamb with two or three 4d nails. Place the first nail about 1 in. from the corner. Blunt the point of this nail with a hammer to minimize the risk of splitting wood. Secure the outside corner of the miter by driving a 4d nail up through the edge of the side casing into the head casing; drill a pilot hole for the nail to prevent knocking the whole thing out of whack.

marking casing

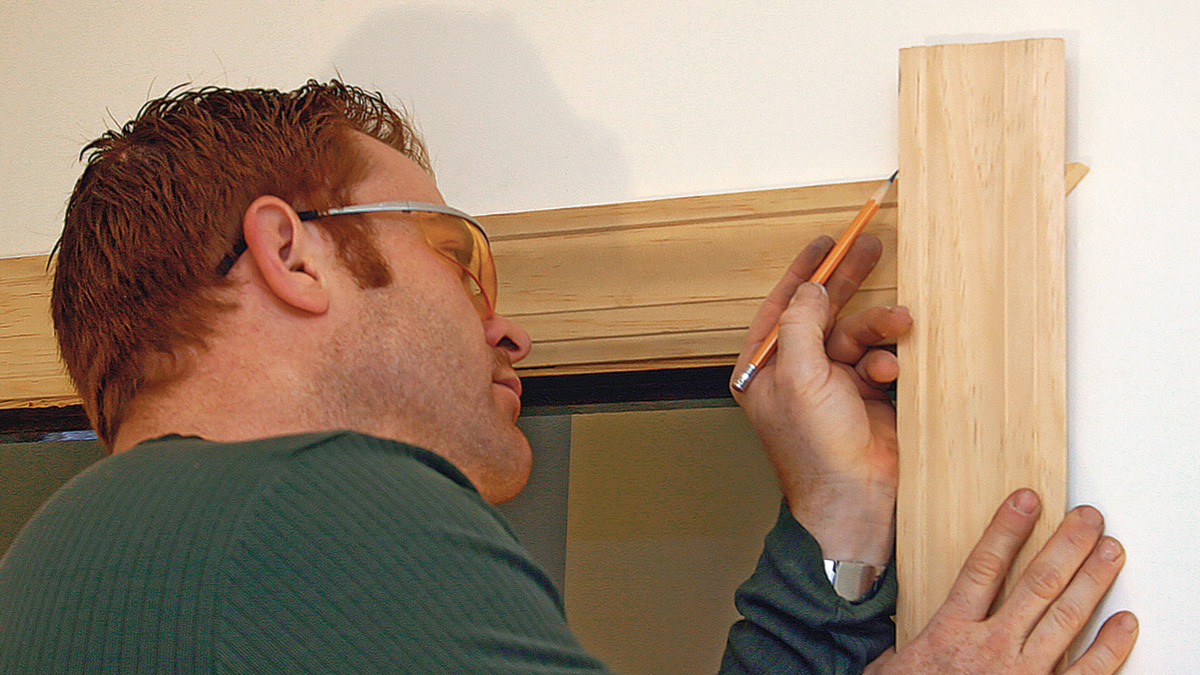
Step 3: Mark the sides upside down. Flip the side casing so that the mitered end touches the floor, and mark the point where the bottom intersects the top of the head casing. Make a square cut, and you’re ready to install the side casing. A word of warning: If the finished floor is severely uneven, you may need to use scribes or a contour gauge to transfer the floor’s profile to the casing before making the cut.

nailing casing
securing frame

using nailset drive below surface to finish

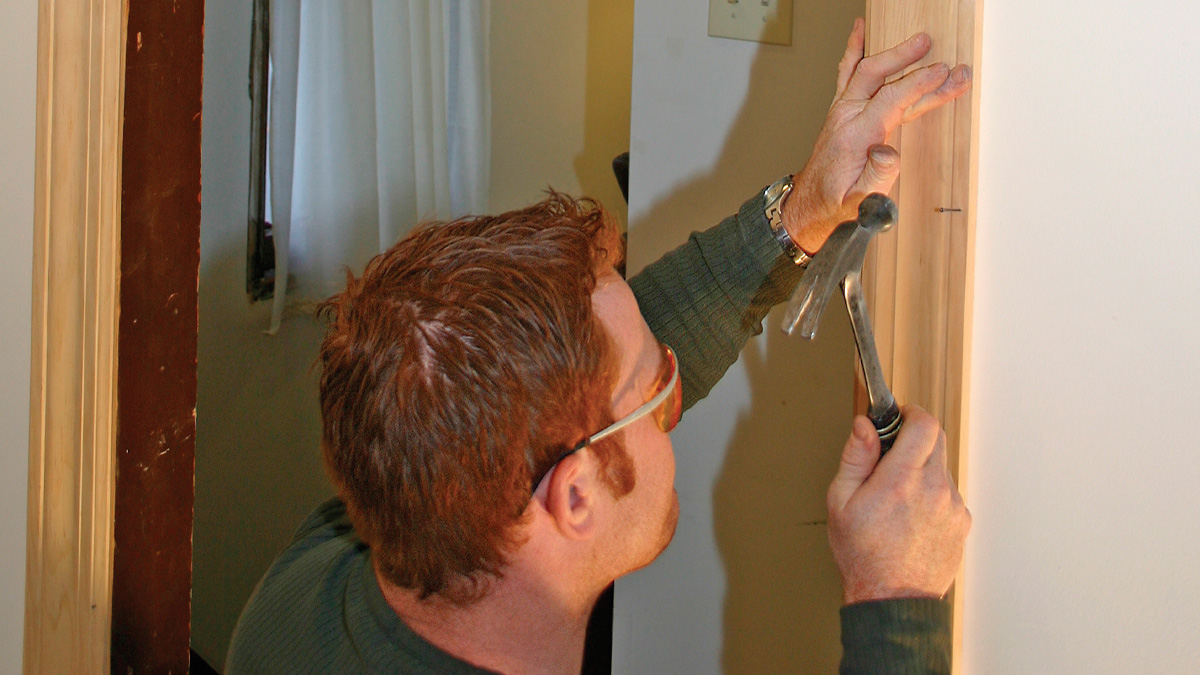
Step 4: Eyeball the spacing. After the miters are fixed, the casing is nailed home. Use 4d nails to fasten the casing to the jambs; 6d or 8d nails are needed to secure the casing to the framing. Nails should be placed an inch or two from each end and the same distance from the hinges. Otherwise, space the nails 8 in. to 16 in. apart. Leave all the heads slightly proud of the surface, then use a nailset to drive them about 1/8 in. below the surface.

Photos by: Tom O’Brien; technical assistance by: Tim Carney of Carney Home Enterprises in New Milford, Connecticut

From Fine Homebuilding #169

Previous: Adding Detail with Built-Up Molding Next: Craftsman-Style Door Casing

Guide

Finish & Trim Carpentry

Chapter

Window and Door Casings

Sign up for eletters today and get the latest how-to from Fine Homebuilding, plus special offers.

Signing you up...

This site is protected by reCAPTCHA and the Google Privacy Policy and Terms of Service apply.
See all newsletters
See all newsletters

View Comments

  1. Musetomg | Aug 01, 2017 09:45am | #1

    I love this method of trimming doors - we recently replaced all the doors in our house and it worked great! Since all the doors are the same height and the standard widths I was able to cut all the mitered blanks at once.

    One change I made is to mark only the top corners and the top center reveal, using a marking knife, and then installing the top piece. I then marked the side pieces and installed them using my jig as a guide to avoid additional marking.

Log in or create an account to post a comment.

Sign up Log in

Become a member and get full access to FineHomebuilding.com

Finish & Trim Carpentry

Finish & Trim Carpentry

Trusted, comprehensive guidance from the pros for creating perfect trim details in any room of the house

View Project Guide

View All Project Guides »

Become a member and get unlimited site access, including the Finish & Trim Carpentry Project Guide.

Start Free Trial

Trim Design
  • Trim Style and Design
Tools and Materials
  • Tools
  • Materials
Interior Trim Basics
  • Tips and Tricks
  • Techniques
  • Using Jigs
Window and Door Casings
  • Windows
  • Doors
Baseboard and Crown Molding
  • Baseboard
  • Crown Molding
  • Specialty Crown Situations
Wainscot and Paneling
  • Beadboard Wainscot
  • Paneled Wainscot
  • Chair Rails
  • Wall Treatments
Mantels and Fireplace Surrounds
  • Design
  • Installing Mantels and Surrounds
Coffered Ceilings

Fine Home Building

Newsletter Sign-up

  • Fine Homebuilding

    Home building tips, offers, and expert advice in your inbox.

  • Green Building Advisor

    Building science and energy efficiency advice, plus special offers, in your inbox.

  • Old House Journal

    Repair, renovation, and restoration tips, plus special offers, in your inbox.

Signing you up...

This site is protected by reCAPTCHA and the Google Privacy Policy and Terms of Service apply.
See all newsletters

Follow

  • Fine Homebuilding

    Dig into cutting-edge approaches and decades of proven solutions with total access to our experts and tradespeople.

    Start Free Trial Now
    • Facebook
    • Instagram
    • X
    • LinkedIn
  • GBA Prime

    Get instant access to the latest developments in green building, research, and reports from the field.

    Start Free Trial Now
    • Facebook
    • YouTube
  • Old House Journal

    Learn how to restore, repair, update, and decorate your home.

    Subscribe Now
    • Facebook
    • Instagram
    • X

Membership & Magazine

  • Online Archive
  • Start Free Trial
  • Magazine Subscription
  • Magazine Renewal
  • Gift a Subscription
  • Customer Support
  • Privacy Preferences
  • About
  • Contact
  • Advertise
  • Careers
  • Terms of Use
  • Site Map
  • Do not sell or share my information
  • Privacy Policy
  • Accessibility
  • California Privacy Rights

© 2025 Active Interest Media. All rights reserved.

Fine Homebuilding receives a commission for items purchased through links on this site, including Amazon Associates and other affiliate advertising programs.

  • Home Group
  • Antique Trader
  • Arts & Crafts Homes
  • Bank Note Reporter
  • Cabin Life
  • Cuisine at Home
  • Fine Gardening
  • Fine Woodworking
  • Green Building Advisor
  • Garden Gate
  • Horticulture
  • Keep Craft Alive
  • Log Home Living
  • Military Trader/Vehicles
  • Numismatic News
  • Numismaster
  • Old Cars Weekly
  • Old House Journal
  • Period Homes
  • Popular Woodworking
  • Script
  • ShopNotes
  • Sports Collectors Digest
  • Threads
  • Timber Home Living
  • Traditional Building
  • Woodsmith
  • World Coin News
  • Writer's Digest
Active Interest Media logo
X
X
This is a dialog window which overlays the main content of the page. The modal window is a 'site map' of the most critical areas of the site. Pressing the Escape (ESC) button will close the modal and bring you back to where you were on the page.

Main Menu

  • How-To
  • Design
  • Tools & Materials
  • Video
  • Blogs
  • Forum
  • Project Guides
  • Reader Projects
  • Magazine
  • Members
  • FHB House

Podcasts

  • FHB Podcast
  • ProTalk

Webinars

  • Upcoming and On-Demand

Podcasts

  • FHB Podcast
  • ProTalk

Webinars

  • Upcoming and On-Demand

Popular Topics

  • Kitchens
  • Business
  • Bedrooms
  • Roofs
  • Architecture and Design
  • Green Building
  • Decks
  • Framing
  • Safety
  • Remodeling
  • Bathrooms
  • Windows
  • Tilework
  • Ceilings
  • HVAC

Magazine

  • Current Issue
  • Past Issues
  • Magazine Index
  • Subscribe
  • Online Archive
  • Author Guidelines

All Access

  • Member Home
  • Start Free Trial
  • Gift Membership

Online Learning

  • Courses
  • Project Guides
  • Reader Projects
  • Podcast

More

  • FHB Ambassadors
  • FHB House
  • Customer Support

Account

  • Log In
  • Join

Newsletter

Get home building tips, offers, and expert advice in your inbox

Signing you up...

This site is protected by reCAPTCHA and the Google Privacy Policy and Terms of Service apply.
See all newsletters
See all newsletters

Follow

  • X
  • YouTube
  • instagram
  • facebook
  • pinterest
  • Tiktok

Join All Access

Become a member and get instant access to thousands of videos, how-tos, tool reviews, and design features.

Start Your Free Trial

Subscribe

FHB Magazine

Start your subscription today and save up to 81%

Subscribe

We hope you’ve enjoyed your free articles. To keep reading, become a member today.

Get complete site access to expert advice, how-to videos, Code Check, and more, plus the print magazine.

Start your FREE trial

Already a member? Log in

Privacy Policy Update

We use cookies, pixels, script and other tracking technologies to analyze and improve our service, to improve and personalize content, and for advertising to you. We also share information about your use of our site with third-party social media, advertising and analytics partners. You can view our Privacy Policy here and our Terms of Use here.

Cookies

Analytics

These cookies help us track site metrics to improve our sites and provide a better user experience.

Advertising/Social Media

These cookies are used to serve advertisements aligned with your interests.

Essential

These cookies are required to provide basic functions like page navigation and access to secure areas of the website.

Delete My Data

Delete all cookies and associated data