
The Secret to Coping Crown Molding
Carpenter Bill Shaw demonstrates how cutting the crown at the same angle as the projection ensures that the cope will fit every time.

Coping crown molding is as much an art as it is a science. It involves a set of skills and techniques passed from master to apprentice, or less formally, from one guy on the job to another. After working with trim for a long time and talking to a great many carpenters, I have developed a handful of crown-coping techniques that I’d like to pass along. Created out of need, the techniques are based partly on math, partly on common sense, and partly on learning from mistakes.
The most-important concept to keep in mind is that every crown profile is designed for a fixed wall and ceiling projection. Once you have determined the projection, you need to reproduce the measurement accurately and consistently in your miter cuts and in the installation of the coped joint. This will always remove the complications brought on by irregular corners, bad framing, and lumpy tape jobs. Cut precisely, a coped joint is forgiving and fits every time.
Transfer the ceiling projection to the saw
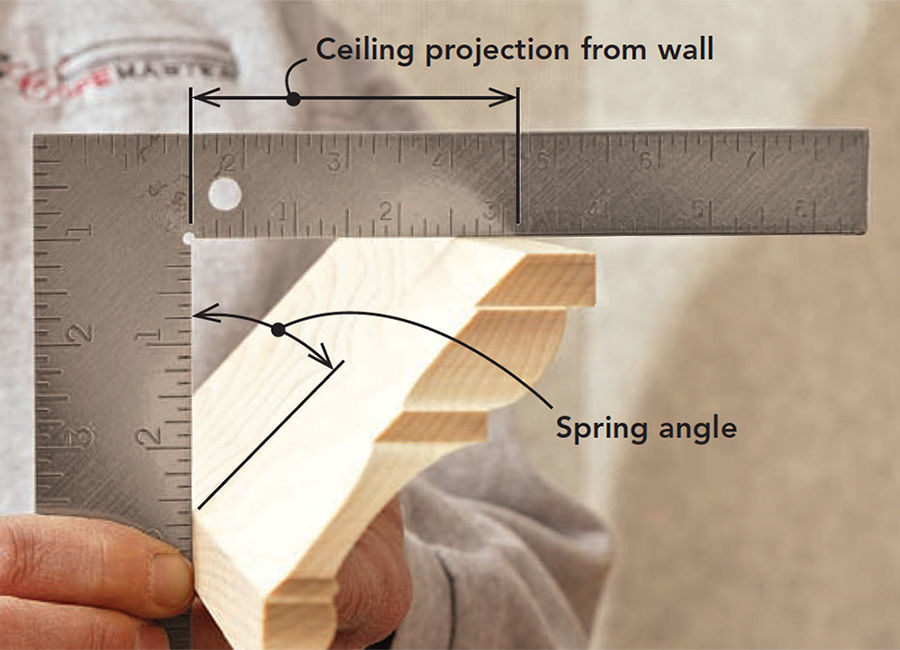
Every crown profile has a specific wall and ceiling projection (see the photo below). If the crown is cut at the same angle as the projection, the cope will fit every time. To find the ceiling projection of the crown, I fit a square onto the bedding angles of a flat sample piece; the ceiling projection is indicated on the top scale, in this case 3 1/8 in.
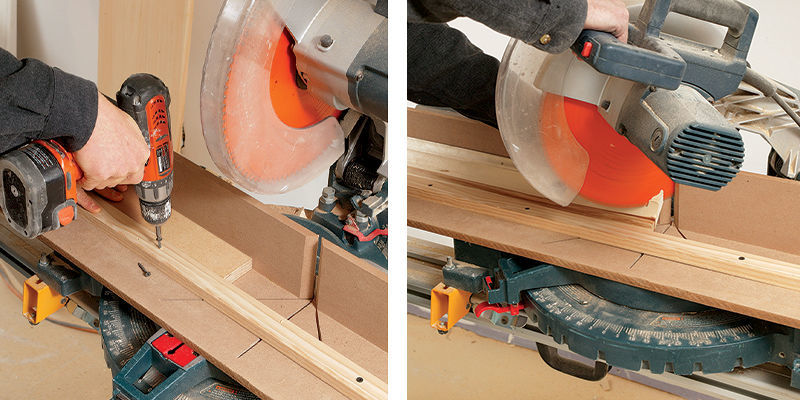
Rather than use a compound-miter saw to cut crown on the flat, I’ve found that it’s faster to add a stop to the saw-table that reproduces the ceiling projection, then cut the molding upside down and backward.
After measuring the projection, I rip a piece of plywood to the width of that measurement (in this case, 3 1/8 in.). I use the plywood to set the position of a stop and screw the stop to the auxiliary table.
To check the cut, I measure the length of the miter; it should equal that profile’s ceiling projection. Installed at that projection, the cope will fit.
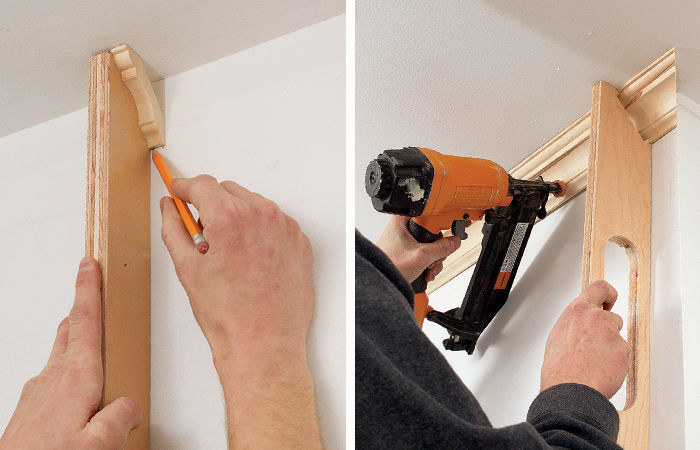
Use gauges and take the guesswork out of the installation
Sprung crown doesn’t make contact with the intersection of ceiling and wall, so measuring from the corner to mark guidelines only introduces errors that result from framing irregularities or joint-compound buildup. Instead, I use the piece I ripped to set the miter stop, glue a slice of the crown into position, and lop off the corner. With the gauge held up to the ceiling, I can mark the crown’s top and bottom positions.
An alternative technique comes from my colleague Dave Collins (www.collinstool.com), who cuts the wall and ceiling projections of a crown profile into a piece of plywood that holds the crown in the proper position. It’s especially handy for laying out and installing outside corners. I measure the angle of the corner, subtract that angle from 180°, and divide by two to get the miter angle. Once the miters are cut, I install the piece, using the gauge to hold it at the proper projections.
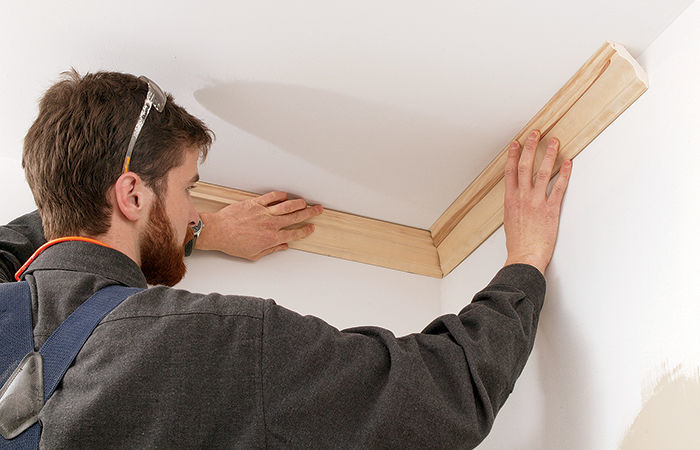
My favorite way to establish a guideline is to use a 2-ft.-long piece that’s coped accurately and a 2-ft.-long square-cut piece. Fitted in the corner, the coped piece locates the square piece at the correct projections, and you can mark the top and/or bottom. The longer pieces take into account more of the wall and ceiling conditions than small gauge blocks.
Caring for a trim delivery
Attention to detail is an important attribute of finish carpentry. Molding quality can have as much to do with the outcome of a trim job as cutting and installation techniques. Here’s the list of things I check over in a trim delivery.
Moisture content – Use a moisture meter to check the trim. Make sure the moisture content is within an acceptable range for your area of the country. You can call a local mill to find out the recommended moisture content for a particular species of wood.
Consistency – Measured with a dial caliper, the trim should not vary by more than 1/64 in. in width over its length or from piece to piece.
Flaws – Be on the lookout for excessive chatter, tearout, and other imperfections.
Relief cuts – If possible, have the supplier mill a relief into the back of the molding. The relief helps to reduce cupping, and it allows the trim to sit flatter on the wall. I prefer one big relief over two smaller cuts on base or large casings; if the stock does cup, it will rock on the area between the two relief cuts.
Cupping – Check profiles with a straightedge. A slight amount of cupping is normal on some pieces, especially with deep profile cuts, but anything with severe cupping should be sent back.
Bed angles – The crown’s bed angles should fit flush in a framing square or be slightly undercut at the ceiling. A 2° to 5° undercut helps if the ceiling is going uphill or if you have to alter the spring angle of the crown.
Climate control – If the trim is to be acclimatized, the job site must be as close as possible to the homeowners’ living conditions. Ideally, the relative humidity should be 35% to 40% at a temperature of 60°F to 70°F. Prime the stock on all sides, don’t store it in the garage or basement, and if possible, use air conditioners or dehumidifiers to offset job-site moisture.
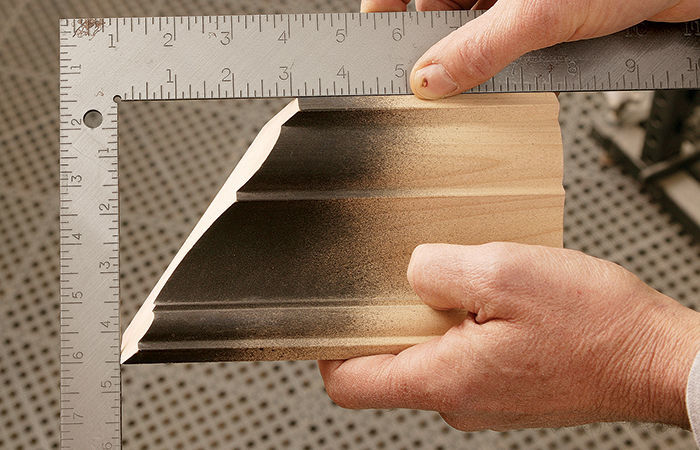
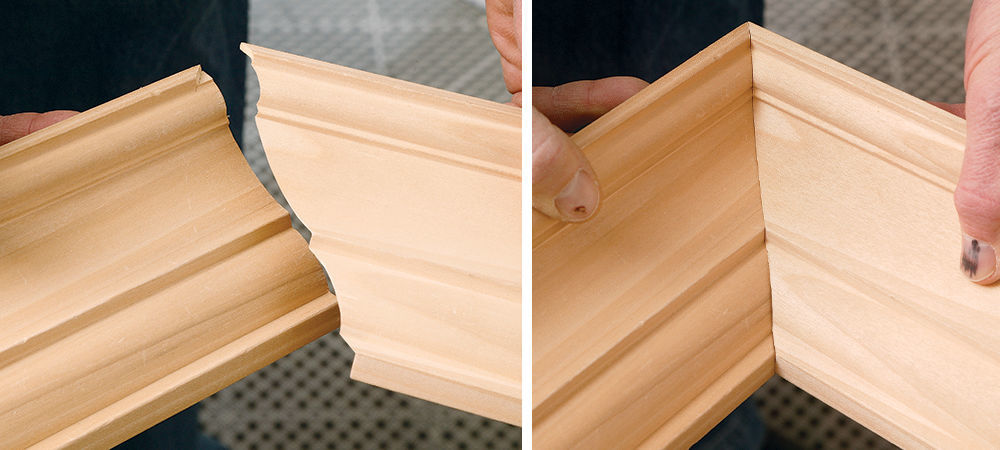
A coped joint that looks mitered
Especially when you’re working with wide stain-grade stock, there are occasions when you’d like the crisp look of a mitered joint but want to keep the integrity and ease of the cope. (Gary M. Katz demonstrated a similar technique in “Baseboard Done Better,” FHB #174) Both sides of the joint need a little attention. After cutting the miter, I cope away the waste but leave the point intact (photo left). I test-fit the mate of the piece and scribe the point onto the opposite piece, then make a shallow cut with a fine-toothed handsaw (photo right).
Photos by: Charles Bickford
From Fine Homebuilding #194
