FHB Logo Facebook LinkedIn Email Pinterest Twitter X Instagram Tiktok YouTube Plus Icon Close Icon Navigation Search Icon Navigation Search Icon Arrow Down Icon Video Guide Icon Article Guide Icon Modal Close Icon Guide Search Icon Skip to content
Subscribe
Log In
  • How-To
  • Design
  • Tools & Materials
  • Restoration
  • Videos
  • Blogs
  • Forum
  • Magazine
  • Members
  • FHB House
  • Podcast
Log In

Fine Homebuilding Project Guides

Roofing

Guide Home
  • Tools and Materials
  • Roof Replacement and Reroofing
  • Roof Ventilation
  • Waterproofing
  • Installing Asphalt Shingles
  • Installing Other Types of Roofs
  • Roof Maintenance and Repair
How-To

How to Install Drip Edge When Replacing a Roof

A pro roofing contractor shows how to install these crucial water-management details before the shingles go on.

  • X
  • facebook
  • linkedin
  • pinterest
  • email
  • add to favorites Log in or Sign up to save your favorite articles
Video Player is loading.
Current Time 0:00
/
Duration 0:00
Loaded: 0%
Stream Type LIVE
Remaining Time -0:00
 
1x
    • Chapters
    • descriptions off, selected
    • captions settings, opens captions settings dialog
    • captions off, selected

      This is a modal window.

      Beginning of dialog window. Escape will cancel and close the window.

      Text
      Background
      Window
      Font Size
      Text Edge Style
      Font Family

      End of dialog window.

      This is a modal window. This modal can be closed by pressing the Escape key or activating the close button.

      This is a modal window. This modal can be closed by pressing the Escape key or activating the close button.

      A drip edge is a piece of metal flashing that you can install at the bottom of your roof to direct the flow of water away from the fascia. It’s is a great way to protect the roofing components that go beneath a home’s shingles. Knowing how to install drip edge properly is a useful skill for anyone embarking on a roof improvement project.

      Drip edge hangs over the sides of your roof, and will not stain over time—meaning it’s both aesthetic and practical, and it will look good in the years ahead. Installing drip edge is an easy way to further shield your home from the elements.


      Video Transcript:

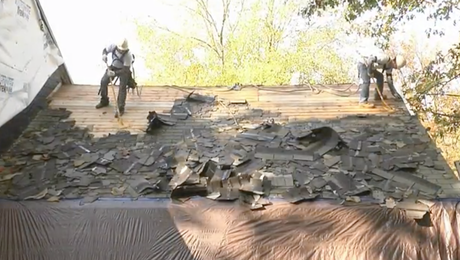
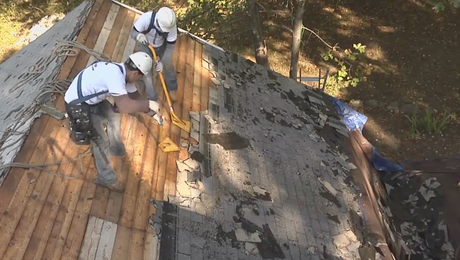
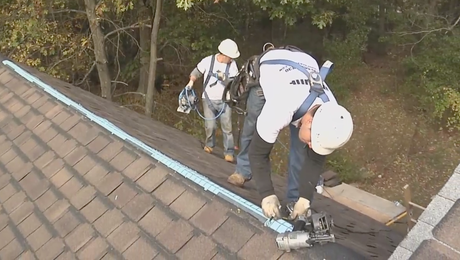
      Narrator: Once the deck is prepped, it’s time to install a drip edge along the eaves.

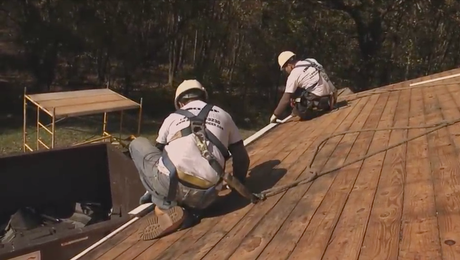
      Tom Melillo, residential project manager, roof services: Drip edge has basically two purposes. The first is to prevent blow-under leaks in wind-driven rains. And in this particular (F-4) drip edge, there’s a bit of a shelf on it that sticks off the edges of the roof.  That shelf acts as a support for the shingles so they are not just hanging off the edge of the roof.

      Narrator: Drip edge also prevents rainwater from running down the fascia, and instead directs it into the gutter. The installers use tin snips to cut the drip edge to size, and follow up with a small flat bar to open up the ends. This allows for an easy overlap of about 1-1/2 inches where two pieces of drip edge meet. Now it’s time for the peel-and-stick membrane. Also known as ice-and-water shield, self-sealing peel-and-stick will be installed along the eaves right over the drip edge. This provides a water-tight membrane to protect against ice dams.

      [Editor’s note, 2017: The IRC requires drip edge joints be lapped by 3 in. That’s been the case since its first publication in 2000. And the ARMA roof shingle manual calls for 3 in. as well.]

      Tom Melillo: Most building codes want your peel-and-stick membrane to be 2-ft. inside the heated wall. The roll is 3-ft. wide, so if you have a 1-ft. soffit, you need 3 feet of peel-and-stick. If you have a 2-ft. soffit, in order to follow code, you’ll need two courses of peel-and-stick.

      The manufacturer puts a split in the backing so you can peel off half at a time. This way you can put the membrane down, peel off half, stick it where you want it, and peel off the other half.

      Narrator: On the eaves, the peel-and-stick goes over the drip edge (though there is some argument in the industry as whether this is the best way to install drip edge). On the rakes, the drip edge goes over the membrane, so the roofers apply the membrane first. The drip edge is nailed in place using 1-1/2 galvanized roofing nails. A felt-tip marker works great for marking cuts. And, again, prying open the end with a small flat bar allows the pieces to overlap cleanly.

      Once the roofers finish off the other rake with drip edge, the put another layer of peel-and-stick along the side-wall transition, lapping it about 8-in. up the wall. This adds extra protection against possible leaks.

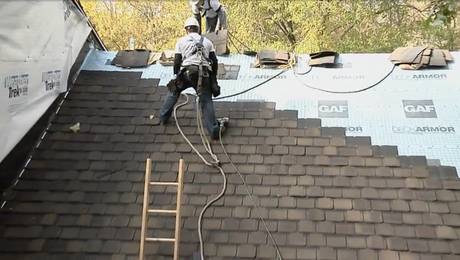
      Then they move to installing the synthetic underlayment.

      Tom Melillo: After the peel-and-stick membrane, we install this polypropylene underlayment. This underlayment is fast replacing traditional 15- and 30-lb. felt papers.

      Narrator: These products are increasingly popular because of their durability, light weight, and additional coverage per roll.

      Tom Melillo: The polypropylene underlayment is installed with a 3-in. overlap. On lower-pitch roofs, we would go with a 6-in. overlap.

      Videos in the Series

      • Introduction: How to Replace a Roof

        Get an overview of the entire process before watching our how-to series on re-roofing an existing building.

      • Replacing a Roof: How to Strip Old Shingles and Patch Sheathing

        A pro roofing contractor demonstrates how to keep a job site clean, remove worn-out roofing, and replace damaged board sheathing before installing a new roof.

      • How to Install Drip Edge When Replacing a Roof

        A pro roofing contractor shows how to install these crucial water-management details before the shingles go on.

      • How To Install Shingles and Step Flashing

        Watch as these roofers lay out materials, set a starter course, and cut and nail down flashing and shingles.

      • Step-by-Step Ridge Vent Installation Instructions

        The last phase of this project includes cutting through the sheathing at the ridge, fastening down vent material, and nailing down roof-cap shingles.

      Previous: Installing Asphalt Shingles over an Existing Shingle Roof Next: Critical Roof Flashings Keep Water Out

      Guide

      Roofing

      Chapter

      Roof Replacement and Reroofing

      Sign up for eletters today and get the latest how-to from Fine Homebuilding, plus special offers.

      Signing you up...

      This site is protected by reCAPTCHA and the Google Privacy Policy and Terms of Service apply.
      See all newsletters
      See all newsletters

      Log in or create an account to post a comment.

      Sign up Log in

      Become a member and get full access to FineHomebuilding.com

      Roofing

      Roofing

      A complete resource that includes the best materials and the right techniques to build a sturdy, leak-free, attractive roof on any house

      View Project Guide

      View All Project Guides »

      Become a member and get unlimited site access, including the Roofing Project Guide.

      Start Free Trial

      Tools and Materials
      • Roof Coverings
      • Roofing Materials
      • Power Tools
      • Handy Helpers
      • Staging and Ladders
      • Safety Equipment
      Roof Replacement and Reroofing
      • Preparing the Old Roof
      • Sheathing
      • Installing the New Roof
      Roof Ventilation
      • Venting Basics
      • Installation
      Waterproofing
      • Underlayment
      • Drip Edge
      • Flashing Adjoining Walls
      • Dormer and Skylight Flashing
      • Chimney Flashing
      • Vent Flashing
      • Gutters
      Installing Asphalt Shingles
      • Calculating Shingles
      • Layout
      • Installation
      • Valleys
      Installing Other Types of Roofs
      • Cedar Shingles
      • Metal
      • Low-Slope Roofs
      • Slate and Tile
      Roof Maintenance and Repair
      • Assessing the Problem
      • Repairing Asphalt-Shingle Roofs
      • Other Roofing Repairs

      Fine Home Building

      Newsletter Sign-up

      • Fine Homebuilding

        Home building tips, offers, and expert advice in your inbox.

      • Green Building Advisor

        Building science and energy efficiency advice, plus special offers, in your inbox.

      • Old House Journal

        Repair, renovation, and restoration tips, plus special offers, in your inbox.

      Signing you up...

      This site is protected by reCAPTCHA and the Google Privacy Policy and Terms of Service apply.
      See all newsletters

      Follow

      • Fine Homebuilding

        Dig into cutting-edge approaches and decades of proven solutions with total access to our experts and tradespeople.

        Start Free Trial Now
        • Facebook
        • Instagram
        • X
        • LinkedIn
      • GBA Prime

        Get instant access to the latest developments in green building, research, and reports from the field.

        Start Free Trial Now
        • Facebook
        • YouTube
      • Old House Journal

        Learn how to restore, repair, update, and decorate your home.

        Subscribe Now
        • Facebook
        • Instagram
        • X

      Membership & Magazine

      • Online Archive
      • Start Free Trial
      • Magazine Subscription
      • Magazine Renewal
      • Gift a Subscription
      • Customer Support
      • Privacy Preferences
      • About
      • Contact
      • Advertise
      • Careers
      • Terms of Use
      • Site Map
      • Do not sell or share my information
      • Privacy Policy
      • Accessibility
      • California Privacy Rights

      © 2025 Active Interest Media. All rights reserved.

      Fine Homebuilding receives a commission for items purchased through links on this site, including Amazon Associates and other affiliate advertising programs.

      • Home Group
      • Antique Trader
      • Arts & Crafts Homes
      • Bank Note Reporter
      • Cabin Life
      • Cuisine at Home
      • Fine Gardening
      • Fine Woodworking
      • Green Building Advisor
      • Garden Gate
      • Horticulture
      • Keep Craft Alive
      • Log Home Living
      • Military Trader/Vehicles
      • Numismatic News
      • Numismaster
      • Old Cars Weekly
      • Old House Journal
      • Period Homes
      • Popular Woodworking
      • Script
      • ShopNotes
      • Sports Collectors Digest
      • Threads
      • Timber Home Living
      • Traditional Building
      • Woodsmith
      • World Coin News
      • Writer's Digest
      Active Interest Media logo
      X
      X
      This is a dialog window which overlays the main content of the page. The modal window is a 'site map' of the most critical areas of the site. Pressing the Escape (ESC) button will close the modal and bring you back to where you were on the page.

      Main Menu

      • How-To
      • Design
      • Tools & Materials
      • Video
      • Blogs
      • Forum
      • Project Guides
      • Reader Projects
      • Magazine
      • Members
      • FHB House

      Podcasts

      • FHB Podcast
      • ProTalk

      Webinars

      • Upcoming and On-Demand

      Podcasts

      • FHB Podcast
      • ProTalk

      Webinars

      • Upcoming and On-Demand

      Popular Topics

      • Kitchens
      • Business
      • Bedrooms
      • Roofs
      • Architecture and Design
      • Green Building
      • Decks
      • Framing
      • Safety
      • Remodeling
      • Bathrooms
      • Windows
      • Tilework
      • Ceilings
      • HVAC

      Magazine

      • Current Issue
      • Past Issues
      • Magazine Index
      • Subscribe
      • Online Archive
      • Author Guidelines

      All Access

      • Member Home
      • Start Free Trial
      • Gift Membership

      Online Learning

      • Courses
      • Project Guides
      • Reader Projects
      • Podcast

      More

      • FHB Ambassadors
      • FHB House
      • Customer Support

      Account

      • Log In
      • Join

      Newsletter

      Get home building tips, offers, and expert advice in your inbox

      Signing you up...

      This site is protected by reCAPTCHA and the Google Privacy Policy and Terms of Service apply.
      See all newsletters
      See all newsletters

      Follow

      • X
      • YouTube
      • instagram
      • facebook
      • pinterest
      • Tiktok

      Join All Access

      Become a member and get instant access to thousands of videos, how-tos, tool reviews, and design features.

      Start Your Free Trial

      Subscribe

      FHB Magazine

      Start your subscription today and save up to 81%

      Subscribe

      We hope you’ve enjoyed your free articles. To keep reading, become a member today.

      Get complete site access to expert advice, how-to videos, Code Check, and more, plus the print magazine.

      Start your FREE trial

      Already a member? Log in

      Privacy Policy Update

      We use cookies, pixels, script and other tracking technologies to analyze and improve our service, to improve and personalize content, and for advertising to you. We also share information about your use of our site with third-party social media, advertising and analytics partners. You can view our Privacy Policy here and our Terms of Use here.

      Cookies

      Analytics

      These cookies help us track site metrics to improve our sites and provide a better user experience.

      Advertising/Social Media

      These cookies are used to serve advertisements aligned with your interests.

      Essential

      These cookies are required to provide basic functions like page navigation and access to secure areas of the website.

      Delete My Data

      Delete all cookies and associated data