The Rafter You’re After: Using SketchUp to Draw Roof Framing
You can use SketchUp to draw roof framing and practice your approach before you're on the job site.

The rafter you’re after
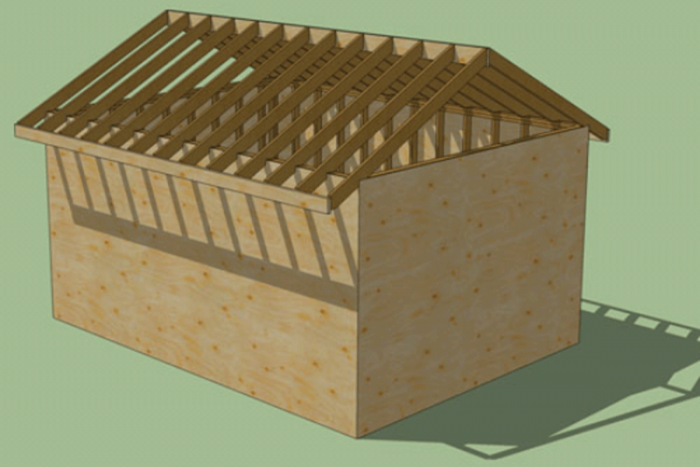
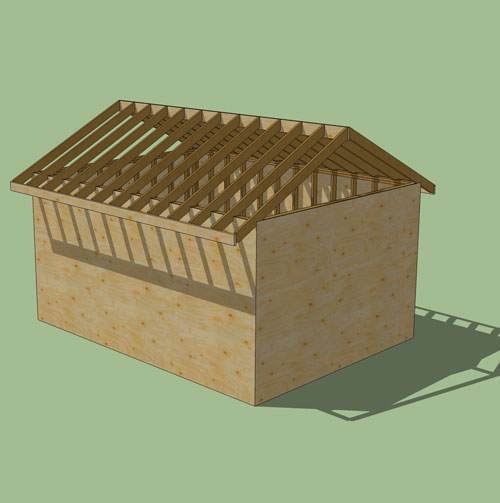
Even though the weather’s great every day on the digital job site, making a roof unnecessary, roof framing is an essential part of a complete 3D model. So this post will show some ideas on how to lay out, create, and digitally “set” rafters on the Doorless Wondershed currently under construction.
Getting ready: Use the offset tool to create wall sheathing
Let’s make our shed a little more solid by adding a layer of sheathing first. By “tracing” the perimeter of the wall-plate component, we quickly create a rectangle for sizing a wall-sheathing component. After the wall sheathing is in place, we can begin rafter-tail layout.
It’s plane to see: Creating a layout plane for rafter sizing
If you have ever tried to draw nonrectangular objects in the 3D realm of SketchUp, you know it can be frustrating. Even though the software helps by coloring lines to represent the X, Y, and Z axes, I developed this method to speed up the process. The tape measure and protractor tools are used to create guidelines that are then easily followed with the line tool for complex geometry. Watch the video to see if you find this method helpful.
Rafter layout without a framing square
With guidelines in place, the line tool gives the rafter shape. Then a few strategic keystrokes make the layout plane disappear, and the board-stretcher tool gives us a rafter “pattern” or component.
SketchUp magic: “Cutting” rafters for the whole roof (and then some!)
This video clip shows what I think are some of the coolest features of SketchUp: copying and moving geometry to duplicate components. Having spent more days than I can remember next to a bunk of lumber cutting hundreds of rafters for houses, the idea of digitally creating a ridiculous quantity of them with a few clicks of a mouse is still hard to believe. Watch how the move tool, with a little help from a couple of guidelines, can be used to shorten the rafter component to allow for the thickness of a ridge. I chose this method to highlight how useful the move tool can be although I could just as easily have allowed for the ridge while in the layout-plane stage of the drawing.
Wrapping up for the day: Adding fascia and a ridge
It would be a big mistake to take this 3D modeling tutorial and assume it is a carpentry lesson. From my experience, it wouldn’t work too well to set rafters without a ridge or some sort of collar ties or ceiling joists, but hey, this is a digital job site, and if you want to put up rafters first, even before the walls, go for it. So it’s time to slip in a ridge and add fascia to make the roof framing at least appear complete.
I hope watching this framing model develop is stirring up motivation in viewers who are taking the time to follow the process to get started on some of their projects. Once you start the process of giving your ideas and concepts a visible existence, I predict it will begin to open you eyes and mind to the full potential of the SketchUp program.
Stay tuned for… ???
A direction for the next digital job site post has yet to be determined. I’ll consider viewer suggestions whether to refine the Doorless Wondershed with a door component or possibly floor framing, a foundation, or some gingerbread trim on the exterior. I’ll check in for your ideas and decide. Until then, remember that here, if you click it twice and it’s still too short, just haul off and click it a third time.
Fine Homebuilding Recommended Products
Fine Homebuilding receives a commission for items purchased through links on this site, including Amazon Associates and other affiliate advertising programs.

Code Check 10th Edition: An Illustrated Guide to Building a Safe House

A House Needs to Breathe...Or Does It?: An Introduction to Building Science

Graphic Guide to Frame Construction


View Comments
These videos have been helpful to me, thank you! I've also found it beneficial to save my Sketch-Up work into Sketch-Up Groups (e.g. roof, walls, etc.). This acts a safety net for me in case I need to remove large portions of my work all at once; plus it allows me to experiment with different roof styles, etc. without giving up my initial work. Just a thought! Thanks again.