FHB Logo Facebook LinkedIn Email Pinterest Twitter X Instagram Tiktok YouTube Plus Icon Close Icon Navigation Search Icon Navigation Search Icon Arrow Down Icon Video Guide Icon Article Guide Icon Modal Close Icon Guide Search Icon Skip to content
Subscribe
Log In
  • How-To
  • Design
  • Tools & Materials
  • Restoration
  • Videos
  • Blogs
  • Forum
  • Magazine
  • Members
  • FHB House
  • Podcast
Log In
Building Skills

How to Draw an Arc for an Arched Doorway

Mark and cut a perfect curve every time by following these simple steps.

By Official Fine Homebuilding Post
  • X
  • facebook
  • linkedin
  • pinterest
  • email
  • add to favorites Log in or Sign up to save your favorite articles
Video Player is loading.
Current Time 0:00
/
Duration 0:00
Loaded: 0%
Stream Type LIVE
Remaining Time -0:00
 
1x
    • Chapters
    • descriptions off, selected
    • captions settings, opens captions settings dialog
    • captions off, selected

      This is a modal window.

      Beginning of dialog window. Escape will cancel and close the window.

      Text
      Background
      Window
      Font Size
      Text Edge Style
      Font Family

      End of dialog window.

      This is a modal window. This modal can be closed by pressing the Escape key or activating the close button.

      This is a modal window. This modal can be closed by pressing the Escape key or activating the close button.

      A lot of the work we do on houses is rectilinear, or plumb, level, and square. Even when angles are introduced on roofs or for stairs, they’re usually pretty straightforward triangles that are easy to figure out with some basic geometry. When curves get thrown at carpenters, the work gets challenging. Framers are often tasked with laying out arches for windows and doors. Framing the arch is fairly straightforward. Drywalling the arch is tricky, but doable. The challenge often happens much earlier in the project when you have to actually determine the curve of the arch. You’ll need to know the width of the opening and determine a suitable radius for the arch. Then you can use a trammel to draw your arch, or use this techniques which only requires a pencil and tape measure.

      Fine Homebuilding video with Scott Grice

      Today we’re going to look at a simple technique for figuring out the radius of an arch, so you can mark it out cleanly and get a nice cut. This particular arch will be 6 inches below our top plate, and it will be 12 inches high and 36 inches wide, but this process will work for any dimensions.

      Here’s how you do it:
      1. From one end of a 4-foot wide sheet of plywood, measure down 6 inches on both sides and draw a line across; this will be the top of the arch.

      2. Measure another 12 inches down from that line and draw a line across the plywood (18 inches total from the end of the plywood); this will define the bottom ends of the arch.

      3. Make a mark 6 inches in from each side (taking away a total of 1 foot, since we’re making a 36-inch wide arch on a 48-inch wide sheet), and make one more mark in the middle of the sheet, on each of the lines above.

      4. Draw a line from each of the outer marks (the ones that define the width at 36 inches) on the line that is 18 inches from the edge of the plywood (the bottom edges of the arch) to the center mark on the line that is 6 inches from the edge (the top of the arch), making a triangle.

      5. Measure the length of the angled lines you just made (the two lines that go from the center of the top of the arch to the two bottom points of the arch), and find and mark the center of each (in this case, 10-13/16 inches is the distance from one end to the center of each line).

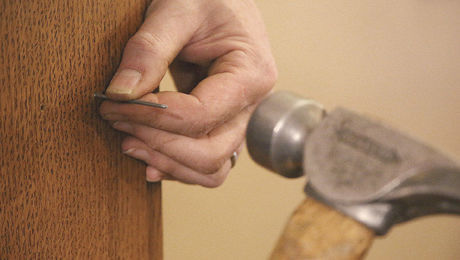
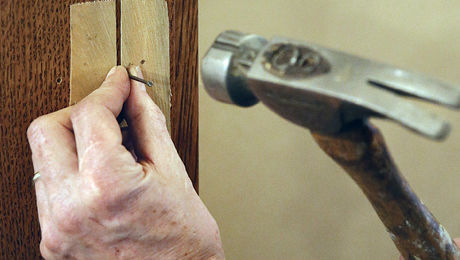
      6. Put a screw at the center of the top of the arch (the center of the line 6 inches from the end of the plywood), and one screw at each of the bottom points of the arch (the marks 6 inches in from each end of the line that is 18 inches from the end of the plywood). Each screw should be located so that the end of your tape measure will be directly over the mark on the plywood when hooked over the head of the screw.

      7. Pick a measurement that is more than half the length of the angled lines of the triangle; in this case we’re using 20 inches.

      8. One at a time, hook your tape measure over each of the screws you just placed, hold your pencil at the measurement you just picked (in this case, 20 inches) and make an arc. Draw these arcs so that they cross each other near the middle of the plywood.

      9. Use a straightedge to draw a straight line from one of the line midpoints you marked in step 5 to where the arc you just drew from the top of the triangle and the arc you drew from the same side of the plywood cross. Do the same for the other midpoint from step 5.

      10. The two lines you drew in step 9 (perpendicular to the angled lines in the triangle you drew in step 4) should cross in the middle of the plywood below the bottom of your arch. Put a screw at the point where these lines cross.

      11. Hook your tape measure over the head of this screw, and use your tape measure and pencil as a compass, connecting the marks where you previous screws (in step 6).

      Now you’ve drawn your arch – all you need to do is cut it out.

      Note: if this process seems a little complicated, you can alternatively use a framing square to draw the perpendicular lines that extend down from the ceter marks you made in step 5. With that done, you can jump right to step 10, place a screw in the point where these perpendiculars cross, and complete your arc with yor tape-measure “compass”.

      Sign up for eletters today and get the latest how-to from Fine Homebuilding, plus special offers.

      Signing you up...

      This site is protected by reCAPTCHA and the Google Privacy Policy and Terms of Service apply.
      See all newsletters
      See all newsletters
      ×

      Get home building tips, offers, and expert advice in your inbox

      Signing you up...

      This site is protected by reCAPTCHA and the Google Privacy Policy and Terms of Service apply.
      See all newsletters
      See all newsletters

      New Feature

      Fine Homebuilding Forums

      Ask questions, offer advice, and share your work

      • X
      • facebook
      • linkedin
      • pinterest
      • email
      • add to favorites Log in or Sign up to save your favorite articles

      View Comments

      1. sshaiko | Nov 22, 2010 09:12pm | #1

        Another way to determine the radius of the arch would be to use a little math...

        radius = height/2 + width^2/(8*height)

        where the "height" is the "drop" of the arch (6" in the video) and the "width^2" is the width of the arch squared(36" in the video). Measure down the centerline of the arch from the arch peak and set your nail or screw. Hook your tape on the nail and mark the arch.

      2. sshaiko | Nov 22, 2010 09:30pm | #2

        actually, the drop in the arch is 12" in the video,... mea culpa

      3. garymac | Nov 24, 2010 09:43pm | #3

        I believe the mathematical formula for the radius is A squared plus B squared over 2(AB). A is the height and B is half the base

      4. Pitfighter | Dec 04, 2010 05:19am | #4

        i ve been a certified carpenter since 1993 with 5 years before that and i have to say .....That demo on arch layout was long winded, condecending (insulting, in case you didnt big words)and good example of little man syndrome.
        thanks for trying youre best to confuse and frustrate our average handyperson, you should practise a couple more years sir ,you'll understand what i am saying ...SMART FELLA.

      5. Derek G | Oct 22, 2012 09:05am | #5

        buy some trammel points

      6. joracomm | Jul 07, 2013 03:22pm | #6

        Hello ... I'm not sure where all the PMS-driven responses are coming from, but I found the video EXTREMELY helpful and not at all condescending - in fact, I can't even see how anyone would find it condescending (????). I used it to create arches for the tops of a couple cabinets I'm building and it came out great. The only two points I'd make it that it would be nice if the video didn't continue to play on other topics; better if the only video showing on this page was the arch one. I didn't realize it would continue to play other video and when I wanted to watch it again,I had to reload the entire page instead of hitting play. The other minor suggestion: Might make step 9 clearer in the video ("...where the arc you just drew from the top of the triangle and the arc you drew FROM THE SAME SIDE of the plywood cross"). Other than that, great job.

      7. user-3976312 | Nov 21, 2019 09:13pm | #7

        I'm glad I really enjoyed geometry in high school. This guy is all over the map with lines and short arcs. I could see where he was going, but I can't see why getting there had to take so long.

      8. JayH25 | Nov 30, 2019 08:30am | #8

        I don't think I'm ever going to post a video here because nobody can say thank you.
        Yes, there is more than one of doing it and showing both ways might be option but then would we complain about it being too long?
        For me to understand it better (keyword: Me) I wish that the camera was zoomed out more to give me a wider picture of the board. I was unsure at times of the locations on the board where he was working.
        But having said this thanks very much for the video Scott. In my 53 years of life you are the first person to show me this method and I appreciate it.

      Log in or create an account to post a comment.

      Sign up Log in

      Become a member and get full access to FineHomebuilding.com

      More Building Skills

      View All
      • Video: Sharpening on the Go
      • Sharpening Chisels
      • Building Skills Video: Tips for Hand-Nailing
      • Hand-Nailing Tricks
      View All

      Up Next

      Video Shorts

      Featured Story

      Grout-Free Shower Panels

      Engineered-stone shower panels are waterproof, but proper installation relies on tight seams and silicone sealing.

      Featured Video

      Video: Build a Fireplace, Brick by Brick

      Watch mason Mike Mehaffey construct a traditional-style fireplace that burns well and meets current building codes.

      Related Stories

      • Podcast Episode 690: Sharpening, Wires Behind Baseboard, and Fixing Shingle Panels
      • Podcast Episode 689: Basement Garages, Compact ERVs, and Safer Paint Stripper
      • A Closer Look at Smart Water-Leak Detection Systems
      • Podcast Episode 688: Obstructed Ridge Vent, Buying Fixer-Uppers, and Flashing Ledgers

      Discussion Forum

      Recent Posts and Replies

      • |
      • |
      • |
      • |
      • |
      • |
      View More Create Post

      Highlights

      Fine Homebuilding All Access
      Fine Homebuilding Podcast
      Tool Tech
      Plus, get an extra 20% off with code GIFT20

      Video

      View All Videos
      • A Closer Look at Smart Water-Leak Detection Systems
      • Podcast Episode 678: Live from the Builders' Show-Part 2
      • Podcast Episode 677: Live from the Builders' Show-Part 1
      • FHB Podcast Segment: The Best of the Fine Homebuilding Podcast, Volume 8
      View All

      Fine Homebuilding Magazine

      • Issue 332 - July 2025
        • Custom Built-ins With Job-Site Tools
        • Fight House Fires Through Design
        • Making the Move to Multifamily
      • Issue 331 - June 2025
        • A More Resilient Roof
        • Tool Test: You Need a Drywall Sander
        • Ducted vs. Ductless Heat Pumps
      • Issue 330 - April/May 2025
        • Deck Details for Durability
        • FAQs on HPWHs
        • 10 Tips for a Long-Lasting Paint Job
      • Old House Journal – August 2025
        • Designing the Perfect Garden Gate
        • Old House Air-Sealing Basics
      • Issue 329 - Feb/Mar 2025
        • Smart Foundation for a Small Addition
        • A Kominka Comes West
        • Making Small Kitchens Work

      Fine Home Building

      Newsletter Sign-up

      • Fine Homebuilding

        Home building tips, offers, and expert advice in your inbox.

      • Green Building Advisor

        Building science and energy efficiency advice, plus special offers, in your inbox.

      • Old House Journal

        Repair, renovation, and restoration tips, plus special offers, in your inbox.

      Signing you up...

      This site is protected by reCAPTCHA and the Google Privacy Policy and Terms of Service apply.
      See all newsletters

      Follow

      • Fine Homebuilding

        Dig into cutting-edge approaches and decades of proven solutions with total access to our experts and tradespeople.

        Start Free Trial Now
        • Facebook
        • Instagram
        • X
        • LinkedIn
      • GBA Prime

        Get instant access to the latest developments in green building, research, and reports from the field.

        Start Free Trial Now
        • Facebook
        • YouTube
      • Old House Journal

        Learn how to restore, repair, update, and decorate your home.

        Subscribe Now
        • Facebook
        • Instagram
        • X

      Membership & Magazine

      • Online Archive
      • Start Free Trial
      • Magazine Subscription
      • Magazine Renewal
      • Gift a Subscription
      • Customer Support
      • Privacy Preferences
      • About
      • Contact
      • Advertise
      • Careers
      • Terms of Use
      • Site Map
      • Do not sell or share my information
      • Privacy Policy
      • Accessibility
      • California Privacy Rights

      © 2025 Active Interest Media. All rights reserved.

      Fine Homebuilding receives a commission for items purchased through links on this site, including Amazon Associates and other affiliate advertising programs.

      • Home Group
      • Antique Trader
      • Arts & Crafts Homes
      • Bank Note Reporter
      • Cabin Life
      • Cuisine at Home
      • Fine Gardening
      • Fine Woodworking
      • Green Building Advisor
      • Garden Gate
      • Horticulture
      • Keep Craft Alive
      • Log Home Living
      • Military Trader/Vehicles
      • Numismatic News
      • Numismaster
      • Old Cars Weekly
      • Old House Journal
      • Period Homes
      • Popular Woodworking
      • Script
      • ShopNotes
      • Sports Collectors Digest
      • Threads
      • Timber Home Living
      • Traditional Building
      • Woodsmith
      • World Coin News
      • Writer's Digest
      Active Interest Media logo
      X
      X
      This is a dialog window which overlays the main content of the page. The modal window is a 'site map' of the most critical areas of the site. Pressing the Escape (ESC) button will close the modal and bring you back to where you were on the page.

      Main Menu

      • How-To
      • Design
      • Tools & Materials
      • Video
      • Blogs
      • Forum
      • Project Guides
      • Reader Projects
      • Magazine
      • Members
      • FHB House

      Podcasts

      • FHB Podcast
      • ProTalk

      Webinars

      • Upcoming and On-Demand

      Podcasts

      • FHB Podcast
      • ProTalk

      Webinars

      • Upcoming and On-Demand

      Popular Topics

      • Kitchens
      • Business
      • Bedrooms
      • Roofs
      • Architecture and Design
      • Green Building
      • Decks
      • Framing
      • Safety
      • Remodeling
      • Bathrooms
      • Windows
      • Tilework
      • Ceilings
      • HVAC

      Magazine

      • Current Issue
      • Past Issues
      • Magazine Index
      • Subscribe
      • Online Archive
      • Author Guidelines

      All Access

      • Member Home
      • Start Free Trial
      • Gift Membership

      Online Learning

      • Courses
      • Project Guides
      • Reader Projects
      • Podcast

      More

      • FHB Ambassadors
      • FHB House
      • Customer Support

      Account

      • Log In
      • Join

      Newsletter

      Get home building tips, offers, and expert advice in your inbox

      Signing you up...

      This site is protected by reCAPTCHA and the Google Privacy Policy and Terms of Service apply.
      See all newsletters
      See all newsletters

      Follow

      • X
      • YouTube
      • instagram
      • facebook
      • pinterest
      • Tiktok

      Join All Access

      Become a member and get instant access to thousands of videos, how-tos, tool reviews, and design features.

      Start Your Free Trial

      Subscribe

      FHB Magazine

      Start your subscription today and save up to 70%

      Subscribe

      We hope you’ve enjoyed your free articles. To keep reading, become a member today.

      Get complete site access to expert advice, how-to videos, Code Check, and more, plus the print magazine.

      Start your FREE trial

      Already a member? Log in

      Privacy Policy Update

      We use cookies, pixels, script and other tracking technologies to analyze and improve our service, to improve and personalize content, and for advertising to you. We also share information about your use of our site with third-party social media, advertising and analytics partners. You can view our Privacy Policy here and our Terms of Use here.

      Cookies

      Analytics

      These cookies help us track site metrics to improve our sites and provide a better user experience.

      Advertising/Social Media

      These cookies are used to serve advertisements aligned with your interests.

      Essential

      These cookies are required to provide basic functions like page navigation and access to secure areas of the website.

      Delete My Data

      Delete all cookies and associated data