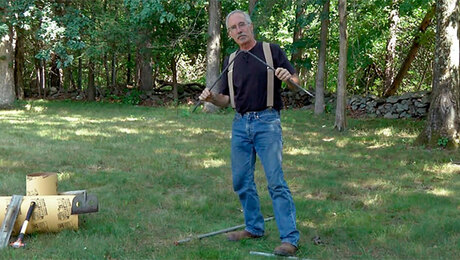
The keepers of our article archive have agreed to bust out an article by Jud Peake on drawing ellipses and put it on the free side of our website. The article is called “The Scribed Ellipse”, and it shows how the author uses a simple trammel rig to draw a quarter of an ellipse. The article also shows how to use the string method to draw an ellipse alluded to by Chris Rogers in his comment. Jud Peake is a legendary carpenter in the Bay Area. He worked on the trim crew that detailed Skywalker Ranch (Trimming out the Main House, fhb# 31). He followed that gig with a job on the crew that rebuilt the San Francisco Conservatory of Flowers. It’s a vast Victorian greenhouse with curved framing members everywhere. You can view it on Wikipedia. If the title existed, Jud would be a certified Curvologist.
Up Next
Video Shorts
Featured Story

Look closely at these common locations for hazardous materials in older homes.
Featured Video
How to Install Cable Rail Around Wood-Post CornersRelated Stories
Discussion Forum
Highlights
Fine Homebuilding Magazine
- Home Group
- Antique Trader
- Arts & Crafts Homes
- Bank Note Reporter
- Cabin Life
- Cuisine at Home
- Fine Gardening
- Fine Woodworking
- Green Building Advisor
- Garden Gate
- Horticulture
- Keep Craft Alive
- Log Home Living
- Military Trader/Vehicles
- Numismatic News
- Numismaster
- Old Cars Weekly
- Old House Journal
- Period Homes
- Popular Woodworking
- Script
- ShopNotes
- Sports Collectors Digest
- Threads
- Timber Home Living
- Traditional Building
- Woodsmith
- World Coin News
- Writer's Digest


View Comments
This technique doesn't produce a true ellipse. The edges are too flat. The only mechanical technique for creating a true ellipse is the string method: Put a temporary pin at the top of the rise on the minor axis, and swing an arc with a radius equal to 1/2 the major axis and a center point at the temporary pin. Where this arc crosses the major axis, drive another pin on each side. A string fixed at each end by the pins on the major axis with the length determined by looping around the temporary pin will now act as a guide for a pencil to trace out the ellipse. As an added bonus, you can bisect the angle created by the 2 halves of the string at any point to get a line indicating the direction of the masonry joints of the arch above.
If the magazine would like to post a diagram of the string technique, let me know and I will draw one up.
This curve in the video is not an ellipse, or even close to one. Chris Rogers' technique is the only way to correctly construct an ellipse, and it's not difficult. The only hard part is getting a string that has no stretch! An ellipse is briefly vertical at the ends of the long axis, and will provide a graceful transition from a rectangle when placed above it. The most common application of this in homebuilding is a front door entry with sidelights and an elliptical transom. Chris- thanks for the tip on the masonry joints.
It doesn't appear to produce an ellipse, agreed. But the next time you are building a boat, it would be a handy way to make a camber pattern for the deck, which is not an ellipse. It's a cool trick...
I think the layout actually produces whats called a broken arch. I'd be curious if this produces the same shape as a fixed radius arc drawn between the 3 nails. If it does than it may be an easier way to lay out large radius (shallow) arcs then a fixed string an pencil.
Hey Chris,
Thanks for the feedback on the ellipse definition. I see your point, and I sit corrected. Nevertheless, whatever we want to call this thing--I'm leaning toward an "ellipse-ish"---it's a cool trick. I drew a bunch of other arcs on the plywood when we shot this video, and each one had a different feel to it. And they sure didn't take long do do. If you'd like to draw up the string technique, we'll work it into the mix.
Chuck
Cool trick! While it doesn't creat an ellipse, it is an ingeneous way to draw an arc - or arch. It is actually a segment arch. An ellipse starts and ends perfectly vertical.
And while ChrisRogers wrote: "The only mechanical technique for creating a true ellipse is the string method", that is not correct either.
There is another equally accurate (and maybe more-so) method called the "trammel method", using a stick with two points (nails?) and a pencil (just search it online). It looks complicated on paper but isn't.
We use it all the time on jobsites to create elliptical arches and groin vault ceilings.
Classicplans,
Thanks, I tried the search and easily found more than I'll ever need to know about ellipses.
This video link is pretty cool:
http://www.youtube.com/watch?v=NYs8pV860w4
And this other one pretty much covers everything else:
http://www.uwgb.edu/DutchS/MATHALGO/Ellipses.HTM
More on ellipses.
Tucker sent me this link to Jim Chestnut’s site.
It’s a home grown video on using trammel to draw an ellipse.
http://www.miterclamp.com/Woodworking_video_index.htm
When I saw this video my first thought was, that does not work the arc is not tangent to the sides as a arched hall opening should be. Then I opened the link to the article by Jud Peake on drawing ellipses and it just confirmed to me that this tip is no more then a wrong way to draw an ellipse. No mater how thought out it may seem it does not produce what I would consider a desired result. But I suppose if what you want is simply an arc not a ellipses then ok but if this was my blog I would remove this tip since it is not even the right way never mind a better way.
I have another method for drawing a true elipse which I have used for years. It is described with diagrams at
http://blog.db-home.com/2009/07/23/elliptical-arches.aspx
I'd be glad to submit photos of teh elliptical arches produced, or even a video of the method and how simple it is.
Actually, the post by Mr. Moreau describes a cycloid and not an ellipse.
See Wikipedia for details.
As to the original video, it's an example of the curve that has appeared in both FHB and FWW a number of times, where, knowing the height of the curve and the distance needed, the formula for finding the radius of the circle necessary to produce the curve is: [(b x b) + (a x a) ] / 2a where a is the height and b is half the distance of the base line of the curve (the chord).
You can get all sorts of calculations including the above at:
http://www.1728.com/circsect.htm,
but most job sites don't have an internet connection (yet)...
If you're slightly OCD like me, you can measure the drawing on page 20 of FHB 204 (June/July 2009) and measure, approximately, a = .75 inches and b = 1.95. Doing the math you get a radius of 2.9, which matches pretty closely to the almost exactly 3 inches I got when I (painfully) traced the curve from the picture repeatedly until I completed the circle.
Everything you never wanted to know about ellipses is here:
http://mysite.du.edu/~jcalvert/math/ellipse.htm
Larry
You want to hear something funny? I almost cried when I saw how accurate and simple the solution was to drawing an arc. I created my account after bookmarking your site. I'm a 30+ year tile setter and I'm always looking for new (to me) and better ways to do things. This site is a key to preserving our trades. Thank you so much! By the way, feel free if you have any tile questions. If I can't answer it I know where to look for answers. Build on!!