Pretty Good Saw Horse

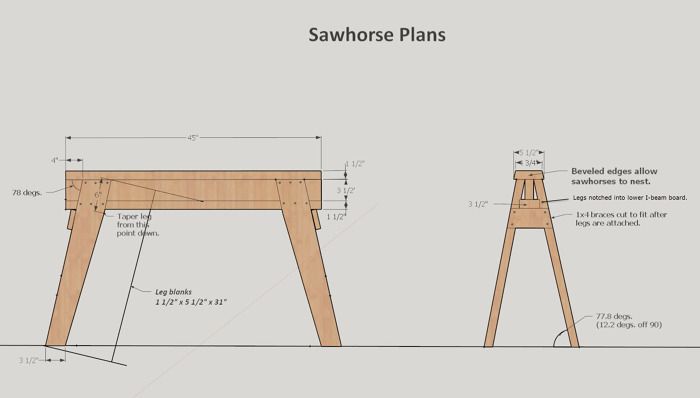
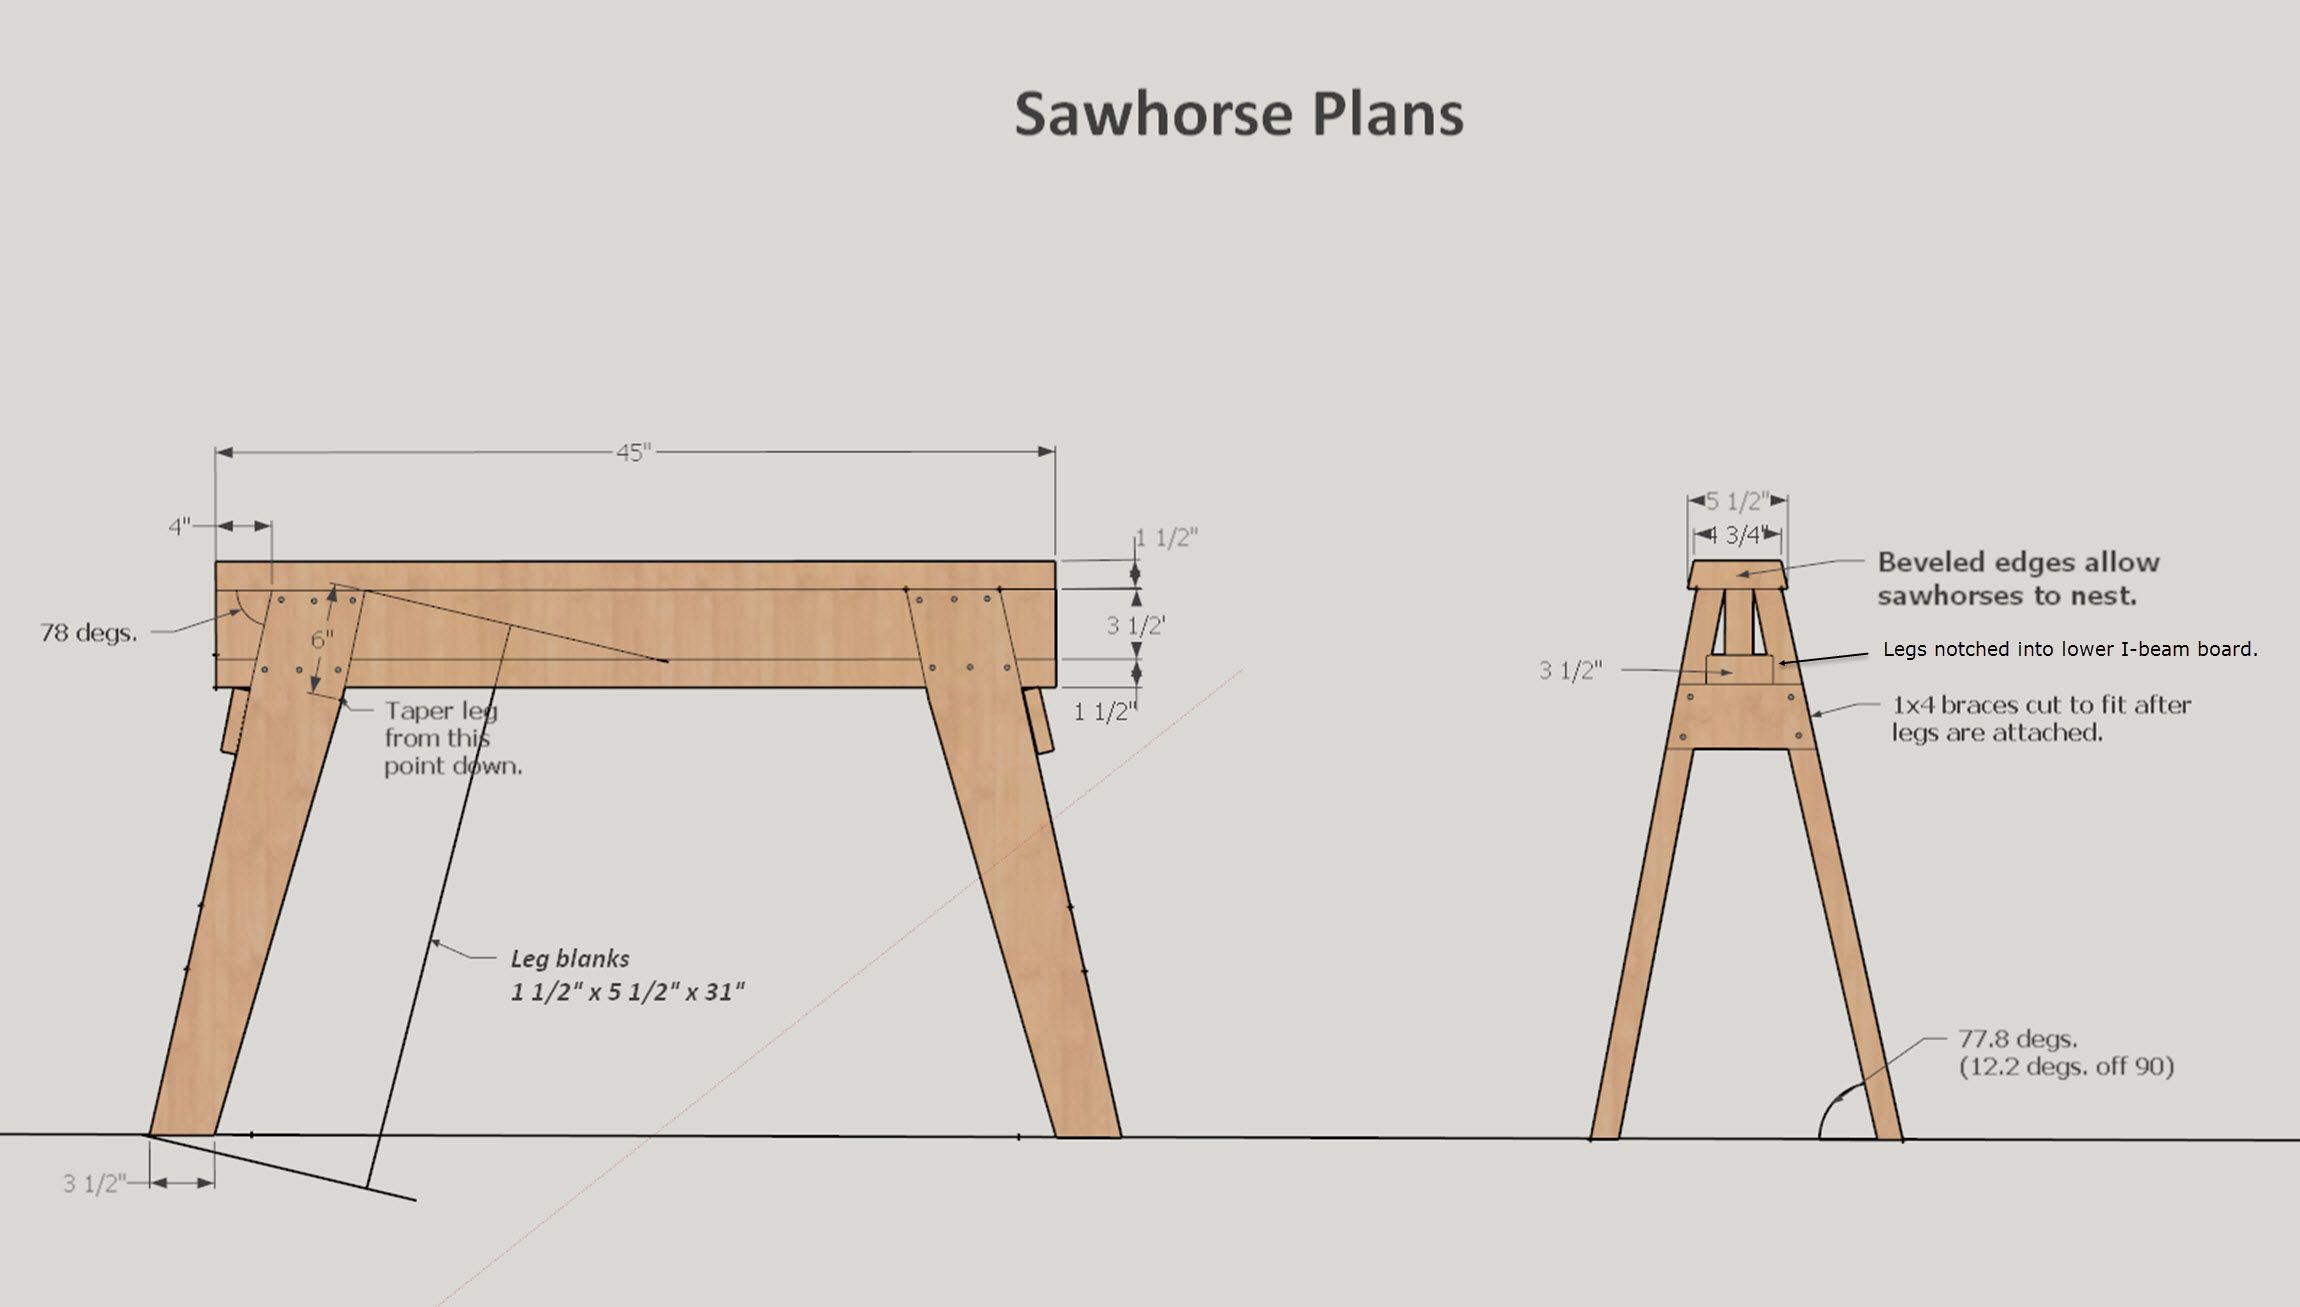
I’ve seen, used and built many sawhorses. Yet, even after over 50 years of working with sawhorses, I hesitate to offer my opinion about the best sawhorse design. Nonetheless, here is the plan for the four pretty good sawhorses my grandson and I built for working on a deck project.
This sawhorse is made from SPF dimensional lumber – 1x4s, 2x4s and 2x6s — and assembled with 2 1/2″ deck screws. The screws in the replaceable top of the I-beam are countersunk 3/4″ to protect saw blades.
This design combines four key elements of a good sawhorse:
(1) The sawhorse is simple. It is built with dimensional lumber and needs only one set up for the legs on a compound miter saw.
(2) The sawhorse is strong. The center board is an I-beam that rests directly on sturdy legs. Structural stock is all 1 1/2″ thick.
(3) The sawhorse is stable. The legs are splayed and tapered like traditional saw benches.
(4) The sawhorse is stackable. The sawhorse nests with similar sawhorses after the top board is beveled and the end braces are attached.
PROJECT NOTES:
(1) Select straight stock with good clean edges, especially for the I-beam parts.
(2) Predrilling with a countersink bit before driving in the deck screws prevents splitting near the ends of the legs and end braces.
(3) Cut the I-beam parts to length and mark the center lines on both ends of each part. Align these marks carefully during assembly. Clamp the parts together before driving the screws.
(4) The compound angles on the ends of the 2×6 leg blanks are all cut identically. After you decide which legs fit where on the sawhorse, then mark and cut the tapers on the inside of each leg. Tapering the legs makes the sawhorse more stable on uneven surfaces.
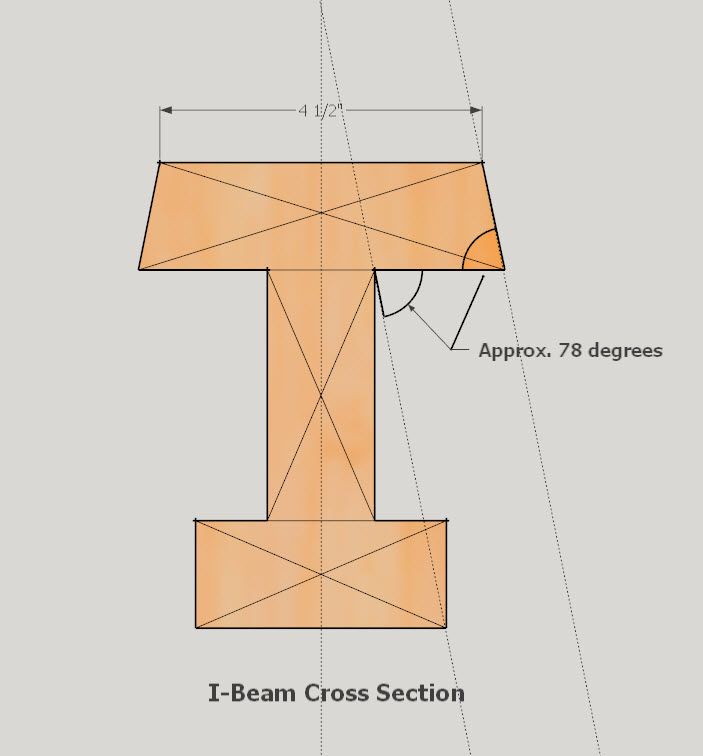
(5) When notching the bottom beam board for the legs, mark the outer edges of the leg notch from the actual placement of the legs. A straight line cast from the intersection of the top and center I-beam boards to the lower outside edge of the lower I-beam board will yield the exact depth of the upper edge of the leg notch. Mark this depth line at the top of the notches. (See the I-beam section photo above.)
(6) The key reference edge is where the leg meets the lower, outer edge of the bottom beam board. In preparation for cutting the notch, mark a pencil line on the lower edge of this board with the flat side of a carpenter’s pencil lead held at a tangent to the edge. Hold the pencil at the same angle for each notch you mark. After the notch is marked, cut multiple kerfs to the marks you have made with a hand saw. Carefully chisel out the waste, paring the notch flat and even just to the lower reference line. When the notch is finished, the inner face of the leg should rest evenly on the lower line across the width of the notch. Attention to detail here will reduce the need for adjustments to a “rocking sawhorse”.
(7) Bevels on the top board can be made using your preferred method –just use the same angle as that between the legs and the I-beam. (See section view above.) These bevels allow the sawhorses to stack and come unstacked easily while resting on the end braces.
(8) To avoid splinters and slivers, chamfer the sawn edges with a block plane, starting with the bottoms of the legs and working upward. Considering the abuse the bottoms of these legs will encounter and how many times these sawhorses are likely to be gripped with bare hands, chamfering these edges is a functional, not an aesthetic detail.


