When casing windows or doors where miters are used, anyone who has done a few knows that they are never square, and often not flush with the wall surface. Rather than using a block plane or rasp to compensate, I’ve learned it’s quicker and more efficient to use the power miter box.
Cut the first piece (top or bottom) to length with true 45° angles (miter boxes I’ve seen have adjustments to true the cut and should be checked periodically), and nail it in place with an even reveal of the jamb.
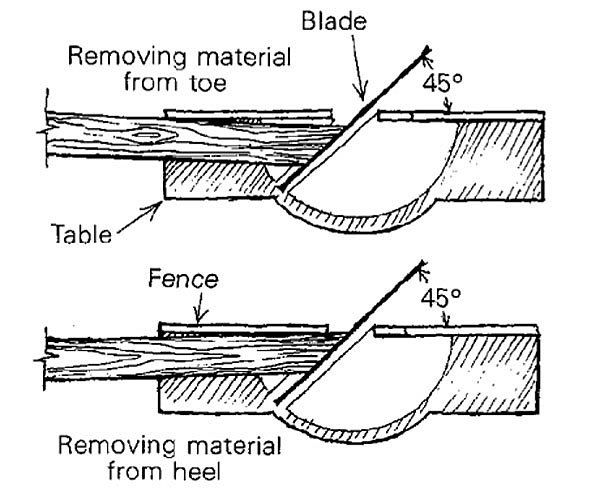
For the sides, start by cutting a true 45 ° (90 ° to the back surface), then hold the piece in place with a consistent reveal, tight to the wall and jamb. If the joint is open at one end of the cut, take it back to the saw and compensate by changing the angle of the material (not the saw) until you get the right cut. If it is still open — but evenly so — across the front, back-cutting is required. To do this, simply insert a thin wood shim to get a small trim angle. Once you have that fit, hold in place at the opening, mark the length, and cut it at a true 45°. (If you’re casing a door, just cut the bottom end off square.) Repeat for the other side.
To fit a final piece where two ends must come together, use the same method. However, you must leave the piece long, so both ends can be trimmed to fit. Once you have both ends fit (piece still long), mark one end to final length and repeat the fitting cut.
This is a safe and — with a little practice — an easy way to get clean fits every time, quickly. A carbide blade helps, but be sure it can withstand the high rpm of power miter boxes.
Chuck Sjodin, Coon Rapids, MN
