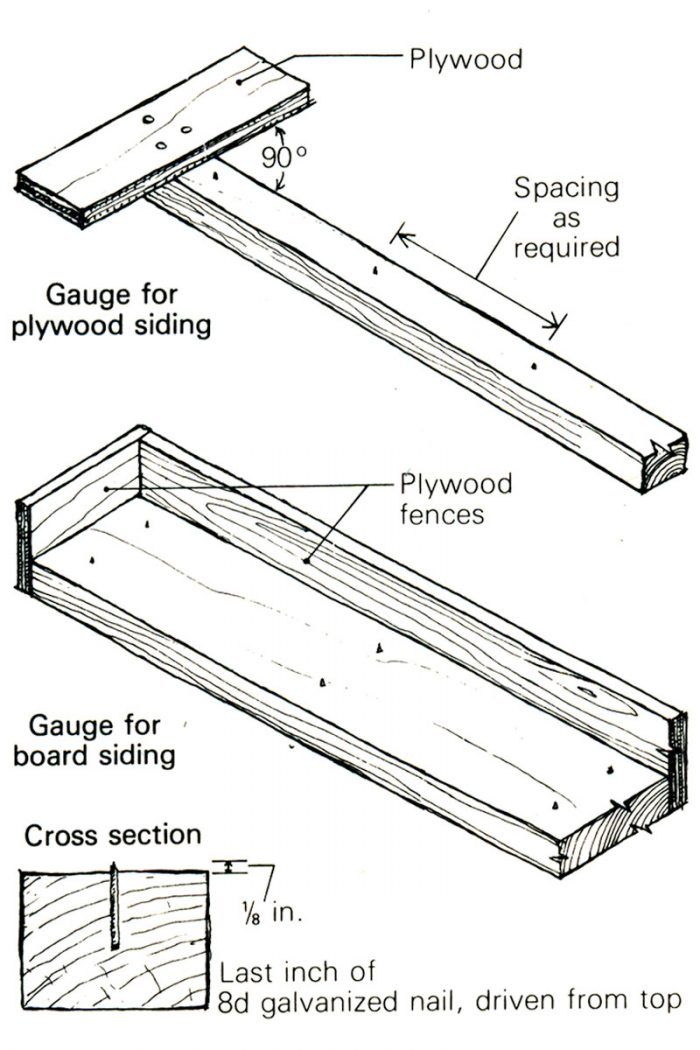
These two site-built gauges for marking plywood and board siding for nailing come in handy where nail lines and spacing have to be uniform, or where visible chalk lines cannot be left on the siding.
The nailing gauge for plywood is like a very long T-square. The blade of the square has nail points on its centerline at the specified nailing schedule. We found that the last inch of an 8d galvanized nail, driven blunt end first, worked best when the point was left to protrude about 1/8 in.
Allowing for the offset between the nail points and the edge of the gauge, lay out stud centers an the plywood top and bottom, hook the marker over the top edge of the plywood (plywood should be face up) and along the layout marks, and strike the device with a hammer along its length. The perforations that will be left represent the nail holes to be used in attaching the siding.
The gauge for board siding is made from 2x framing lumber (as wide as the boards to be marked) with plywood fences nailed to one edge and to one end. The nail points in the 2x are spaced on stud centers along its length, and as desired across its width.
The siding is marked by positioning a precut board against both fences face down and applying pressure; once again, the perforations indicate nail locations. Boards can be positioned and marked at various points along the gauge to allow for joints in the siding, or openings such as windows and doors. Nail temporary stops on the gauge to locate these positions. These easily made jigs enable you to produce accurate, evenly spaced nailing lines at production speed.
—Malcolm McDaniel, Berkeley, CA
Edited and illustrated by Charles Miller
From Fine Homebuilding #5


