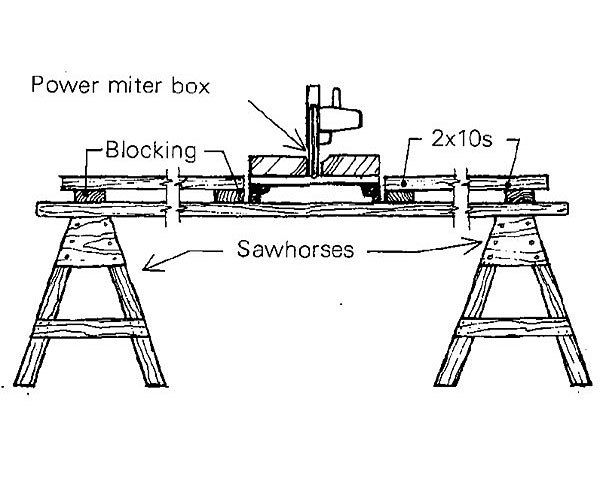
On a construction site, a convenient setup for a power miter box saw is essential if the tool is to earn its keep. A good setup must combine easy removal of the saw for secure lock-up, long supports on each side of the saw, easy storage, and a waist-high saw table. My jig, shown in the drawing, allows for lift-off removal of the saw, which means it can be brought to a construction site before the building is enclosed and taken away each night.
Because accurate cuts are so easy to make with one of these saws, inexperienced workers can get excellent results for such tasks as rough framing. If the jig has sufficiently long side boards, a stop for identical-length studs may be fastened to them. I haven’t found it necessary to fasten my saw to this jig, but if you want you could insert dowels through the bolt holes in the box into the 2×10.
My 10-in. saw will not quite cut through 2×6 material unless I use one of these two tricks: On 90° cuts, I first bring the saw down through the wood as far as it can go, leaving the last 1/2 in. or so uncut. Then I lift up the front edge of the board to complete the cut. If I am making numerous cuts, or cuts at an angle other than 90°, I fasten a suitable length of 1/2-in. plywood along the side boards and across the saw table in order to jack up the bottom of the lumber up the saw’s range.
Phillip Zimmerman, Berkeley, CA


