Synopsis: Batten doors can be made quickly from simple lumber and are at home on sheds and barns and in houses with a simple, rustic flavor. Here’s how to make one, with an illustration showing several variations.
A fine-looking batten door can be made from materials sold at any building-supply house, and can be built with limited funds and equipment. In the years when our business had no shop and little machinery, we produced custom batten doors at job sites, using only a tablesaw, an electric drill, and a few clamps. They looked great, and were also competitive in price with factory-made doors.
Batten doors do have some inherent problems, though. Wood moves. A 36-in. door can vary as much as 3/8 in. in width between a dry winter and a humid summer. This will show on the side opposite the hinges, and the door that fits perfectly this winter may need to be planed down next summer and have its latch mortise reworked. The problem can be minimized by accommodating wood movement in the construction. Sealing the wood also helps, but if you use an oil finish, the door will move more than if you use varnish.
As a rule, batten doors do not stay perfectly flat and straight. They tend to bow across their widths and sag away from their hinges. The severity of these problems will depend on the species, grading, dryness, and thickness of the lumber that you use, and how carefully you put the door together.
Boards 1-in. thick are best for interior doors, as are 1-5/8-in. boards for exterior doors, although you can use 3/4-in. tongue-and-groove stock for interior doors and 1-1/2-in. stock for exterior doors. The batten should be 1-1/4 times as thick as the door body, and 6 in. to 8 in. wide.
To begin, select the stock and cut it to approximate size. If it is roughsawn, joint one face, thickness-plane, joint one edge, rip to width, cut to length, tongue or groove (or half-lap) each edge, and do any decorative milling.
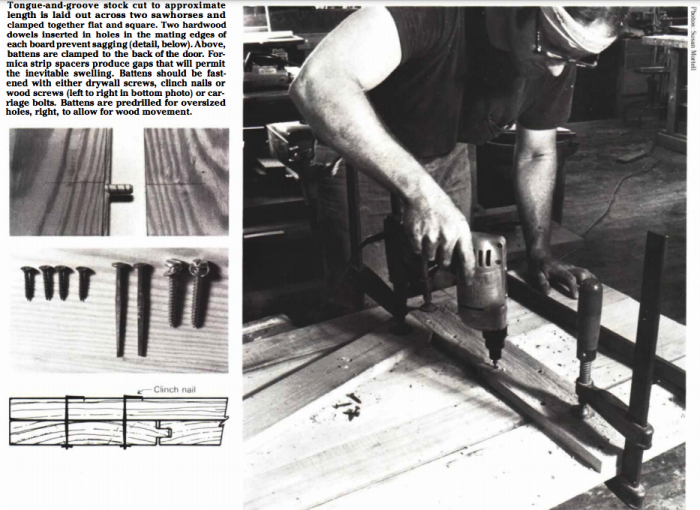
I edge-join the boards with dowels to keep the door from sagging away from its hinges and use a Stanley self-centering doweling jig to drill two holes for 2-in. long hardwood dowels in the mating edges of all the boards. The holes should be drilled level with the eventual position of the hinges—about 13 in. from the top of the door and 7 in. from its bottom. Dowel diameters vary with the thickness of the stock, but I use 3/8-in. dowels with 3/4-in. boards, and 1/2-in. dowels with thicker stock. Once the holes are drilled, I apply a sealer (usually Watco or tung oil) and a first coat of finish or stain to the boards. On a door that will be painted, a coat of primer will do.
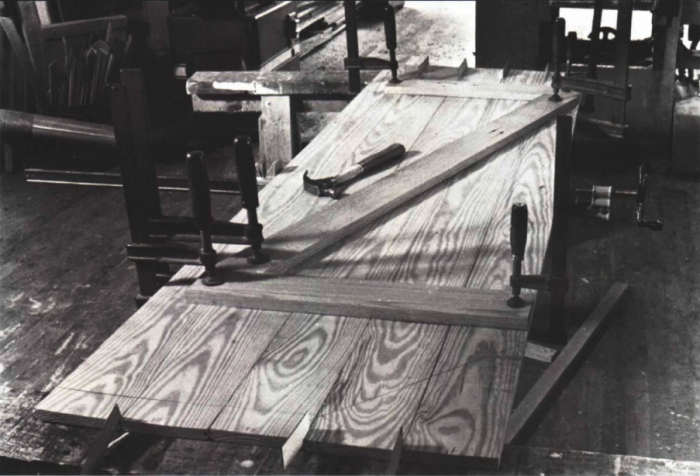
On a flat surface, assemble the door, inserting the hardwood dowels in the drilled holes. The dowels should not be glued, nor should the boards be pulled up tightly in the clamps. Instead, I insert strips of Formica between the edges to produce uniform gaps between the boards. The resulting gaps allow the wood to expand.
Being careful to keep the eventual location of hardware in mind, lay out the battens on the back of the door. Several pattern possibilities are shown in the drawing below. Check to be sure the door is square and flat, then clamp the battens in place. Battens should never be glued to the body. Attach them with metal fasteners so the wood can expand and contract freely.
I use four types of fasteners: rose-head clinch nails for their old-style look and ease of application, drywall screws for speed when I’m not concerned with the looks of the batten side of the door, wood screws, countersunk or counterbored and plugged, and carriage bolts for the substantial look they give the face of the door. In any case, the batten should have an oversized hole, to allow the body of the door to move without bowing the door. Be careful to predrill even for clinch nails to avoid splitting the wood where the nail breaks through on the opposite side. Ideally, the clinch nail should be bent twice so that it penetrates back into the wood (drawing, facing page), ensuring a tight fit. However, it is common practice simply to fold the clinch nail flat. When the battens are secure, remove the Formica spacer strips.
A few tips regarding hardware may help you avoid frustration. Interior batten doors are usually too thin to take either a mortised latchset or a cylinder latchset. Consequently, you should plan on either a thumblatch or a rim lock. Batten doors are most often installed with a strap hinge, an H-L hinge or an H hinge.
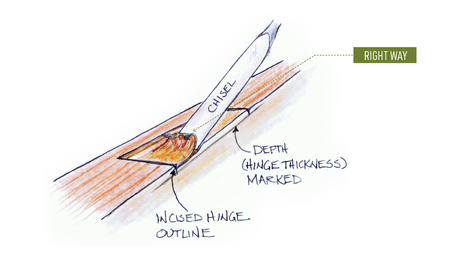
If you don’t want the traditional look such hinges give a door, you can use butt hinges. They should be sized so that the screws fasten to the edge of the door itself, not to the end grain of the battens where they won’t hold. There are also offset hinges that can help you work around batten placements. Size the hinge so that its throw and the length of the batten allow the door to open 180° without hitting the casing. In some instances it may be best to hang the door from the casing, not the jamb, or use a half-surface hinge, one that combines a strap across the surface of the door with a butt plate mortised into the jamb.
— Bruce Gordon is a partner in Shelter Associates, a design and building firm in Free Union, Va.


