An Introduction to Timber Framing
Learning this traditional method begins with the mortise-and-tenon joint.
Synopsis: New Hampshire timber framer Tedd Benson provides an overview of timber framing, including a discussion of the joinery and tools this specialty requires. The uninitiated will get the basics, and enough information to give it a try.
The standards of work in timber-frame structures aren’t new; we have inherited them from a 2,000-year-old tradition of craftsmanship. The evolution of this building method (which throughout much of history was just about all there was to carpentry) resulted from pursuing a very simple goal: to put together better and stronger buildings. The proof of the success of this development can be found in the barns, houses, churches, temples and cathedrals that have become architectural treasures in all parts of the world. It wasn’t until the advent of nails, joinery hardware and dimensioned lumber that true timber framing went into decline.
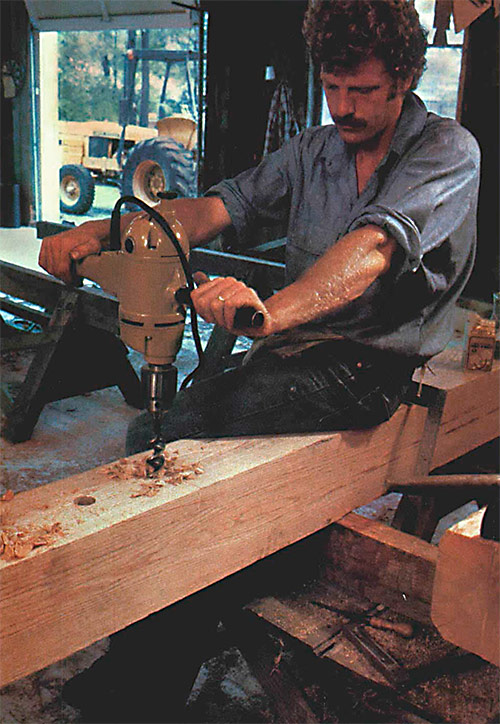 In reviving the craft today, we pay careful attention to the lessons and the standards evinced by these old buildings. Indeed, the thrill of practicing timber framing today lies in knowing that there is much left to learn, and in believing that each improvement brings us closer to the day when we can feel we are no longer journeymen. At the same time, we are working toward continued refinement and development. Timber-frame buildings are finding renewed acceptance for many reasons, but the integrity of the structure and the rewards to the craftsman and home owner are preserved only when high standards are maintained.
In our own shop we have learned this obvious truth the hard way — good timber frames happen only as a result of good joinery. Precise work is as important in timber framing as it is in cabinetry, so joint-making is the first thing an aspiring timber-framer needs to learn.
Mortise and tenon
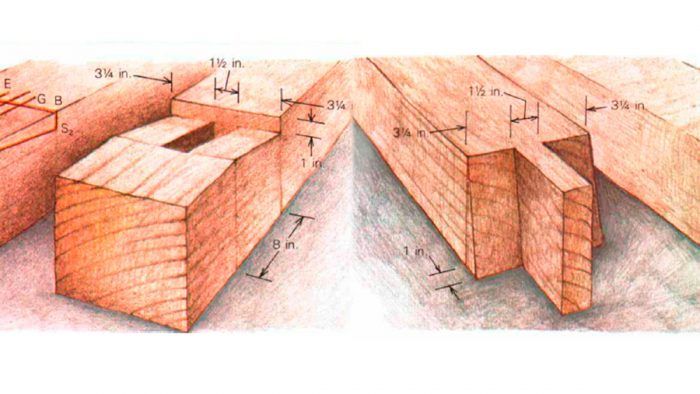
This joint is practically the definition of a timber frame. Most of the joints that go into a frame are variations on the basic mortise-and-tenon joint. Once you’ve mastered the skills for making this joint, you should be able to execute just about any other joint in the frame. And since there are several hundred joints in the average timber frame, speed and precision are equally important.
The joint we will be working on is the shouldered mortise-and-tenon. It’s a good example of a slightly modified mortise-and-tenon. We use this type of joint where major girts or connector beams join a post. The full width of the horizontal timber is held by the bottom shoulder on the post, and this extra bearing surface makes the joint far stronger than a straight mortise-and-tenon.
Squaring up
Before you can lay out the joint, the timber must be square at the joint area. Each face of the joint must be square if you’re going to achieve a precise fit. One way to square and flatten timbers is to run them through a large thickness planer. With pine, hemlock, fir and other soft woods, this works well. But with oak, we’ve had no luck. There just doesn’t seem to be a planer that has enough power to get the job done without driving the operator nuts. Therefore, we take a big power hand planer to the timber for rough squaring (we’ve had good results with the 6 1/8-in. wide Makita 1805B), and then finish the job around the joint area with a hand plane.
From Fine Homebuilding #12
To view the entire article, please click the View PDF button below.
Fine Homebuilding Recommended Products
Fine Homebuilding receives a commission for items purchased through links on this site, including Amazon Associates and other affiliate advertising programs.

Bluetooth Earmuffs

Protective Eyewear
Speed Square


