Building a Helical Stair
Laying out a spiral stringer with a little help from the trig tables.
Synopsis: The author explains his approach to making a simple but effective bending form for a helical stair riser. It’s easier to build and requires less material than framing a circular wall. Warning: some math required.
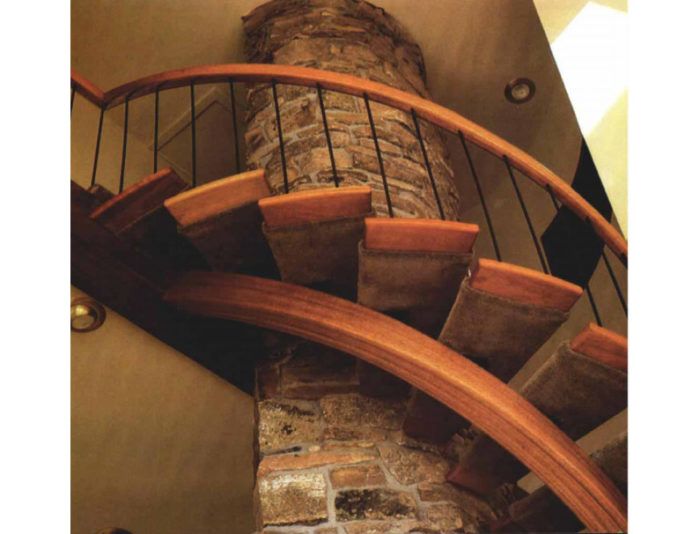
A house I recently finished near Telluride, Colo., needed a spiral stairway to wrap halfway around its 4-ft.-dia. stone chimney. I decided that a helical stringer supporting the treads by fabricated steel brackets would satisfy structural requirements and complement the house’s contemporary design.
In theory, making a laminated wood helix isn’t that difficult. Basically all you do is wrap successive layers of wood around a cylinder so that it spirals upward at a constant angle. But to glue up a helical bent lamination like the one I wanted for my stair stringer would require a cylindrical bending form larger than the chimney itself. I could have framed up such a form from curved plywood plates and 2x studding, but that would have eaten up a lot of time and materials.
I chose instead to make a bending form from five pieces of ¾-in. plywood and a strip laminated from three layers of ¼-in. plywood. The trick was to space the on-edge pieces of ¾-in. plywood at equal intervals along the proposed rise of the stairway, and to locate on each of these supports—or bulkheads—a 10-in.-wide plane that would lie precisely ¾ in. below the surface of my theoretical half cylinder. To these five planes I could attach three layers of ¼-in. plywood. Glued together, this rigid plywood curve would be the platen, or base, of the bending form. To it I’d clamp the mahogany plies that would make the helical stringer.
In section, I wanted the stringer to be 5 in. wide by 6 in. deep, with its corners radiused with a ¾-in. roundover bit. Plies ¼ in. thick would easily make the required bend, and I used 20 of them 6 in. wide.
The centerline of the helical stringer would lie 42½ in. out from the centerline of the chimney cylinder. This meant that a typical 36-in. wide tread would clear the stonework by about ½ in. Subtracting half of the stringer thickness (2½ in.), gave me a 40-in. radius for the concave side of the stringer. This dimension then was the radius of the outside (convex side) of the bending form.
To create the helix, the first and fifth supports of the bending form needed to support the stringer against vertical edges. The second and fourth needed 45° edges, and the stringer would run over a horizontal edge at the middle support.
I nailed the five plywood bulkheads to the floor with 2×4 blocks and braced them diagonally to handle the forces they’d have to withstand during gluing and clamping. Next, I bent the three layers of ¼-in. plywood over these supports. The first layer was screwed and glued to the bulkheads, and the next two glued on top. I made sure that during this process the whole assembly stayed properly aligned throughout its length.
For more photos, drawings, and details, click the View PDF button below:
Fine Homebuilding Recommended Products
Fine Homebuilding receives a commission for items purchased through links on this site, including Amazon Associates and other affiliate advertising programs.
Plate Level
Original Speed Square
Anchor Bolt Marker


