Building Louvered Shutters
Jigs and careful planning make quick, accurate work of a potentially tedious job.
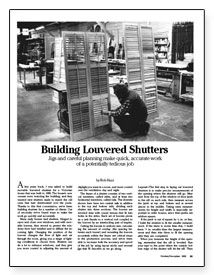
Synopsis: Old-fashioned louvered shutters can be tedious to make, so the author looks for methods and jigs that make the job go faster. One of them is an angled bed for his planer that makes the double-beveled slat quick to make.
A few years back, I was asked to build movable louvered shutters for a Victorian house that was built in 1888. The house’s new owners were restoring the building, and they wanted new shutters made to match the old ones that had deteriorated over the years. Thanks to this first commission, we’ve been building shutters for a number of clients. Out of necessity we’ve found ways to make the work go quickly and accurately.
Many early homes had shutters. Hinged to open and close over windows, and with movable louvers, they served to protect the windows from bad weather and to diffuse the incoming light. Changing the position of the louvers changes the flow of light and air through the room, giving you a range of lighting conditions to choose from. Shutters can do a lot to enhance windows, and they give you more control in adjusting the amount of daylight you want in a room, and more control over the ventilation day and night.
The frame of a shutter consists of two vertical members, called stiles, and at least two horizontal members, called rails. The shutters shown here have two central rails in addition to the top and bottom rails, dividing each shutter into three sections. The louvers are beveled slats with round tenons that fit into holes in the stiles. Each set of louvers pivots as a unit thanks to a vertical rod coupled to the louvers by an interlocking pair of staples.
Cutting the louvers to uniform size, calculating the amount of overlap (the spacing between each louver) and mounting the louvers accurately within the frame are critical steps in the production process, and we’ve been able to increase both the accuracy and speed of the job by using layout sticks and several jigs that I’ll describe as we go along.
Layout
The first step in laying out louvered shutters is to make precise measurements of the opening where the shutters will go. Measure from the top of the window or door jamb to the sill on each side, then measure across the jamb at top and bottom and at several places in the middle. Taking extra measurements for height and width is especially important in older houses, since their jambs are seldom square.
If the jamb is out of square by 1/8 in. or less, I build the shutters to fit the smaller measurement. If the skew is worse than this, I build them 1/8 in. smaller than the largest measurement and then trim them to fit the opening after they are completed.
When you measure the height of the opening, remember that the sill is beveled. Run your tape to the point where the outside bottom edge of the shutter will hit the sill. Then when the shutters are built, you can bevel the bottom edge of the rails.
For more photos, drawings, and details, click the View PDF button below:


