Laying out for Framing
A production method for translating the blueprints to the wall plates.
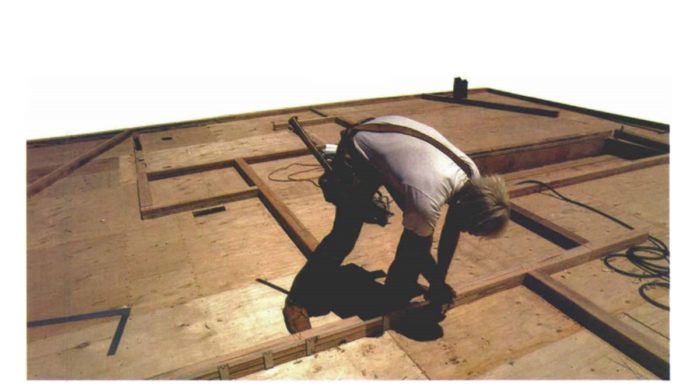
Synopsis: A production carpenter explains how to lay out wall plates, the first step in framing walls for a house. An accurate job here will save everyone time later. The article includes sidebars that detail rough door openings and rake walls while a glossary explains the components that go into framed walls.
On big production projects where jobs are highly specialized, the carpenter assigned to layout uses a hammer very little. His tools are a lumber crayon (known in the trade as keel), a pencil, a layout stick, a channel marker and a tape measure. If he marks the top and bottom plates correctly, the carpenters may not even need a tape measure to frame up the walls. All of the figuring that involves the plans — and there are a lot of variables to anticipate — is done at the layout stage.
On large jobs, I don’t necessarily frame the house I lay out. On houses I contract, I do both jobs. Either way, I treat layout as if there won’t be anyone around to answer questions when the framing starts. Doing the layout as a separate operation increases the speed and accuracy of framing, whether you’re building your own house by yourself or working as part of a big crew. The plans are an abstraction of the building to be constructed. Layout systematically translates your blueprints into a full-size set of templates — the top and bottom plate of each interior and exterior wall on a given level of the house. The pieces of the puzzle can then be cut and framed in sections.
There is little about a finished house that isn’t determined by the layout. The actual procedure falls into four distinct steps. Within each step, you have to deal with wall heights and the locations for windows, doors, corners, partitions, beams and point loads. You also have to deal with specials (which is anything else and usually means prefab components).
The first step in layout is to go over the blueprints and mark them up with the information you’ll need, in the form it will be most useful. Step two is to measure out the slab or deck and establish chalklines representing every wall on that level. This is called snapping out. In step three you’ll decide where walls begin and end and which ones will be framed first, and then cut top and bottom plates for each wall. This is called plating. Finally you detail the plates by marking them with all the information the framer will need to know to build the walls. Layout requires a thorough knowledge of framing. But even then, regional framing techniques vary widely.
Layout principles
Layout is based on parallel lines. If two lines are parallel and one is plumb, then the other will be plumb. Also, if a pair of lines meet at a right angle, then another pair of lines, each parallel to its counterpart in the first pair, will meet at a right angle. Stated less theoretically, put a 2×4 on top of another 2×4 and cut them to the same length. Using a square, draw a line across the edges of both every 16 in. Frame in between these top and bottom plates with studs of equal length, and stand the wall up and plumb one end. Now all of the studs will be plumb. Doors and windows that have been laid out with these studs will be plumb. And if your foundation and deck are square and level, then any interior walls paralleled off the outside walls will also be square and plumb.
For more photos, drawings, and details, click the View PDF button below:
Fine Homebuilding Recommended Products
Fine Homebuilding receives a commission for items purchased through links on this site, including Amazon Associates and other affiliate advertising programs.
Guardian Fall Protection Pee Vee

100-ft. Tape Measure

11" Nail Puller
