Plunge-Router Stairs
An adjustable mortising jig simplifies the construction of an open-riser stairway.
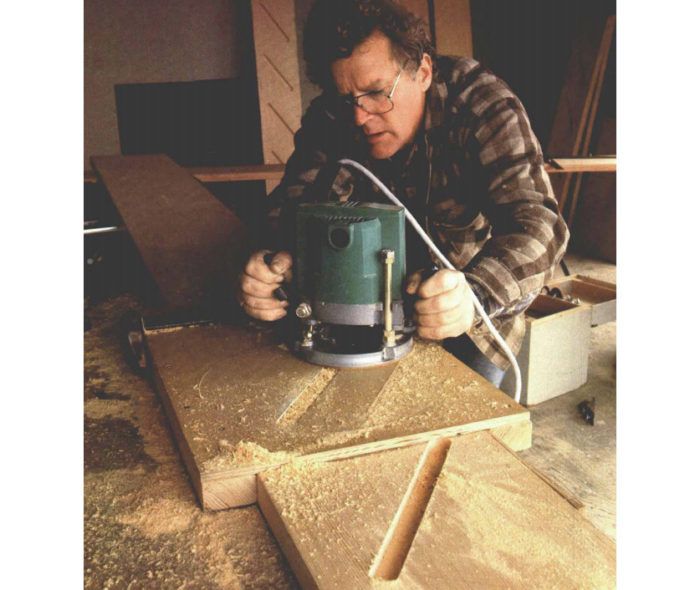
Synopsis: This article explains how to use a plunge router and an adjustable mortising jig to make an open-riser stairway. Diagrams show how to lay out the treads.
Leaving the risers out of a stairway can make a big difference in some houses. The open spaces between the treads allow for air circulation, and also a way for natural light to get into a sometimes claustrophobic corridor. Last summer, I built a pair of these riserless stairways for a three-story house, and it gave me two good problems to solve.
First, I wanted to mortise, or house, the treads into the stringer rather than notch them. I think housed treads look better, and this method also leaves the stringer intact, allowing for longer spans and a stairway with less bounce. The problem was how to cut the mortises quickly and accurately.
I knew all along that I would be making these cuts with my plunge router. This kind of router allows the bit to be lowered directly into the work, rather than let into it from the side. My job. was to figure out what kind of a jig would do the job precisely, yet still be easy to move along the stringer.
The second problem was to make the jig adjustable. Although the rises and runs for the two stairways were nearly equal, they had enough variation from floor to floor to require a different setup for each pair of stringers. My solution to both of these problems is the device I call the universal stair-stringer jig.
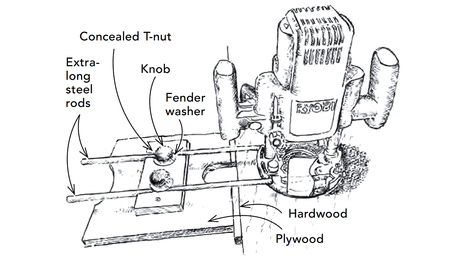
The jig consists of two basic parts: a rotating circular template and a cradle. A slot centered on the template’s axis duplicates the cross section of the tread material, and guides the bit. Because I use a router bit that has a ball-bearing pilot mounted over the cutter — instead of under the cutter as is the usual case — I can size the cutout in the template to the exact profile of the stair tread. The cradle is a rectangular piece of plywood with a circular hole that is slightly larger than the template. Parallel fences on the bottom of the cradle position the jig on the stair stringer. So that it will be easy to move the jig along the stringer, I put the fences about 1/8 in. farther apart than the width of the stringer.
To use the jig, I lay the cradle over the stringer and I rotate the template until it aligns with the tread layout. This is where the universal part comes in. The jig can accommodate any tread layout, no matter what the rise or run of the stairs. When I’m satisfied with the alignment, I shim the fence against one side of the stringer. Then I use a bar clamp to lock the template inside the cradle, and to hold the jig in place as the stringer is routed.
For more photos, drawings, and details, click the View PDF button below:
Fine Homebuilding Recommended Products
Fine Homebuilding receives a commission for items purchased through links on this site, including Amazon Associates and other affiliate advertising programs.
Original Speed Square

100-ft. Tape Measure
Plate Level


