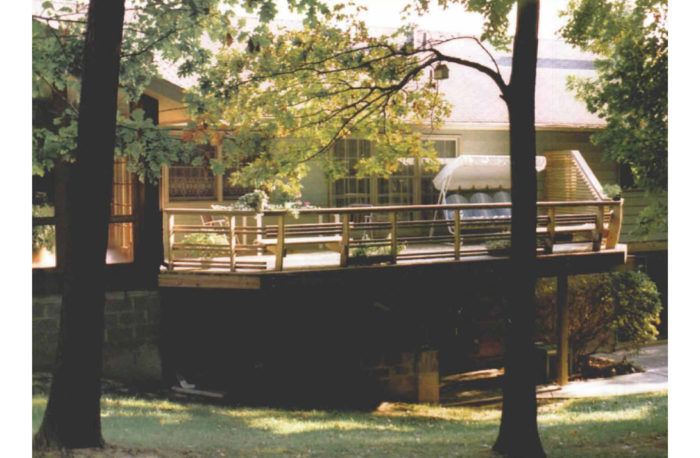
We get a lot of pleasure from the birds and other wildlife that live near our house here in Virginia. So when we decided to build a deck, it was important that it provide a transition from our living space to theirs. The house backs into the woods, and we wanted a graceful deck that wouldn’t obstruct the view. On many other decks I have seen, the assembly of railings and supporting posts masks the view with a clumsy grid of horizontal and vertical lines. But I also wanted to make sure that the deck would stay strong and solid for decades, so it features a number of details that are designed to ward off the destructive effects of the weather.
The design stage
I usually know how the parts of a finished project should fit together. But as a novice carpenter, I had to learn some hard lessons about the nitty-gritty of putting the parts in place. I found that it’s less frustrating (and less expensive) to work problems out with a pencil rather than with a saw.
To prepare for this project, I worked up a scale drawing that included a plan view, elevation views and details. I also drew and drew again lots of pencil sketches to help me understand how each piece would be made and how each joint would fit together.
I had to balance code requirements and aesthetics. For example, our county’s policy requires 4×4 posts to support a deck railing. I knew these would look bulky, so my permit application included calculations showing my railing design (2×5 posts on 42-in. centers) to be stronger than required (4×4 posts on 60-in. centers). This data is found in tables entitled “Properties of Sections” in The Wood Book (Hatton—Brown Publishers, Montgomery, Ala.).
I wanted a deck pattern that would be decorative and that would visually break up the 30-ft. length of the deck. After looking at a variety of options, I decided to use a herringbone pattern made from 2×4 deck boards, run at a 45° angle. Making each “panel” 5 ft. wide meant that the longest deck board would be just over 7 ft. long, so I could start with standard 8-ft. boards. This minimized expensive waste.
Once I had the design squared away, it was easy to make up an accurate bill of materials. As a retail customer, I was able to negotiate only a relatively small discount on the initial bulk order. I knew I’d pay dearly for what I forgot — both in dollars and in lost time. On the other hand, liberal estimating could leave me with a lot of leftover materials that would be hard to store or to resell. In the end, my detailed material take-off was well worth the effort. On clean-up day, the only wood left over was a few treated 2x4s, which were quickly used in a landscaping project, and some 2x2s, which now serve as tomato stakes.
Figuring a foundation
With the planning complete and the lumber stacked in the garage, safely out of the sunlight to keep it from warping, construction could begin. One side of the deck would be supported by three separate posts. Two of the posts were supported on a concrete-block retaining wall, which had been built two years earlier with the future deck in mind. The rebar-reinforced blocks had been filled solid with concrete, and the footing was oversized in order to support the deck weight. When it came time for the deck, all I had to do was install anchor bolts for the posts.
For more photos and details, click the View PDF button below:
Fine Homebuilding Recommended Products
Fine Homebuilding receives a commission for items purchased through links on this site, including Amazon Associates and other affiliate advertising programs.

4-Gallon Piston Backpack Sprayer

FastenMaster Screw Bolt Fastening System

100-ft. Tape Measure


