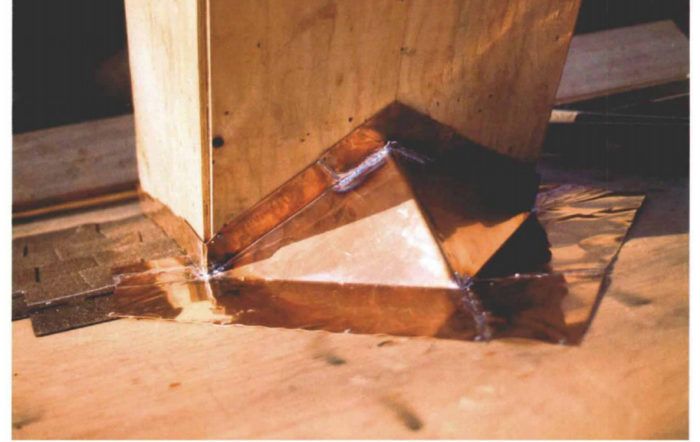
Synopsis: A chimney cricket is a mini-roof that helps shed water away from the vulnerable intersection of a sloping roof runs and the back of a chimney. In this article, the author shows how to make a soldered copper cap for a cricket.
The best place for a chimney to exit a roof is at the ridge. Water will run away from the chimney, not toward it, and flashing becomes a fairly simple matter. Builders in New England did this back in the days before sheet metal was readily available.
When you move a chimney downslope, however, runoff will strike it, often forcing water up under the flashing and down into the house along the bricks. Leaves and other debris can build up behind the chimney and decompose into a moisture-laden compost that rots roof boards and corrodes the flashing. The way to avoid this mess is to build a well-flashed cricket.
A cricket, or saddle, is a miniature gable roof covered with metal that sits between the back of the chimney and the main roof. The intersection of cricket and main roof produces a pair of valleys that divert water, snow, and debris around the chimney. Recently I built a small cricket for a wooden chimney structure that houses a pair of woodstove chimney pipes. Although the wooden chimney structure made attaching the cricket easier, constructing the cricket and flashing it were much the same as they would be for a masonry chimney.
Carpentry
The cricket I built was small enough to make with plywood—no rafters—but I’ll speak in terms of common and valley rafters in order to relate the geometry to standard roof framing. Since the chimney structure was 2-ft. wide across the back, the run of the cricket common rafter was half of that (12 in.). The main roof of the house had a pitch of 9-in-12, so to make things easy I gave the same pitch to the cricket. The run of the cricket common rafter being 12 in., the rise was 9 in. and the length, or slope, an even 15 in. You can calculate this using the Pythagorean theorem, but it’s easier just to measure the diagonal on a framing square.
Each half of the cricket roof surface is a right triangle with one leg 12 in. long (the length of the ridge) and the other leg 15 in. long (the length of the common). The hypotenuse connecting these two sides is the valley. To begin construction, I took a piece of 1/2-in. CDX plywood 12 in. by 15 in. in size and cut it diagonally, giving me both halves of the cricket at the same time.
To make the pieces fit properly, I beveled the ridge edges at 37°, which is the equivalent of a 9-in-12 common-rafter plumb cut. Then I beveled the edge that runs along the valley at 45°. This was a sharper bevel than was necessary, but the resulting undercut wasn’t a problem.
For more photos and details, click the View PDF button below:
Fine Homebuilding Recommended Products
Fine Homebuilding receives a commission for items purchased through links on this site, including Amazon Associates and other affiliate advertising programs.
Peel & Stick Underlayment
Portable Wall Jack
Flashing Boot Repair
