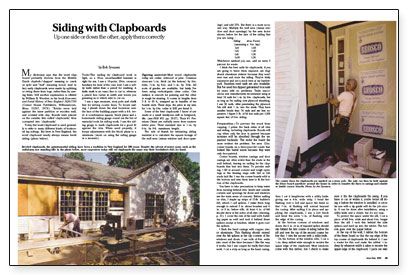
Synopsis: Beveled wood siding, or clapboards, has been used for several hundred years in some parts of the country. This article, written by a seasoned Massachusetts builder, explains how it should be installed. He covers all phases of the job.
My dictionary says that the word clapboard probably derives from the Middle Dutch clapholt — “clappen” meaning to crack or split and “holt” meaning wood. And in fact early clapboards were made by splitting or riving them from logs, rather than by sawing them. Still another explanation is offered by William B. Weeden in his book Economic and Social History of New England 1620-1789 (Corner House Publishers, Williamstown, Mass. 01267, 1978): “Bricks were laid against the inner partition or wooden wall, and covered with clay. Boards were placed on the outside, first called ‘clayboards,’ then corrupted into ‘clapboards.’
Today the word clapboard is used generally to refer to many different kinds of horizontal lap sidings. But here in New England, the word clapboard nearly always means bevel siding.
Tools
The nailing for clapboard work is light, so a 16-oz. wood-handled hammer is right for me. I use a 10-point, 20-in. crosscut handsaw for most of the cuts. And I use a utility knife rather than a pencil for marking. A knife mark is an exact line to cut to, whereas a pencil line varies in width and leaves you guessing as to which side to cut on.
I use a tape measure, story pole and chalk line for setting course lines. To locate nailing, I plumb down the stud locations onto the face of the building paper with a 4-ft. level. A combination square, block plane and a homemade siding gauge round out the list of essential tools for siding work. I use the siding gauge to mark clapboards for a good fit against the trim. When used properly, it keeps adjustments with the block plane to a minimum (more on using the siding gauge in a moment).
Figuring material
Most wood clapboards today are cedar, redwood or pine. Common sizes are 1/2-in. thick by 6-in. wide, 5/8-in. by 8-in. and 3/4-in. by 10-in. All sorts of grades are available, but lately I’ve been using vertical-grain clear cedar. One surface is smooth for painting and the other is rough for staining. It comes in lengths from 3 ft. to 20 ft., wrapped up in bundles of ten boards each. These days, the price in my area for 1/2-in. by 6-in. cedar is $.82 per lineal ft.
Some of the best clapboards I know of are made at a small family-run mill in Sedgwick, Me. Their #1 Premium Clears are radially sawn from eastern white pine. Their standard size is 1/2-in. by 6-in. by 8-ft. maximum length.
For more photos, drawings, and details, click the View PDF button below:
Fine Homebuilding Recommended Products
Fine Homebuilding receives a commission for items purchased through links on this site, including Amazon Associates and other affiliate advertising programs.
Smart String Line
Plate Level
100-ft. Tape Measure


