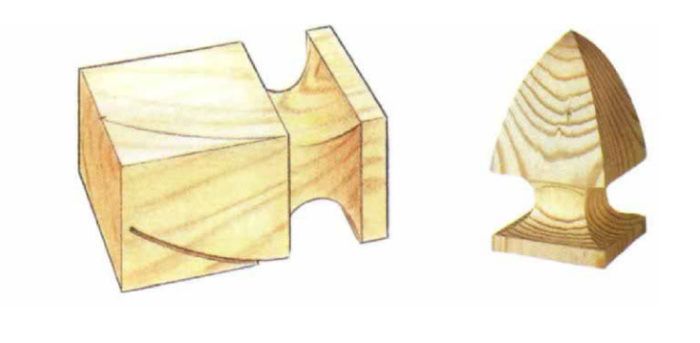
I make a deck-post cap that has been most popular with my clients.The design isn’t particularly original — it’s a Williamsburg knock-off — but it does add some curved detail to otherwise boring, rectilinear decks, and it can add a finishing touch to a fence as well. Curves are nice and friendly, unlike the all-too-common detail of simply cutting posts off at an angle.
I’ll admit that the caps are time-consuming to make, but once you’re set up, a rained-out afternoon can result in 25 or 30 of these profitable details. One building-supply store sold my caps for $7.50 each.
I use pine, pressure-treated with CCA, for the caps. It’s widely available around here so I’m able to get some pretty good material. Be aware, however, that the pressure-treating process does not always force chemicals into the heart of a 4×4. That’s okay for a post, perhaps, but not for these caps because so much stock is cut away. So select your material carefully. It should have a minimum of checks and should be as dry as possible — the wet stuff cuts poorly and checks easily. There’s no doubt in my mind, however, that redwood or cedar would work at least as well, and probably better, than pressure-treated pine.
Use straight and square stock. All faces should be the same dimension to ensure consistent results later on. The particular dimensions aren’t so important, but make certain that all of the pieces are exactly the same size, particularly in cross section.
You’ll need a drill press and a bandsaw. A multi-spur bit works a little better for the boring operations than does a Forstner bit, which has a tendency to burn in the pitchy, stringy pine. A note about safety, however — don’t get sloppy while using a drill press or a bandsaw. A while back, I cut off my left thumb with a multi-spur bit chucked in a drill press — these days I’m more careful. I use a simple Plexiglas guard to protect the spinning bit when it’s at the top of the stroke (and no longer buried in the workpiece). I made it by heating a scrap piece of plastic with a propane torch and bending it over a metal rod.
After cutting the cap using the procedures outlined below, you’re ready to install it. Use construction adhesive to glue a 1-in. dia. dowel into the base of the cap. Drill a mating hole in the end of a 4×4 post. Spread a little construction adhesive in the second hole, a little on the bottom of the post cap, and slip the cap into place. This will hold the cap firmly; I’ve found that driving a small finish nail through the base of the cap and into the post risks splitting the cap.
For more photos, drawings, and details, click the View PDF button below:
Fine Homebuilding Recommended Products
Fine Homebuilding receives a commission for items purchased through links on this site, including Amazon Associates and other affiliate advertising programs.
Flashing and Joist Tape
Standard Marking Chalk
Lithium-Ion Cordless Palm Nailer
