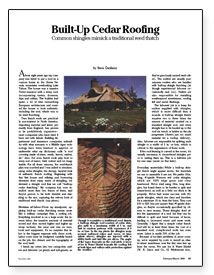
Synopsis: The price of top-grade Western red cedar shingles may deter some, but this article describes how thick layers of shingles can be used to mimic the look of an old-fashioned European thatch roof. The project is a big house at Lake Tahoe, and the author’s descriptions of the volume of materials it takes will make for good reading even if the roof isn’t your style.
About eight years ago my company was hired to put a roof on a custom home in the Sierra Nevada mountains overlooking Lake Tahoe. The house was a massive Tudor mansion with a steep roof, incorporating turrets, dormers, hips and valleys. The builder had spent a lot of time researching European architecture and wanted the house to look authentic, including the roof, which was to be reed thatching.
True thatch roofs are practically nonexistent in North America. Importing material and labor, primarily from England, has proven to be prohibitively expensive—most companies who have tried it have met with failure. Building departments and insurance companies unfamiliar with what amounts to a Middle Ages technology have been hesitant to approve or underwrite what my dictionary calls “a roof covering made of straw, reeds, leaves, rushes, etc.” Also, I’ve seen thatch roofs play host to every sort of insect, bird, rodent, and rot imaginable. For all these reasons, the reed-thatch plan was scuttled and I was asked to simulate, using cedar shingles, the droopy, layered look of authentic thatch roofing. Beginning with that first house and refining and borrowing elements from many styles of shingling, we devised a shingle roof that we call “built-up cedar thatching.” My company has now installed more than two dozen of them, and they’ve proven to be both durable and dazzling to the eye, capturing the velvety look of traditional reed thatch.
Division of labor
From my standpoint, applying built-up cedar thatching seems more like a military campaign than a roofing job. Everything involved is on a large scale: the intense labor; the massive amounts of material stored and then moved higher and higher up steep inclines; the wear and tear on men, tools, and equipment. It’s no surprise that labor is the biggest expense with these roofs. Labor costs must be budgeted carefully based on the job, the climate, and the topography of the roof itself.
I break my crews into two categories: nailers and laborers (or grunts and subgrunts, as they’ve graciously named each other). The nailers are usually journeymen roofers who are familiar with built-up shingle thatching (although experienced laborers occasionally nail, too). Nailers are also responsible for installing weatherproof membranes, roofing felt, and metal flashings.
The laborers’ job is to keep the nailers supplied with shingles, which is more difficult than it sounds. A built-up shingle thatch requires two to three times the amount of material needed on a standard shingle roof, and every shingle has to be hauled up to the roof via winch or ladder as the job progresses (there’s just too much material for a rooftop delivery). Also, laborers are responsible for splitting each shingle to a width of 5 in. or less, which is critical to the appearance of these roofs.
For more photos and details, click the View PDF button below:
Fine Homebuilding Recommended Products
Fine Homebuilding receives a commission for items purchased through links on this site, including Amazon Associates and other affiliate advertising programs.
Anchor Bolt Marker

Original Speed Square

Fall Protection


