A Site-Built Stair
Using readily available materials and on-site carpentry techniques to build a tasteful staircase.
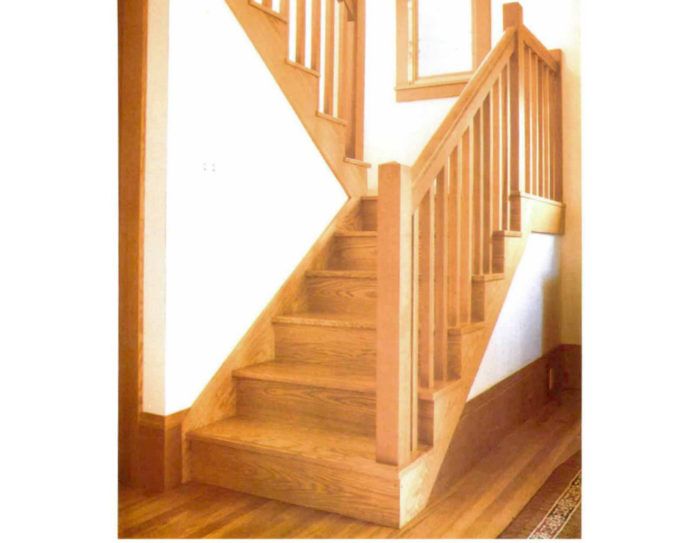
Synopsis: This article details the construction of a set of stairs with an intermediate landing to provide access to a second-story addition. The author builds the stairs, including its newel posts and railings, on site so techniques are straightforward and effective.
It’s easy to see why carpenters are attracted to stairs. Along with framing a roof, building a staircase is one of the most challenging geometrical tasks in building a house. And once the variables of rise, run, headroom, railing and landing configurations have been resolved, the carpenter assigned to build the stair can look forward to airing out some of the finish-carpentry tools that have been languishing in the corners of his toolbox.
Architects can also fall victim to the spell of a well-turned stair, and they often design elaborate stairs — no doubt at the request of their clients. Unfortunately, complicated stairs are frequently beyond the budget. Sometimes they must even be built off site and reassembled in place. A pleasing staircase can, however, be built using standard on-site carpentry methods. This article is about such a stair. It connects the ground floor of a turn-of-the-century Arts and Crafts-style house to a new upstairs addition, designed by architect Glen Jarvis.
From the ground floor up, the stair has two primary flights connected by a landing. Another landing on the second floor leads to a short flight with only three risers. Glen’s original design for the stair detailed a traditional oak balustrade assembled from manufactured parts. But as we got further into calculating the costs of the remodel, it became clear that the money wasn’t going to be available for expensive stair parts and their fastidious fitting. Jarvis and I met with the owners of the house, Morris and Regina Beatus, mulled over our options and decided to build a simpler stair inkeeping with the original house. The treads and risers would still be oak, for its durability and to match the oak floor in the upper and lower halls. The railing would be of clear Douglas fir, which would match the door and window trim.
Horses on rake walls
Once we had the second floor framed and the roof in place, we calculated the rise of the stair by measuring the distance from the existing oak strip floor in the lower hall to the top of the subfloor in the upper hall. To this number we added 5/16 in. to account for the thickness of the oakstrip flooring that would cover the upper-hall floor. We then divided this number by thenumber of risers to establish the riser height. For this stair, the rise ended up at 7 3/4 in. and the run at 10 in.
The landing between the two primary flights of stairs is 6 ft. wide, which is the minimum width allowable by our code to accommodate our 3-ft. wide treads — also a code minimum. Once we knew our riser heights, we began our stair framing by building the lower landing first. There was nothing tricky about this part of the project because we used standard framing lumber and conventional stud-wall construction techniques to build the stair’s super-structure. The stair horses (also called carriages, stair stringers or stair jacks in some parts of the country) were cut from 2xl2s. On the open side they bear on 2×4 rake walls. On the wall side they are affixed with 16d nails to ledgers that are anchored to the stud walls. Drywall backing blocks made from 2×10 stock fill the stud bays adjacent to the 2×6 ledgers. Once we had the landings and horses in place, we installed some temporary treads and didn’t work further on the stair until the drywall work was complete.
For more photos, drawings, and details, click the View PDF button below:
Fine Homebuilding Recommended Products
Fine Homebuilding receives a commission for items purchased through links on this site, including Amazon Associates and other affiliate advertising programs.
Plate Level
Smart String Line
Anchor Bolt Marker


