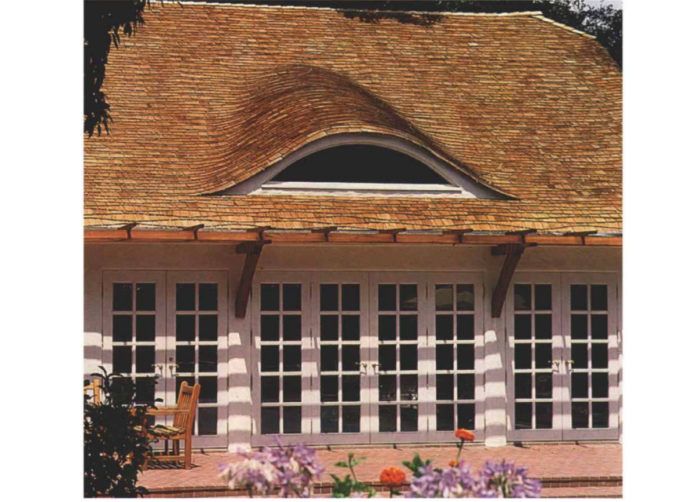
Synopsis: Adding a gracefully curved eyebrow window to a roof takes precise planning, some unusual framing, and curved templates for roof sheathing. The author explains how to do it.
Eyebrow dormers had their American hey-day during the late 19th century, when they turned up on the elaborate roofs of Shingle-style Victorian and Richardsonian Romanesque houses. Tucked between the conical towers, spire-like chimneys and abundant gables that distinguish these buildings, the little eyebrows provided a secondary level of detail to the roof and some much needed daylight to upstairs rooms and attics.
The roof cutters of that era could probably lay out an eyebrow dormer during a coffee break, but for a contemporary West Coast carpenter such as myself (well-versed in shear walls, production framing and remodeling techniques), framing an eyebrow dormer presented an out-of-the-ordinary challenge.
The setting for this dormer project was a rambling Tudor house in Atherton, California. The owners were adding a garage and remodeling several portions of the building, including a dilapidated barnlike recreation room next to the swimming pool. The roof of the house was covered with cedar shingles, and at the eaves and gable ends, curved shingles gave the roof a thatched look. Eyebrow dormers, rising by way of gentle curves from the plane of the 8-in-12 roofs, would look right at home on the house.
My job was to install five of them in the garage roof and a single larger eyebrow dormer in the roof of the recreation room. The garage ceiling would remain unfinished, so I didn’t need to worry about providing backing for drywall or plaster. I would, however, have to solve that problem in the recreation room. The garage dormers required a lower level of finish while presenting the same conceptual problems, so I decided to build them first.
Rafter-type eyebrow
By the time I got on the job, contractor Dave Tsukushi had already taken delivery of the windows for the garage roof. They were arched, single-glazed units available off-the-shelf from Pozzi Wood Windows (Bend Millworks Systems, Bend, Ore.). The windows were 64 in. wide by 24 in. tall, and had 4-in. wide frames made of pine. The arched frames were quite sturdy, so we decided to incorporate them as part of the structure. We faced them with 3/4 in. ACX plywood, which would serve as a vertical surface for attaching the rafters, as well as backing for a stucco finish. At the top of the arch, this plywood face frame is 3 3/4 in. wider than the window frame. This dimension accommodates the 22 1/2 degree plumb cut of a 2×4 rafter on a 5-in-12 slope — the pitch of our dormer. I screwed the face frame to the first window; then I braced it firmly on the roof, exactly on its layout between the roof trusses.
An arched window 2 ft. high with a base about 5 ft. wide makes a pretty tight curve for the dormer roof sheathing to follow. To make sure the curves stayed smooth and to ensure plenty of backing for the plywood, I decided to put my 2×4 rafters on 4-in. centers. I laid out their centerlines on the base of the window, and then used a level held plumb to transfer them to the arched portion of the face frame. Next I got out the string.
For more photos, drawings, and details, click the View PDF button below:
Fine Homebuilding Recommended Products
Fine Homebuilding receives a commission for items purchased through links on this site, including Amazon Associates and other affiliate advertising programs.

Magoog Tall Stair Gauges
Short Blade Chisel

Bluetooth Earmuffs
