Synopsis: A carpenter details his technique for making curved crown molding by laminating pieces of wood, cutting a rough profile on a tablesaw, and finishing the job with a scraper made from an old drywall taping knife. Low-tech, low-cost, and effective.
As a carpenter, I spend most of my time at work swinging a hammer or wielding a saw. But I’m always looking for a chance to try a new technique. Recently, while I was touring a house under construction, owner Paul Kreutzfeldt showed me a straight piece of stock crown molding he planned to use for the kitchen ceiling, then looked up at a curved wall in the room and said, “That piece is going to be a bear.”
“Yup,” I answered, excited. “Mind if I give it a try?”
“Go right ahead,” he said with a smile.
There are two basic approaches to making curved trim. You can glue several pieces of wood end-to-end and then cut the curve on a bandsaw, or you can laminate thin strips of wood around a curved form. If you use the first method and decide to stain the trim, the separate pieces may accept stain differently, and the joints usually show through. Laminated trim, on the other hand, is stronger than butt-joined trim and usually looks better when it’s stained. Because Kreutzfeldt had yet to choose between staining and painting his crown molding, I decided to laminate it. As it turns out, Kreutzfeldt decided to paint it.
Making the bending form
The first step was to make a form that matched the curvature of the convex wall. Finished with drywall, the wall defined a 90° arc having a radius of about 24 1/2 in. Unfortunately, the curve was far from perfect, wandering out of round by up to 3/8 in. That forced me to make a template for the form.
To create the template, I bandsawed a 24 1/2-in. radius curve in a sheet of 1/8-in. tempered Masonite. I then held this template against the curved wall 3 3/4 in. from the ceiling, which is where the bottom of the crown molding would contact the wall. After scribing the template with a pencil compass, I trimmed it with a jigsaw for a snug fit.
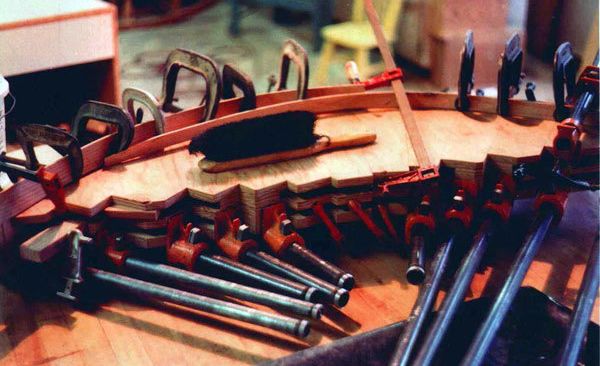
Making the bending form itself was the easy part. Back at my shop, I traced the outline of the template onto three pieces of 3/4-in. plywood, cut them out and nailed them together, placing 3/4-in. plywood spacers between layers to produce the proper thickness. Finally, on the back edge of the form, I bandsawed a series of steps parallel to the front edge to give the clamps good purchase.
Preparing the stock
The next step was to prepare thin strips of wood for lamination. The factory-made crown molding I wanted to match was made of white pine, but I selected clear sugar pine for my molding. Sugar pine has a uniform straight grain, is easily bent without splitting, and well, that’s what I had on hand.
For more photos and details, click the View PDF button below:
