Strengthening Plate-to-Rafter Connections
It may be time to abandon the time-honored toenail.
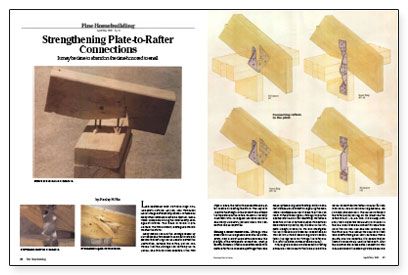
Synopsis: An engineer discusses the use of metal plate-rafter connectors as an alternative to the conventional approach of toenailing. A dozen examples from several manufacturers are illustrated and discussed. An accompanying chart lists load capacities of different models.
Late September 1989: Hurricane Hugo clobbers South Carolina. April 26, 1991: Tornadoes knife through Butter County, Kansas. In these and many other instances of extreme weather, woodframe houses are among the most heavily damaged structures. The mode of failure is predictable: The roof blows off, leaving bare walls to weather the storm.
Many people consider the damage caused by hurricanes and tornadoes to be an act of fate and assume that nothing can be done to prevent the destruction. Perhaps this is true, but I’m convinced that the damage can certainly be reduced, and with minimal expense. If the roof stays in place, the rest of the house stands a better chance of resisting the storm. The key is to improve the strength of the connection between the top plates and the rafters. Research I recently undertook with colleagues Laurence Canfield and Henry Liu shows, just how much this connection can be improved.
Making a better connection
Although wind pressures on buildings have been studied extensively, only a few studies have examined the strength of the rafter/plate connection. What is known, however, is that a connection made with metal rafter ties is considerably stronger than one made by toenailing. Unfortunately, not all manufacturers publish information regarding the maximum recommended uplift loads their ties can resist. Without those figures, it’s tough to pick the appropriate tie. So in our laboratory, we tested a selection of ties in various shapes from several manufacturers to establish the ultimate strength of each tie. We also investigated the uplift resistance of toenailed connections, as well as two different sizes of lag-screw connections (the lags were run through the rafter and 3 in. into the plates; a washer was included).
First, I’ll give a couple of notes about our testing procedures. Nails used for the three different toenailed connections we tested included 8d common nails, 16d box nails and ring-shanked, 16d common pole bam nails. The 16d nails often split the rafter during nailing, so we predrilled the rafters with a 5/32-in.-dia. hole. It is unlikely, however, that carpenters would drill pilot holes in the field. Each toenailed connection used three nails: two on one side and one centered on the other side. The lumber we used for all tests was construction-grade stock obtained from a job site, and we inspected it to ensure that no flaws or cracks would bias the test results. After the appropriate rafter/plate connection was made, samples of the assembly were placed in a hydraulic test apparatus that pulled the rafter away from the plate. We tested at least 15 connections, pulling until the connection failed.
For more photos, illustrations, and details, click the View PDF button below:
Fine Homebuilding Recommended Products
Fine Homebuilding receives a commission for items purchased through links on this site, including Amazon Associates and other affiliate advertising programs.
Shingle Ripper

Stabila Classic Level Set
Peel & Stick Underlayment


