Trimming the Front Door
Ripped, mitered and reassembled interior moldings add a custom look to a front entry.
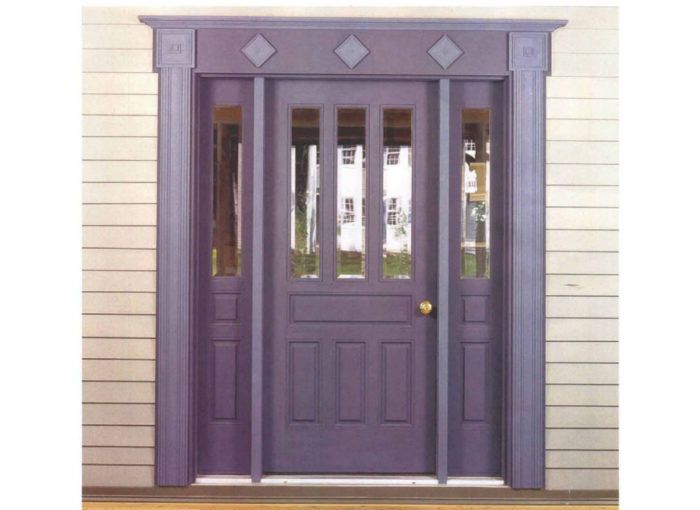
Synopsis: A thrifty carpenter and woodworker describes how he trims a front door with leftover poplar from interior casings, clear pine stock, and simple joinery. A sidebar describes a clever way of gluing mitered joints with the help of hot-melt glue and temporary triangular clamping blocks.
Consider the front door, if you will. There is something about this entrance that, if done tastefully, really invites a person into the home, eager to see more. Why, then, are so many front doors stamped in standard, prefabricated trim? You know what I mean: the same old dentils, sunbursts and broken pediments. They’re usually southern yellow pine and can cost anywhere from $200 to $350. My partner, Steve Vichinsky, and I recently built a Victorian house with a large hip roof, an octagonal turret and a wraparound front porch. Considering all the work we had put into this house, I wanted to do something special with the front door.
My goal was to build something quickly that was pleasing to the eye and well made. I took a spin around town, looking at the ornate, older homes here in Amherst, Massachusetts, to get design ideas. A day and a half later I had a front door with custom trim that looked great and was less expensive than the prefab stuff. Plus it was a lot of fun to make.
Interior trim used outside
A local millwork company had milled up all my interior trim for the windows and the doors. The casing was 3/4 in. by 3 3/4 in. poplar. The first 3/8 in. on both sides of the face was milled square to the edges. Next to these flat sections were 3/16-in. coves and then a 1/8-in. V-groove. Two 5/16-in. beads were next to the V-grooves. The rest of the trim came to a beveled peak in the center of the casing. I also had plinth blocks made for the doors, bullnose pieces to separate the casing from the plinth blocks, rosettes for above the doors and the windows, and detailed baseboard.
As I stood looking at a finished, trimmed-out room, it suddenly hit me: “Why can’t I use the interior trim outside?” I stepped outside. Thinking of the houses I had seen, I knew this front door had to be built out in both width and depth to match the scale of the house. The interior trim alone wasn’t beefy enough.
Fattening the trim
To give the opening more width, I nailed 1×8 clear-pine stock to the sides of the door and 1×10 over the top. The head, or top piece, extends 1 in. past each leg. This gives a nice effect where the leg meet the head, later accented by the siding. An overhanging head is a common feature of most fancy, exterior door trim. I now had a blank field of pine with which to work.
For more photos, drawings, and details, click the View PDF button below:


