Raised Paneling Made Easy
A combination of built-up moldings and layers of plywood duplicates a traditional look.
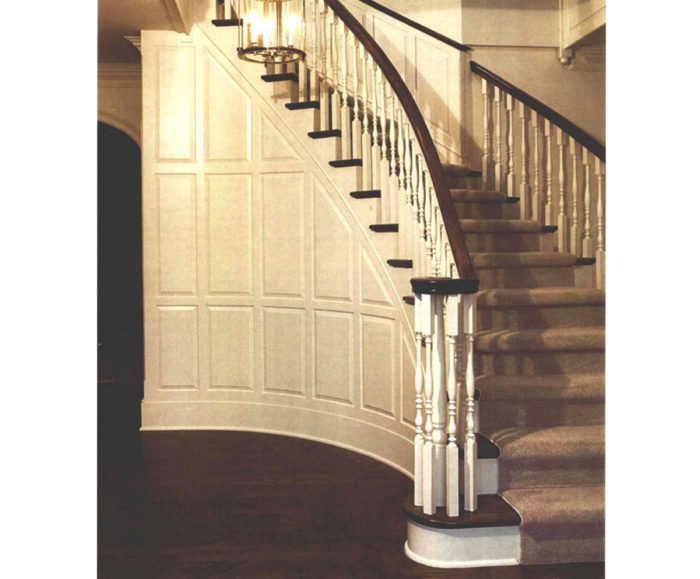
Synopsis: Faced with the task of making a curved frame-and-panel wall below a stair, the author develops a technique of layering plywood, hardboard, and molding. The approach saves time and produces a classically styled wall that complements the formal feel of the entry. A sidebar describes mitering odd angles.
Glenn Bostock, a cabinetmaker living in Pipersville, Pennsylvania, was contracted to fabricate a frame-and-panel wall in the entryway of a house in New Hope, Pennsylvania. A formidable task, but certainly not an insurmountable one. There was, however, a challenge: The panelled wall was to be built on the inside curve of a circular staircase.
Traditionally, curved frame-and-panel walls were made by sawing, shaping and planning solid wood. Even with a fully equipped modern shop, the stiles, rails and panels would require elaborate jigs and extensive shaper work.
Bostock came up with a technique for duplicating the appearance of traditional frame-and-panel construction that was less expensive and quicker than traditional methods. His technique employs a series of overlapping layers, including bending plywood, tempered hardboard and kerfed pine. Each layer was nailed or glued in place, and the whole assembly then was trimmed out with moldings that hid the seams and fasteners of earlier layers.
Bostock’s process was simple, and the most difficult task was making accurate cuts so the molding fit together well. Granted, the construction of the wall took a lot of time, but not nearly as much time as a solid-wood raised-panel wall would have required.
Although Bostock’s project was a curved staircase wall, his techniques would work just as well for building a flat raised-panel wall. An added benefit for those with limited access to a shop is that Bostock’s techniques can be accomplished almost entirely on site.
Two layers of bending plywood provide a firm foundation
Bostock began by attaching two layers of 3/8 in. bending plywood directly to the studs. Bending plywood is made of three laminations; the middle layer is thinner than the two outside layers. Eventually, the two layers of bending plywood would be covered by other layers of panels, stiles, rails and moldings. The bending plywood provides a solid base upon which to attach subsequent layers.
Bostock attached the first layer of bending plywood with nails and construction adhesive. The construction adhesive filled any gaps between the plywood and the studs, and the nails were more than adequate for drawing the plywood up to the studs. The second layer was put on with carpenter’s glue and 1 1/4 in. staples. The yellow glue turned the two pieces of the bending plywood into one unit. Bostock used a paint roller to apply the glue quickly. The staples were placed every 6 in. to assure a tight, even fit between the two layers.
Lay out the frames and panels
Once the bending plywood was attached, Bostock marked the stiles, rails and panels on the wall. Bostock colored in the location of the rails and stiles with pencil to make them easy to identify. Bostock drew all vertical lines with a level, and he then measured horizontal distances off a level line close to the floor. This horizontal line was established by marking points in several locations around the radius with a level and connecting the points using a thin piece of wood bent into the curve. Once the layout of the vertical and horizontal lines was complete Bostock began the installation of the stile and rail base pieces.
For more photos, drawings, and details, click the View PDF button below:


