Building a Curved Stair on Site
A stick-framed stair lifts the eye upward while keeping the costs under control.
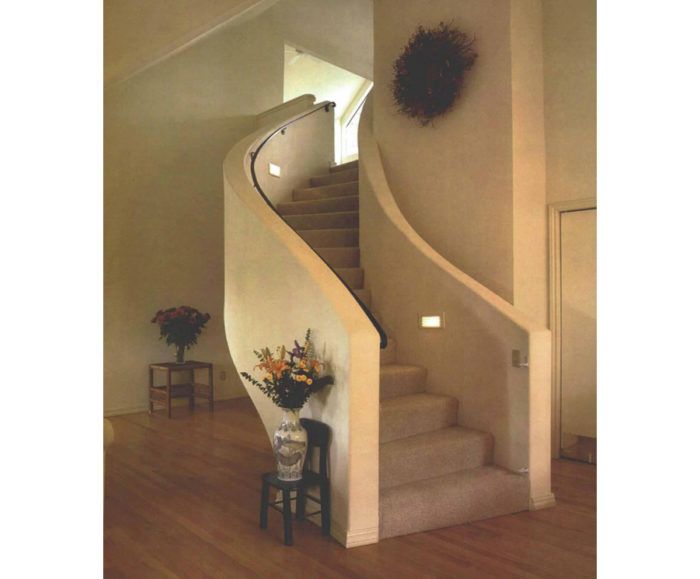
Synopsis: A carpenter explains how he built a curving staircase on site by using plywood templates and straight dimensional lumber.
Working feverishly with Super Glue, I completed the model of this stair at 3 o’clock in the morning on Dec. 24. Later that day, I showed the model to a skeptical building inspector. He studied it, mulled it over, and then said, “Go ahead and build it. Merry Christmas.”
Because stairways take up a lot of space, finding room for them in remodels is always a problem. And that was certainly the case when we added a second-story addition to a house in Seascape, a development a few miles south of Santa Cruz, California. The plans showed a staircase all right, but it was clear to all of us that the proposed stair, which included two landings, would have overwhelmed the living room.
Unsure of how to proceed, we went ahead and built the addition and periodically pondered the stair. As the roofers were applying the shingles to the new roof, we were still pondering. And, I might add, we were tired of getting to the second floor by way of a 10-ft stepladder.
Standing atop the new second floor and looking down at the recently laid hardwood floor in the living room, I began to envision a winding stairway. A winding stair would eliminate the two landings shown in the working drawings, and it would introduce a bold, sculptural element into the living room. Unfortunately, curves cost money. A winding stair undoubtedly would exceed the portion of our bid that had been allotted to the stair. But I couldn’t get the image of that curved stair out of my mind. I knew it was the right solution, so I asked our boss, contractor Dennis Dyrdahl, if I could take on the responsibility of designing and building the stair. With Dennis’ blessing, I began my work by studying a back issue of Fine Homebuilding.
Convincing the inspector and the clients
Back in 1989, David Stark Wilson built a spiral stair by defining the stair shape with floor-to-ceiling 2×6 framing lumber, wrapping it with plywood and then cutting away the unneeded portion of the assembly, thereby leaving a pair of helical plywood box beams to serve as the stair stringers. I wanted to use the same construction method, but instead of a spiral stair, I wanted to build one that was mostly an arc in plan, with a recurve at the first-floor landing.
I began with a scale drawing of the floor plan at 1/2-in.: 1-ft. scale. Then I drew a number of stair plans with outside radii varying from 6 ft. to 9 ft., and tread widths of 36 in., 38 in., and 40 in. I calculated the number of steps needed and turned the last five steps in the opposite direction to achieve a pleasing S-shape.
For more photos and details, click the View PDF button below:


