A Rail-and-Stile Garden Gate
Simple joinery techniques yield a memorable feature for any garden.
Synopsis: A furnituremaker and gate builder details construction of a garden gate. The lap joint used to connect rails and stiles is relatively simple to make, and details in panels and pickets make the gate memorable.
My work as a gate builder began in 1982. I landed a commission for a garden gate (with an accompanying arbour) to be built on a public corner lot in Larkspur, California. What marks this date is my departure from the typical, nailed-together, batten-style gates common to most yards with fences. My client wanted something a little dressier than that and was willing to pay for it. So I took the opportunity to make a gate with real rails and stiles, just like a traditional door for a house or a cabinet.
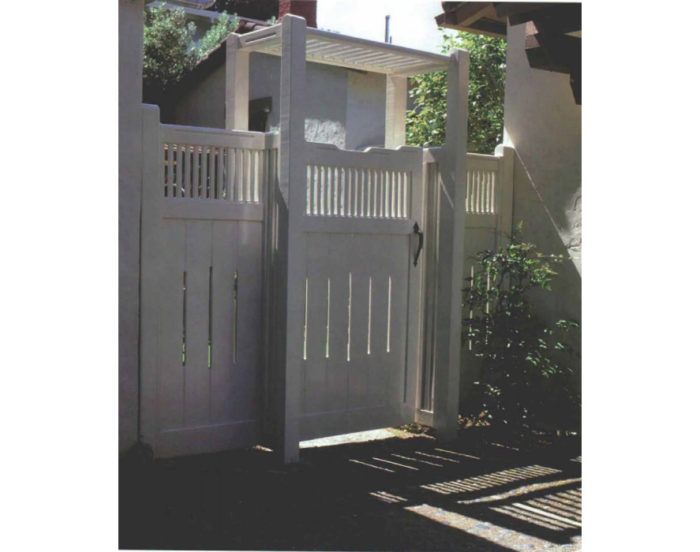
I’ve built a lot of gates since that one, experimenting with each gate to blend aesthetics and efficiency. The gate illustrated in this article is one of my old standbys: a Craftsman-style gate that goes well with the arbours and trellises that detail many older homes here in northern California.
I built the gate shown in the installation about 10 years ago out of redwood. The one shown in the construction photos, however, is made of western red cedar. Both woods are excellent for gates. But I’ve been using more and more of the red cedar of late because it costs less. And as cedar gets more expensive, I’ve turned to fishing through my supplier’s inventory for the best stock among the knotty grade. If saving a little money interests you, check out the lesser grades. There are often mostly clear pieces with a few knots that you can work around.
Why I like the lap joint
As is true with other kinds of doors, there are several ways to join a gate’s rails and stiles (the horizontal and vertical portions, respectively, of the gate’s frame). The options include the traditional mortise-and-tenon joint, the floating tenon, the doweled joint, the biscuit joint and the cope-and-stick joint preferred by many production-minded doormakers. Of all of them, I have grown to prefer a joint rarely used in door making: the lap joint. To my way of thinking, it has two big advantages. First, it provides a large mating surface for the glue to get a grip. Given the strength of contemporary glues, this trait is a real plus. And second, the lap joint is reasonably easy to machine (it’s the reasonable joint I’m concerned with here, not some schematic puzzle out of a book on Japanese joinery).
This gate is composed of 2×4 stiles, a 2×8 bottom rail and a top rail that started out as a 2×8 before I cut a stepped profile in it. The middle rail is a 2×4. For larger gates I use a 2×10 bottom rail, and I adjust the stile width upward accordingly. To avoid clumsy proportioning, I make sure the width of the stiles falls between one half and two-thirds the width of the bottom rail. The planks in the bottom portion of the gate are 1x6s, and the pickets along the top are also 1xs, ripped to 1 1/4 in. wide.
For more photos and details, click the View PDF button below:
