Building a Picket Fence
A carpenter uses shop-built sections and sturdy foundations for a traditional structure.
Synopsis: This is a thorough guide to building a picket fence that will resist the ravages of time and weather. One secret: there’s a lot going on below ground. A sidebar discusses pros and cons of setting fence posts in gravel and concrete.
When my wife and I bought our quaintly down-at-the-heels mid-19th-century cape, it was screened from the drive by a graceless fence of weathered-gray, 6-ft.-tall pickets. Made from recycled window-muntin stock, the pickets were nailed to 2x4s and held up by round cedar posts driven into the ground. Even if it had been well built and standing straight and true, it still would have been all wrong. Seen from the house, 85 ft. back and 6 ft. or 8 ft. lower than the driveway’s end, the closely spaced pickets blurred like the spokes of a spinning wheel into a solid screen. A privacy fence was the last thing we needed at the end of an 1100-ft.-long driveway. And what message did its style and condition give to visitors? Or indicate about the people who lived there? Better to live with no fence at all. So I tore it down, intending to build a better fence someday.
Designing a friendly, graceful fence that will last
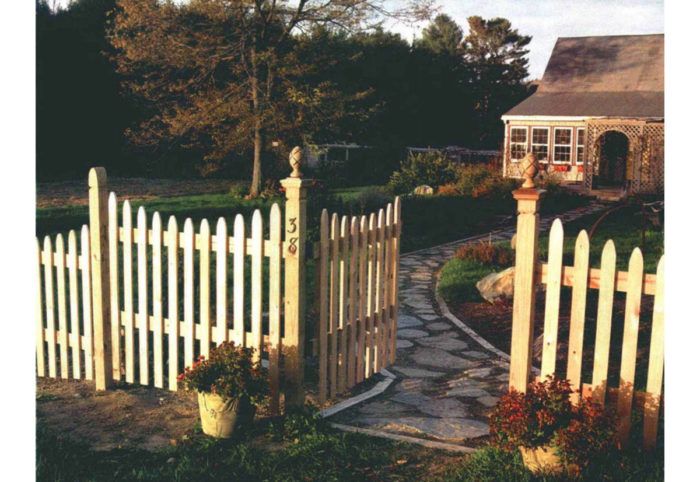
We knew that we wanted a fence that would be architecturally appropriate and that would also feel welcoming. Waist-high pickets would invite conversation across the fence while maintaining polite reserve. I opted for a 3-ft. height.
I decided to use 1×3 stock for my pickets with the same 2-1/2-in. spacing between them. I designed the picket tops by sketching various combinations of angles and radii until I found a couple of examples that I liked. I transferred these designs to full-size cardboard mock-ups and showed them to my wife, who picked my favorite of the bunch. I enlarged the same shape to use for the post finials. I then copied the patterns onto 1/4-in. hardboard for use as cutting templates. My choice for picket material was native clear Eastern-white cedar, which is decay-resistant and weathers gracefully.
As for the fence itself, I wanted it to start at our garage/greenhouse and run straight down a gradual slope for about 120 ft. Initially, I spaced the posts approximately 5 ft. apart; this distance is close to the classical ideal proportion of panel width to height. The post centering was determined by my requirement for a full-width picket space next to each post. With 11 pickets at each panel, the on-center post spacing worked out to be a satisfactory 5 ft. 1 in. The pickets would be draped so that their tops formed a concave arc. I also wanted a gate to open onto the walkway that leads to the house’s front door.
The stringers, or rails of the frame that would carry the fence, would be pressure-treated 2x4s on the flat and would sit in dadoes in the backs of the posts. Even though the framing was to be pressure-treated, I was concerned about rot forming at the junction of the stringer and the pickets, and planned to rip a 15° bevel on the top of the stringer. This also meant that I would have to cut a corresponding beveled dado into the post.
For more photos, drawings, and details, click the View PDF button below:


