Designing and Installing Baseboards
With stock moldings and simple milling, you can create a variety of baseboard designs, but they all require careful fitting.
Baseboards are so called because they derive from the base of a pedestal, the lowest part of the stand upon which classic columns are placed. Almost all the interior trim in a home is modeled on classical antecedents: Many great period houses reproduce classical models in every magnificent detail, while less elaborate trim echoes the form with a range of derivative elements. Column capitals and the entablature above become frieze and cornice of ceiling molding, and columns themselves become door and window casings. Pedestals are represented by a paneled wainscot under a chair rail: When the paneling is eliminated, the baseboard remains.
The clamshell (or ranch) base in a tract house shows how the economies of construction have reduced baseboards to a thin shadow of their former grandeur. But with simple shop detailing and stock molding, handsome baseboards can be built in a variety of designs and styles.
First the floor, then the baseboard
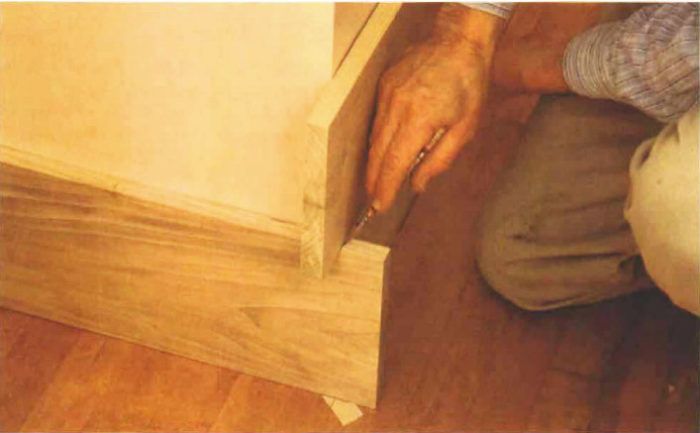
Wooden floors, particularly strip and plank floors, require room to move with seasonal changes of humidity. A small gap between the flooring and the wall allows this movement, and baseboard covers the gap. A tight joint between the floor and the baseboard requires that the floor be installed first, and the baseboard scribed to it.
In a room to have a wall-to-wall carpet, the baseboard should be installed first, laid to the subfloor without scribing. It isn’t necessary to tuck carpet under the baseboard: Carpet installers will fit the carpet tight against it, hiding the bottom edge entirely. Sometimes, narrowstock baseboards, such as clamshell, are installed 1/2 in. or so above the subfloor, but that’s only to keep the carpet and pad from obscuring too much of the shallow profile.
Layout lines ensure that scribed baseboards line up around the room
In its simplest form, a baseboard is really a foundation for the more detailed profiles that can be developed from it. But a simple baseboard is an ideal model for reviewing installation. This design calls for a 1×8 baseboard with a stock cap.
I start by marking a pair of reference lines along the walls, parallel to the average floor plane. The lower line represents the top edge of the installed 1×8. The lower line must therefore be no more than 7 1/4 in. (the width of stock 1×8) above the floor at any point around the room. In practice, setting the lower line at 7 in. ensures a tight fit in case you miss a dip in floor.
I use a long straightedge to establish the line location, but I do not make the mistake of working to a level reference. Baseboard is effectively floor trim, and the floor plane is the critical reference, level or not. Making the baseboards level in a room that is not level merely draws attention to the deficiency.
The upper line is a scribe line, parallel to the baseline and 1 in. or so above it. An inch is usually sufficient, but for a really erratic floor, you must ensure that the space between the two lines is greater than the maximum variation in floor height.
Once I’ve located the base and scribe lines, I snap them along all walls with a chalkline. You may think this is far too complicated for baseboard work. But the layout is not difficult, nor time-consuming. It may be possible to avoid it if simple base is being fitted in new construction, but the antique houses where I do most of my work never allow that degree of convenience.
For information about baseboard design and photos, click the View PDF button below


