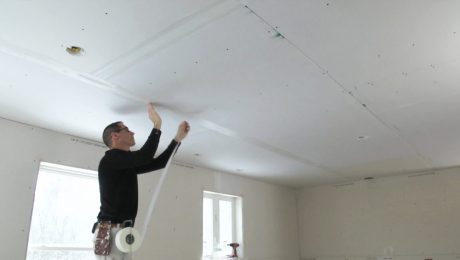
The mother of all drywall jobs gave birth to this invention. We needed to cover the ceiling of a warehouse, soon to be a recording studio, with two layers of 5/8-in. drywall and one layer of sound board. The room is about 50 ft. by 80 ft., with 18-ft. ceilings. The job required that 375 sheets of drywall be raised to the men on a scaffold 13 ft. high.
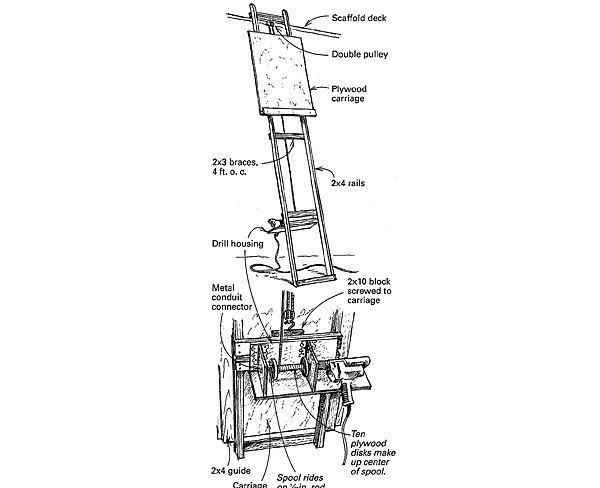
At the start of the job, the hoist shown in the drawing started out as a manually operated system. I could place a sheet of drywall on the plywood carriage and haul on a length of 3/8-in. rope to lift the carriage. The rope ran through a pulley at the top of the hoist, and then to the back of the carriage where it was secured by way of a hook to a 2×10 block. A bit of paraffin wax rubbed on the rails and contact points made the carriage slide pretty well. I got through the first day okay, but by the start of the second day, I found that my hands were plenty tender, in spite of my abundant calluses. By day’s end, I was in agony (with a new appreciation for seasoned sailors). I decided to rethink the hoist. What motor did I have on hand that could be enlisted to help lift a deep stack of heavy drywall?
Reasoning that the motor would have to be reversible to get the carriage down the rails, I recalled my Milwaukee 1/2-in. reversible drill and its extraordinary torque. I decided to try it.
First, I exchanged the single pulleys for double pulleys to put less strain on the motor. As shown in the drawing above, I mounted the drill on the backside of the hoist, where a 1/2-in. dia. threaded rod extended from the drill’s chuck through a spool. I used my belt sander to grind three flats on the end of the rod, allowing the chuck to get a good grip.
I made the spool out of plywood, using my 1-5/8-in. dia. hole saw to cut the ten center sections that fit over the threaded rod. Then I used my 1-1/2-in. dia. hole saw to cut the two end pieces of the spool.
I sandwiched all the parts on the threaded rod and tightened the whole bunch with lock nuts and washers. Then I drilled a 1/2-in. hole in one of the spool end pieces. The rope threads through this hole, where it is secured with a simple overhand knot.
The spool was held in place by a 3/4-in. plywood housing screwed to a couple of 2x braces. The housing includes a pair of plywood mounting brackets affixed to the housing with metal framing clips. The threaded rod would have shredded the plywood, so I needed some type of bearing. After rummaging around in my supply bins, I finally came up with a couple of metal connectors used for joining flexible conduit. I drilled an 11/16-in. dia. hole in each of the plywood mounting brackets, and then threaded the connectors into the brackets. The rod slides through the bearings, capturing the spool between the mounting brackets with about 1/4-in. play from side to side.
The last step before launch was to spin the spool by drill power while using a sandpaper block to smooth out the sharp edges made by the hole saw. As the first sheet of drywall climbed up the hoist, my sore hands payed a silent tribute to all sailors.
A final note. As the rope coiled onto the spool and then reversed direction as it started the next layer, the torque on the drill increased. This is because enlarging the diameter of the spool adds strain to the motor. I think the problem could be lessened by using 1/4-in. dia. rope, as the larger 3/8-in. rope that we used was probably overkill.
David Gath, Agoura, CA
