Installing Wood Clapboards
How a seasoned crew uses a story pole and an efficient work sequence to install this traditional siding.
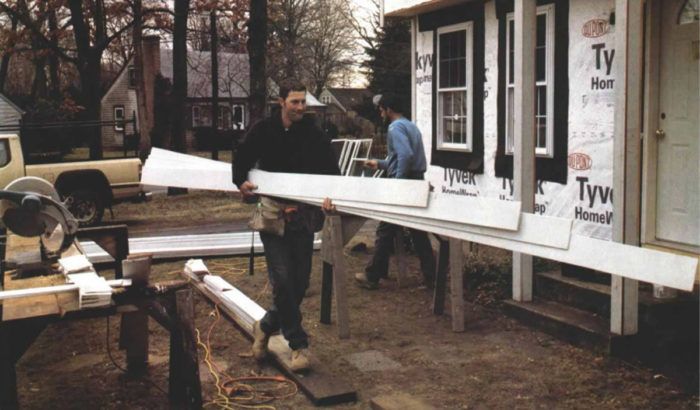
Synopsis: This article covers the installation of wood clapboards, a traditional and regionally popular exterior wall finish. The authors cover all the basics, and also offer advice on what wood species is best.
We’ve installed clapboards just about every way but upside down. We’ve tried different nailing locations and patterns, and various hand-driven and pneumatic fasteners. We’ve installed clapboards from the bottom up and from the top down, and we’ve organized our installation teams several ways. Although we wouldn’t call any of our experiments failures, we have found a layout method, fastener and fastening pattern, crew size and details that assure good performance and efficient installation.
A few details before starting
Before we layout and install clapboards, several details need to be in place. We have up whatever housewrap we’re using, and install the corner boards. Corner boards provide a stop for the clapboards so that they don’t have to be mitered or coped. We make our inside corners out of 1×2 or square 5/4 stock. Anything less would be too thin and leave the painter no room to caulk between the inside corner and the ends of the clapboards.
Outside corner boards avoid the need for delicate mitered joints at locations easily damaged by lawnmowers and other equipment. We make ours from 1-in. stock and prime any raw edges before installing the siding. Doing so minimizes shrinking and swelling and just about eliminates stains from dissolved tannins leaking to the face.
For a heavier look, we sometimes build outside corners from 1×3 furring and apply 1×6 finish corner boards over them after the siding goes on. We nail the outside edge of the finish corner board to the clapboards every 16 in. to 24 in., being sure to nail through the thick bottom of the clapboards. The clapboards support the overhanging corner board, and nailing is less likely to crack it. Overlapping clapboards with the corner board in this way is a more watertight detail, but the nooks where clapboards go under corners can provide homes for insects.
When we apply the corner boards, we let them run long. Then we trim them to length once the water table — the horizontal board where the wall meets the foundation — has been installed.
On gable ends without overhangs, we install 1×6 rake boards over 1×3 furring that runs flush with the top of the roof sheathing. We leave enough room to slide the clapboards at least 3 in. under the 1×6. On overhanging rakes, we cut the clapboards to the rake angle and butt them to the soffit. Then we trim this joint with a piece of 1×3.
For more photos, illustrations, and details, click the View PDF button below:
Fine Homebuilding Recommended Products
Fine Homebuilding receives a commission for items purchased through links on this site, including Amazon Associates and other affiliate advertising programs.
Smart String Line
Anchor Bolt Marker

100-ft. Tape Measure


