Capping a Curved Stair Wall
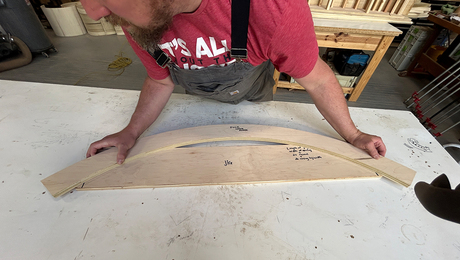
Wide horizontal laminations show off the grain of the maple caps.
Synopsis: A finish carpenter explains how he used wide, thin laminations to form this curving rail capping a stair wall. The rail is glued in place a few layers at a time.
I had contracted the finish stair work on a large spec house in Boulder, Colorado, basing my estimate on the blueprints. When I showed up to start work, though, I realized I had to toss that estimate out the window. The job had apparently gotten much simpler.
I wouldn’t have to build curved stringer stairs with mitered risers and miter-returned treads. The framing contractor had built both curved staircases leading from the foyer to the second floor. And 34-in.-high 2×4 kneewalls took the place of the massive round newels and 2-in. pipe rails specified on the prints. Then the builder, Vaughn Paul, asked me to finish the curved kneewalls with maple caps. He wanted the caps to bend around the stair’s radius without showing laminations on their tops. The caps were to meet the drywall cleanly—no trim. My mind raced. How was I to bend helical twists into boards without visible laminations or trim?
The cap had to be laminated; there was no other way to bend it. I reasoned that even maple, as hard and dense as it is, flexes if thin enough. I might be able to glue and clamp a horizontal lamination into the correct twist, then saw it to the helical shape. The laminations would show on the edges, but not on the face.
Gluing two layers at a time
My hardwood supplier resawed some 12-in. boards into 3/16-in. thicknesses for me. But even then, maple is tough. Figuring that less material would be easier to bend, I rough-sawed the curves to within 1/4 in. of their finished dimension into the individual laminations. Even so, I could clamp and glue the bend into only two laminations at a time. I used Titebond Supreme, spreading it with cheap, disposable paintbrushes. This special-order glue has a long working time, and it’s easier on sanding belts than regular Titebond.
I screwed cauls on 4-1/2-in. centers to the plywood top plate with 3-1/2-in. drywall screws, and used additional 1×2 cauls on top of the lamination to spread the clamping pressure evenly. It took eight days and all my clamps to glue up the two 5-ft.-long twisting boards.
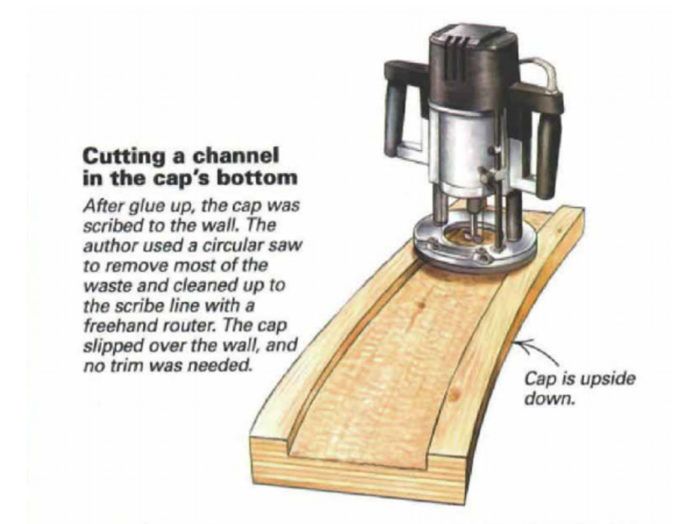
When the final lamination cured, I unclamped the caps and unscrewed the cauls. Placing the caps atop the kneewalls, I traced the wall’s outline on their underside. The finished cap was to project 1-1/4 in. beyond each side of the wall, so I set my compass to the overhang and scribed the finished width from the wall.
I bandsawed the curves, staying about 1/16 in. outside of the scribed lines to leave room for final sanding and truing. I didn’t use a jigsaw because I feared the blade would wander.
For more photos, drawings, and details, click the View PDF button below:


