
Forming and Pouring Foundations
Foundations hold up the house, hold back the earth, and keep out the water. If they're not level and square, you may end up custom-cutting every rafter.
Synopsis: All sorts of aggravating problems crop up during construction when foundation work is sloppy. In the second of two articles on the topic, the authors explain how to get it right, covering wall layout, form assembly, placing concrete, and stripping forms when the job is done. Read the first article on constructing footings, which is the first stage of creating a sturdy foundation.
Part II of a two-part series on foundations: In the previous issue of Fine Homebuilding (#119) , we looked at forming and pouring footings.
The lime-green neon sign flashed “Learn your future today.” Our crew, skeptics all, filed in through the purple door in the tiny storefront and listened expressionless as the gypsy inside delivered eerily detailed portraits of each of us as well as glimpses into what was in store for our lives. Rick shrugged off her bizarre prophecy that his future would involve “packaging the earth.” Then, a couple of years later, he decided to buy a concrete-form business from a friend. On hearing the news, Rick’s wife said, “My God, Rick, that lady was right: You are going to be packaging the earth.”
There are over a dozen different types of forming systems for poured-concrete walls, but the basic concepts of laying out, squaring, leveling, pouring and finishing are common to any good foundation job. So whether you’re pouring a foundation yourself or paying someone to do it for you, it’s important to understand the process because things can go wrong in both subtle and dramatic ways.
The foundation hole must be level
The key to raising foundation forms quickly and securely is having a good base to set them on. We always prefer to put a foundation on concrete footings. The footing surface is flat and level, so the forms go up as quickly as we can move them.
The alternative to using footings is setting the forms on a gravel or crushed-stone base on the floor of the foundation hole. A good foundation hole is usually within 2 in. of level. Any more than that means a lot of labor for us scratching down or filling up to level as we set the form panels.
The excavator is also responsible for the amount of overdig, or the area that is dug beyond the actual perimeter of the foundation. Ideally, there should be 4 ft. to 5 ft. left between the forms and the hole sides to give us the room we need to handle the forms and to work on the outside of the walls. For safety’s sake, the sides of the hole should not be excavated vertically or undercut. Instead, there should be some sort of slope or pitch to the hole walls.
Another critical duty of the excavator is making sure that the concrete trucks have good access to the foundation. If they don’t have access, we end up having to push the concrete by hand along the forms, sometimes 40 ft. or more. If site conditions deny even poor access, we call in a concrete pump truck to the tune of an extra $500 to $600. Once the hole is satisfactory and the footings are ready, we give the tops of the footings a final sweep before layout.
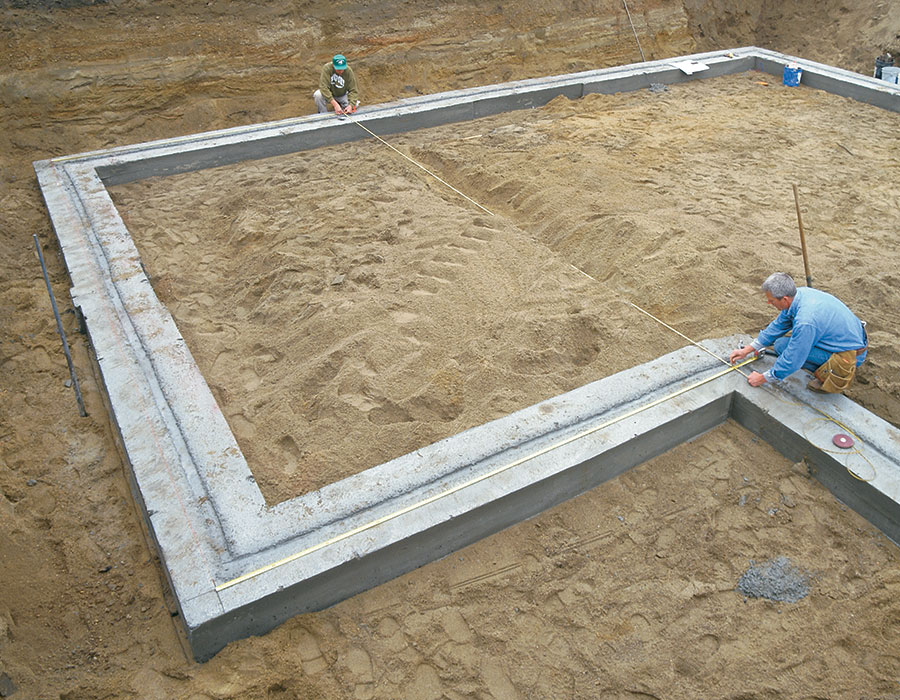
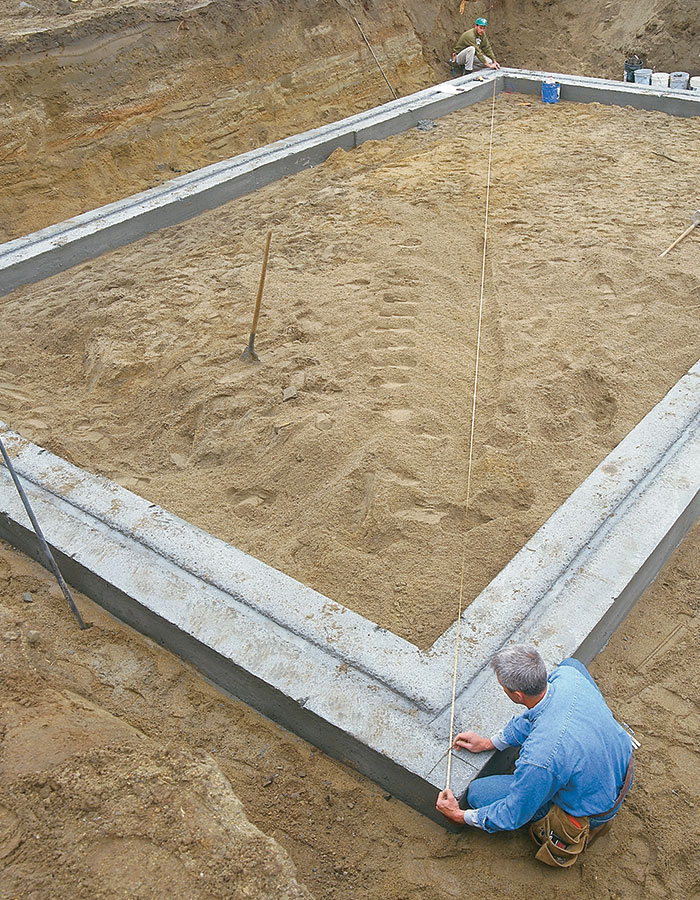
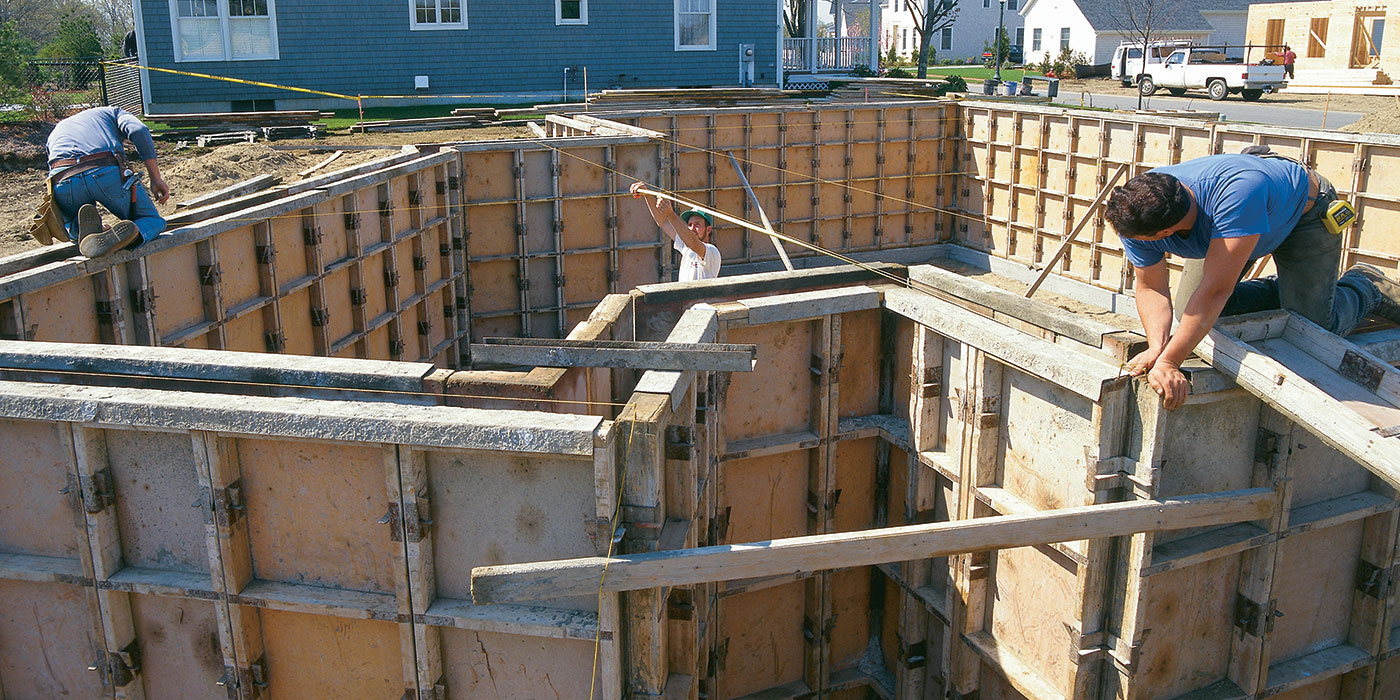
Laying out the foundation walls
Working on the floor of the foundation hole or on top of the footings, you first have to find the outside point for every corner or jog in the foundation (1). Diagonal measurements are then taken to check for square (2), and chalklines are snapped for lining up the forms (3).
 |
 |
The foundation is laid out on top of the footings
We plot out the foundation walls the same way we did the footings. The goal is to pinpoint every corner and angle on the outside face of the foundation wall. Before we stripped the footing forms, we had scribed the corner points of the longest foundation wall on top in the concrete from points that had been marked on the forms. We double-check the distance between these points as well as the distances from the surveyor’s stakes.
When we laid out the footings, we figured out all the diagonal measurements to find the location of the other corners and jogs in the foundation. Those same calculations are used again on top of the footings for the foundation. When all our points have been established, we take diagonal measurements to be sure the layout is square. We then snap lines between the points that represent the outside face of the foundation walls to give us a guide to follow as we set the forms.
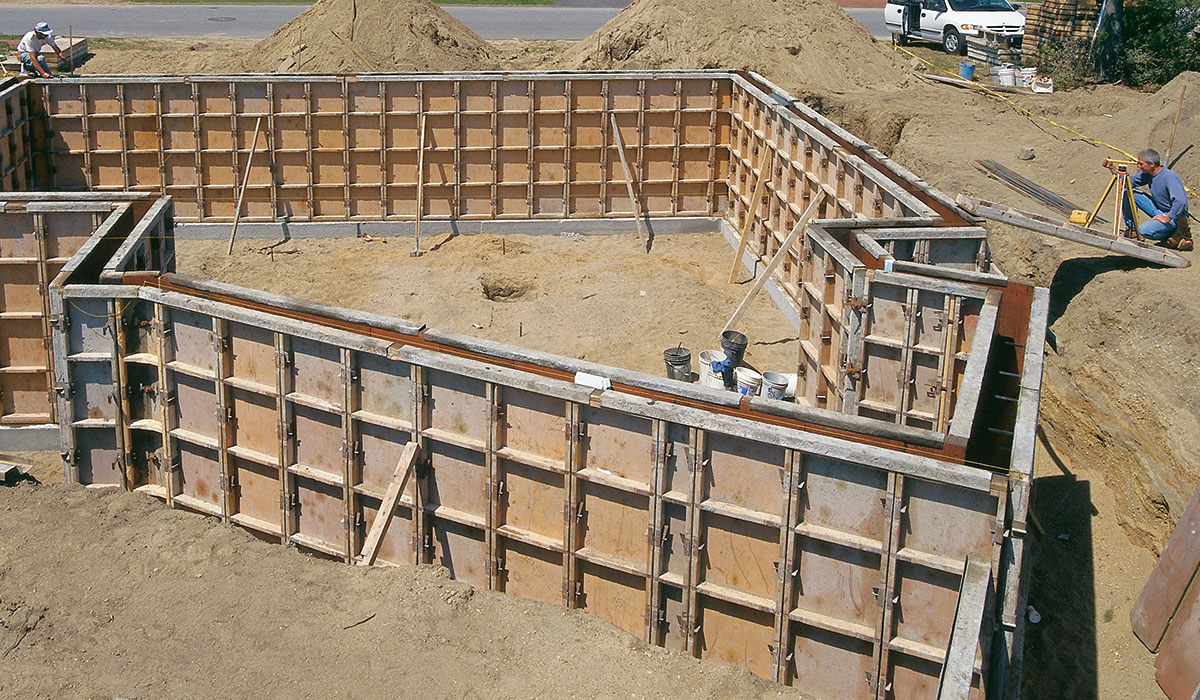
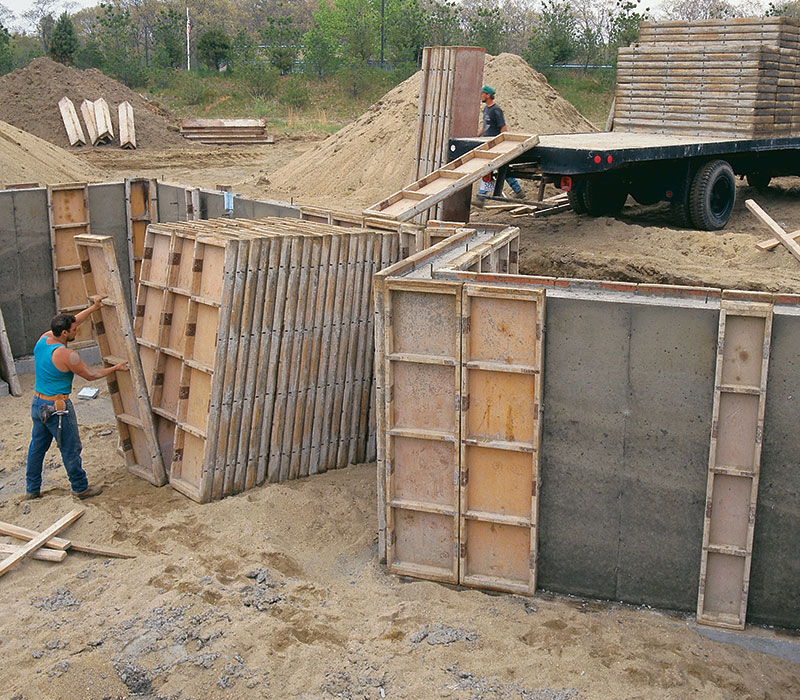
Forms are set up in pairs
As a couple of crew members work on the layout, the rest distribute forms around the perimeter of the hole, sliding them down along the sides of the hole in pairs. By the time the layout is done, enough forms are in the hole, and the layout crew can begin setting them up.
The forming starts in one corner. We use 90° forms for inside corners, but for outside corners we have special brackets that join two standard forms at a right angle. Once the corner forms are set up, we tweak them until they’re exactly plumb, using shims if necessary. Plumbing each corner precisely simplifies the later job of squaring the top of the foundation.
When a corner has been set, crew members each take a direction and begin setting up the standard-size (2 ft. wide) forms. To join our forms together, metal Ts are slipped through reinforced holes in the side rails of the form that is already set up. Then flat, slotted foundation rods are slipped over the ends of the Ts, locking the inside and outside panels at the specified width for the foundation wall, in this case 10 in. Foundation rods not only determine the width of the wall, but they also—along with the Ts—keep the forms from spreading during the pour.
The next panels, one inside and one out, are placed close enough to the previous ones to feed the ends of the Ts into the matching holes. Then the forms are pushed hard against each other, and a flat, tapered pin, or wedge, is slid into the slot on the end of the T, locking the two panels together. At this point, the wedges are left loose in the slot until the walls have been squared and straightened.
Our forms come in 2-in. wide increments from 2 in. to 24 in., so it’s easy to anticipate what we’ll need for each wall. A 30 ft. 2-in. wall will use thirty 24-in. panels plus a pair of 2-in. fillers. If a wall is 41 ft. long, we use forty 24-in. panels and a pair of 12-in. panels. If a wall length is specified to an odd inch or to a fraction (we just love those), we simply nail a spacer made of -in. thick furring or the appropriate-size plywood to the ends of an inside and an outside panel to make up the difference. The panels with spacers are then locked to neighboring panels with longer Ts.
Besides 90° corners, the most common angle we’re asked to form is 45°. We have forms and brackets similar to our 90° system to create 45° angled walls. However, for other angles, we usually build forms on site.
The house featured here had sections offset from the main body of the house at 30° and 60°. We formed these angles by locking smaller-size panels together with perforated-steel strapping. The inside panels are connected to the outside panels with -in. steel rod (called pencil rod). We bolt clamps onto the pencil rod to hold the panels at the 10-in. wall width. Voids between the forms are filled with rigid-foam insulation that we cut and insert.
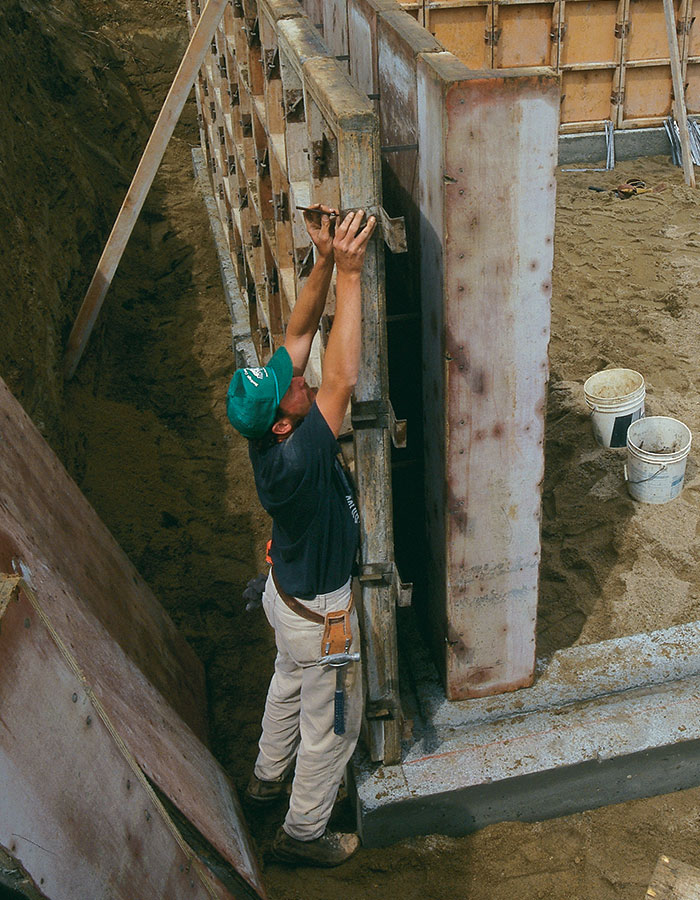
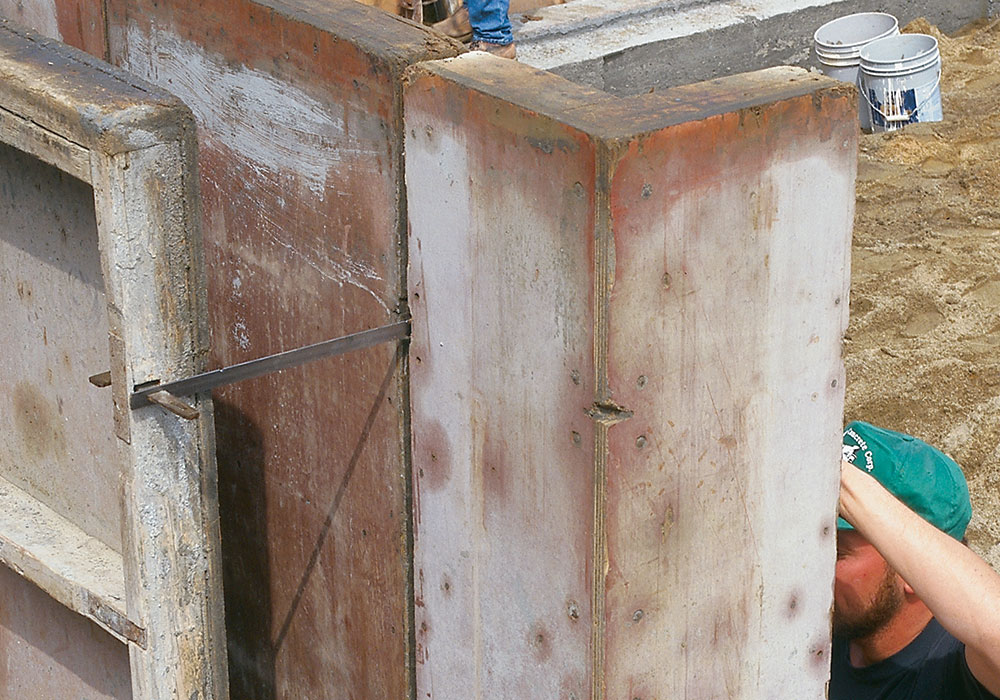
Assembling the forms
Forming starts in a corner that uses a right-angle form for the inside and special brackets for the outside (4). Slotted rods that slip over Ts hold the forms apart at the right wall width (5), and tapered pins, or wedges, through the Ts hold adjacent panels together (6). Bracing keeps the walls plumb during the setup and pour (7).
 |
 |
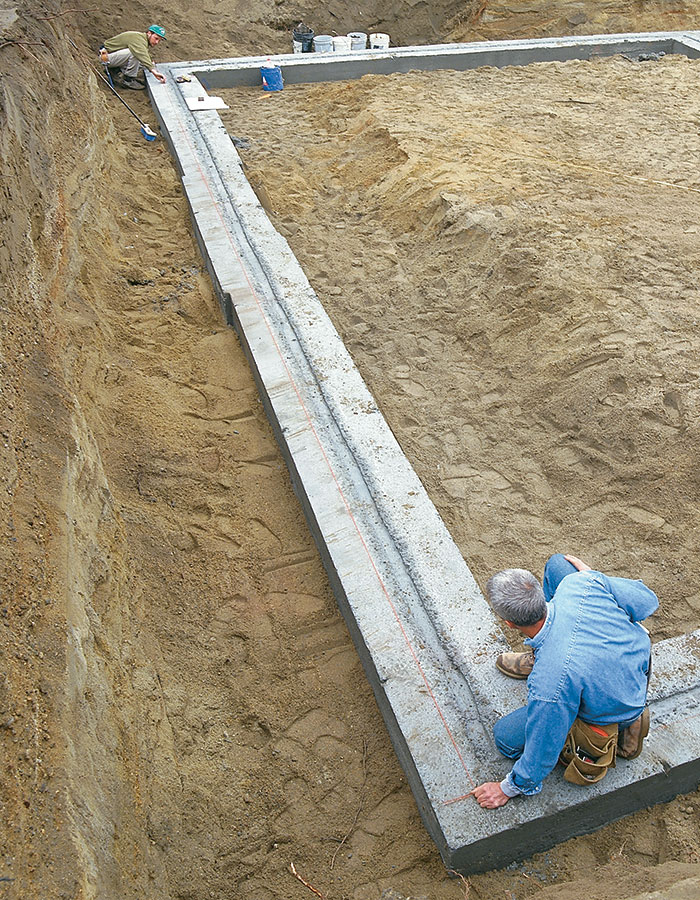
Strings straighten and square walls
As the forms go up, we brace both the inside and outside sections with 2x bracing every 8 ft, to 10 ft. to keep forms from racking and falling over. When all the panels are up and the job is closed in, we slip steel channel over the tops of the forms. The channel fits tightly, locking the panels into alignment with each other.
Next we string the whole job to straighten and square the foundation. Mason’s twine is stretched from one corner to the other; the string is kept lined up exactly with the face of the outside corner panels. Then a crew member walks along the top of the forms, telling two other crew members who are on the ground (one inside, one out) which way to adjust the 2x braces to straighten the wall. Braces are not nailed; instead, they are wedged under a horizontal member of the form.
The next job is squaring the foundation by measuring diagonally between the corners just as we did when laying out the foundation on the footings. If need be, we shift a corner or two until our diagonal measurements are equal. When the entire job is squared, we once more straighten the tops of the walls and tighten the bracing.
Next we check and tighten all the hardware, the easiest but probably most crucial job of the process. Each foundation rod is checked methodically inside and outside to make sure that it is properly engaged by a T. If a T misses the slot in the rod, it can cause the wall to blow out from the weight and pressure of wet concrete. As the rods are checked, each wedge is driven home to tighten the joints between the forms.
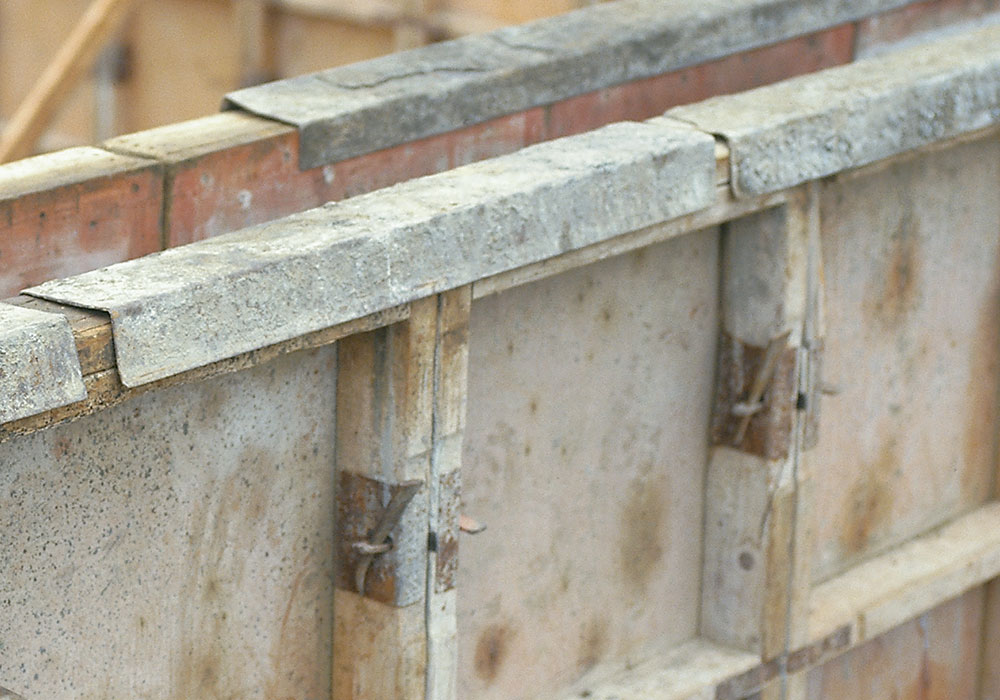
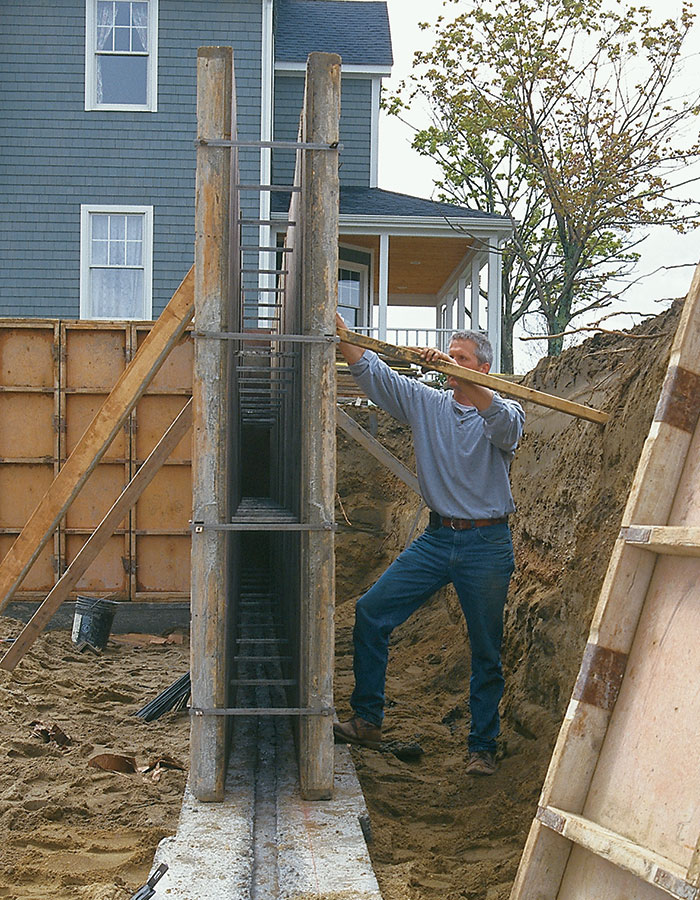
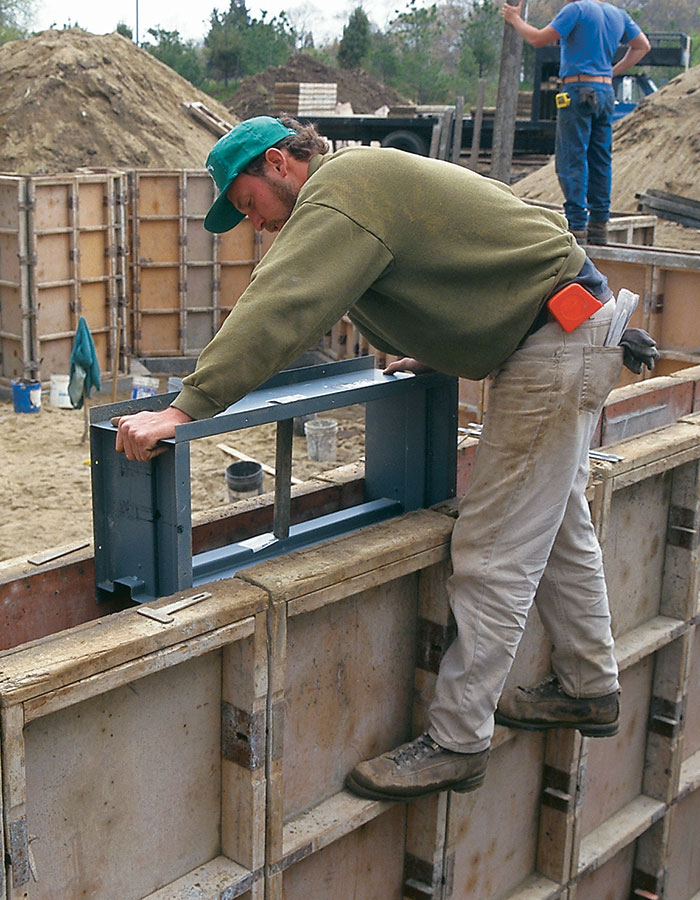
Final prep before the pour
Before the concrete trucks arrive, strings are stretched as guides for straightening the walls (8). The top of the foundation is found with a transit (9), and chalklines are snapped at that level (10). Basement-window frames are inserted and tacked to the forms (11), and form-release oil is applied to the inside of the forms (12).
 |
 |
 |
A transit helps to find the top of the pour
We’re now ready to shoot the grade, or the height of the foundation wall. Because we’re on footings, we shouldn’t have any high or low spots to factor in. Unless otherwise specified, the grade is established at 93 in. from the bottom of the form, and a 6d grade nail is driven at that elevation. (Our forms are 96 in. tall; our alignment channels are 2-1/2 in. deep. A pour height of 93 in. keeps the concrete off the channel.) A yardstick is then placed on top of that grade, and the height is read through our transit.
The crew member with the yardstick works his way around the foundation, setting grade nails at each corner on the outside form at the height indicated by the crew member at the transit. If a wall is longer than 24 ft., we set a grade nail in the middle of the wall. Lines are snapped between the grade nails, and then extra nails are set in the snapped line about every 4 ft.
Before the channel went on, we’d slipped the basement-window frames down between the forms. At this point, the frames are brought up to the grade line and tacked to the inside of the forms. We also locate and nail in metal forms for the beam pockets. These forms leave a small shelf inside the wall to hold the end of the main beam. If the foundation requires a sewer chase or a chase for any other purpose, we slide a Styrofoam block between the forms and secure it at the proper location with 16d duplex nails driven from the outside. These blocks are made on site to the required dimension and fit tightly between the forms.
The inside faces of the forms have to be coated with form-release oil to prevent the forms from sticking to the concrete as it cures. We usually apply the oil just before or as the trucks arrive. There are many types of form oil and release agents. Motor oil and diesel fuel used in the old days have been replaced with more environmentally friendly nontoxic mixtures. Many places require the use of these newer products, and we’ve had good luck with paraffin and vegetable-oil-based release agents. We use a handheld pump sprayer with a wand to apply a light coat on the panel faces.
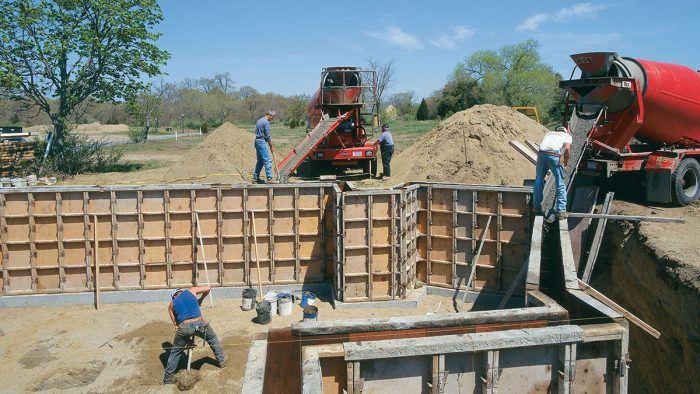
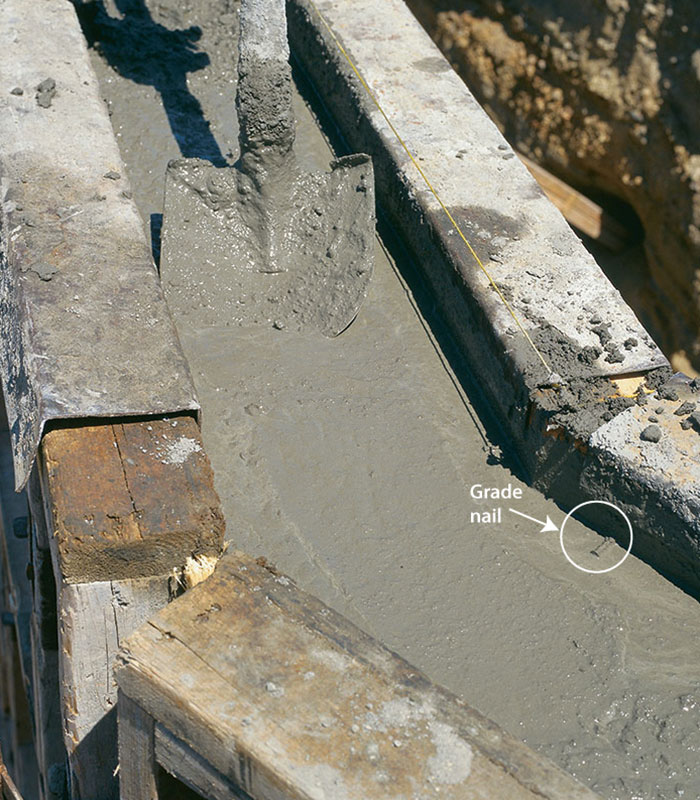
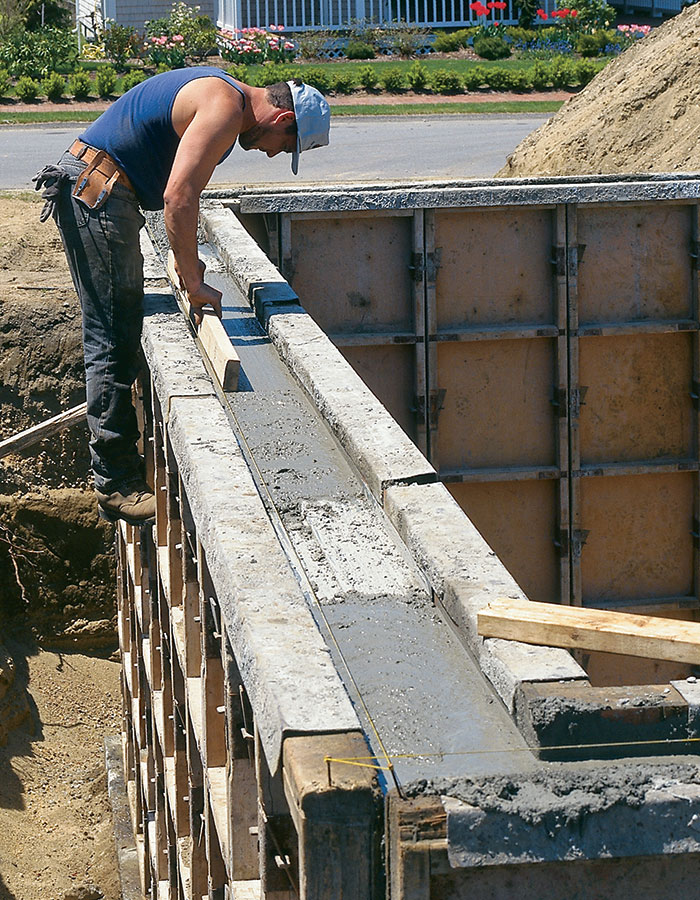
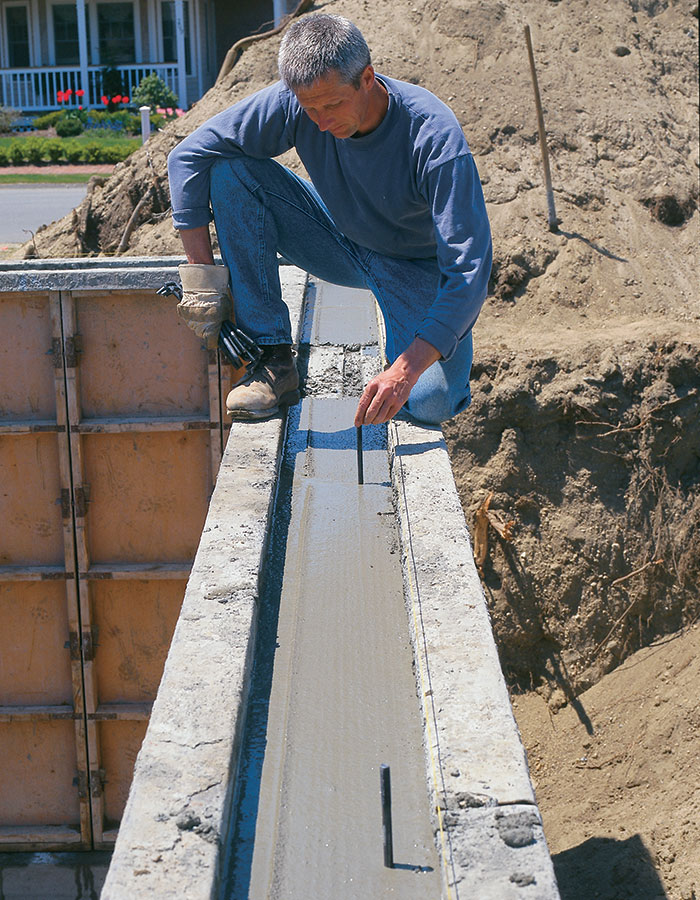
Filling the forms
When the prep work is done, the forms are filled with concrete. The backside of a shovel floats the top of the concrete until it’s halfway through the grade nails (13). The top is then screeded with a 2×4 to smooth it out (14). Anchor bolts are inserted while the concrete is still soft (15).
 |
 |
Concrete has to be the right mix
When we order concrete, we specify the strength of the mix and the slump, or stiffness of the mix. A 2,500-psi mix provides sufficient strength for most house foundations, and most mixes arrive at a slump of around 4, a medium number that flows readily. Occasionally, we ask the drivers to add a little water and spin the load if it seems too stiff. However, too much water can weaken the concrete, so we’re careful to add only a small amount to make the concrete easier to manage without diminishing its strength.
Because concrete starts to cure within two hours, we begin the pour with the most time-consuming or hard-to-reach areas of the foundation and work our way around the foundation from there. This strategy keeps any of the walls from curing before the other walls can be poured.
During the pour, we keep a constant watch for blowouts or shifting panels. We stop the pour as needed to rebrace walls, keeping the forms aligned and plumb. When the concrete nears grade, we slow the pour rate a little and move the chutes to keep from overfilling the forms.
Once the walls are topped off, we check the strings again to make sure the walls stayed straight, adjusting the forms if necessary. Our concrete mix is generally loose enough that we don’t have a problem with voids from pockets of trapped air. But if a real stiff mix is specified for a job, we tap the forms with a rubber mallet, and in extreme cases we use a vibrator to remove trapped air from the mix.
With the forms filled, we grade the top surface by floating the backside of a shovel on the concrete and working it to level the surface. At this point, we also add or remove a touch of concrete until half of each grade nail is exposed.
A crew member then follows along, screeding the surface with a length of 2×4. The edge of the 2×4 is pushed vigorously up and down, forward and back, to bring water up to the surface, making it smooth and level. The final step is inserting
-in. anchor bolts into the top of the wet concrete. Some local codes may require that the bolts be in position before the concrete is poured to ensure proper aggregate consolidation around the bolts. But our building officials allow us to insert the bolts directly into wet concrete, moving them up and down slightly to make sure there is no trapped air around them. When we poured this job, CABO code required bolts every 6 ft. Here in Rhode Island, that requirement has since been upgraded to anchor bolts every 4 ft.
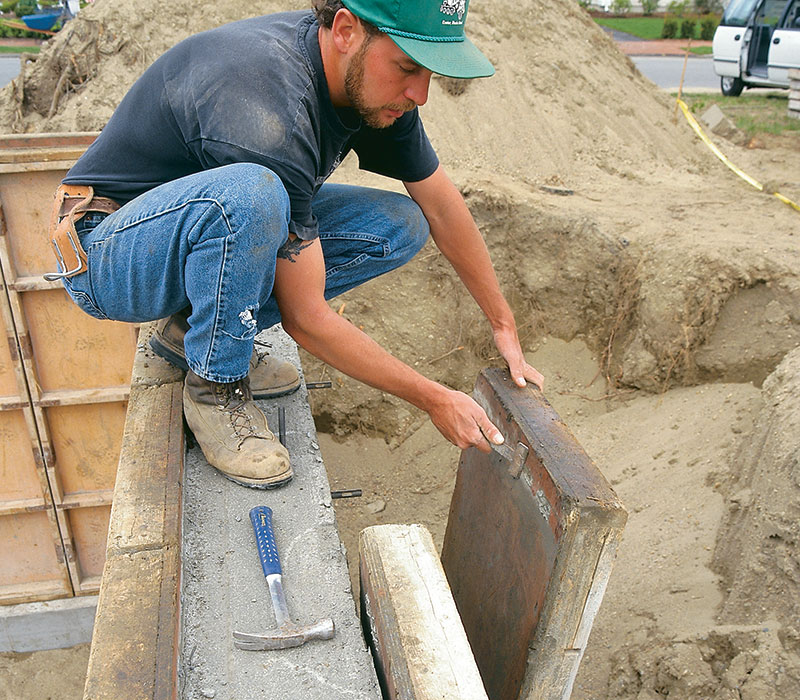
Stripping the forms
After the concrete has cured overnight, the crew strips off the forms (16) and takes them to the truck to be stacked. As each form is removed, excess concrete along the top is scraped off (17). The ends of the foundation rods are then broken off with a hammer (18).
 |
 |
Stripping forms: setup in reverse
The concrete is allowed to set up overnight, and the next morning, we’re back at the site to strip the forms. Stripping is basically the setup process in reverse. First, we remove the string and the channel from the tops of the forms. Then the Ts, wedges and any other removable hardware come off.
If the form oil has done its job, the panels should pop away from the walls easily. The excess concrete that built up at the grade line is scraped off the forms, which are brought to the truck.
After the forms have been stripped, we snap off the ends of all the foundation rods that held the forms together and that now project beyond the foundation. The rods are scored so that they break off safely below the surface of the foundation wall. We remove the rods to make the job site safer for the rest of the subcontractors and to allow the exterior of the foundation walls to be damp-proofed.
It’s best to let the concrete cure before backfilling the foundation. Concrete doesn’t reach its full compressive strength for 28 days or so, but five days to seven days is usually sufficient curing time for the concrete walls to withstand backfill pressure. Still, it’s always a good precaution to brace the inside of any green walls that are long and straight before backfilling against them.
—Fine Homebuilding contributin g editors Rick Arnold and Mike Guertin are builders and residential-construction consultants in North Kingstown and East Greenwich, Rhode Island.
Photos by Roe A. Osborn.
From Fine Homebuilding #120
Fine Homebuilding Recommended Products
Fine Homebuilding receives a commission for items purchased through links on this site, including Amazon Associates and other affiliate advertising programs.
Smart String Line
Original Speed Square

100-ft. Tape Measure
