A Pair of Built-in Hutches
Faced with spaces that weren't close to square, this carpenter judiciously applied trim and careful scribing to hide the worst of it.
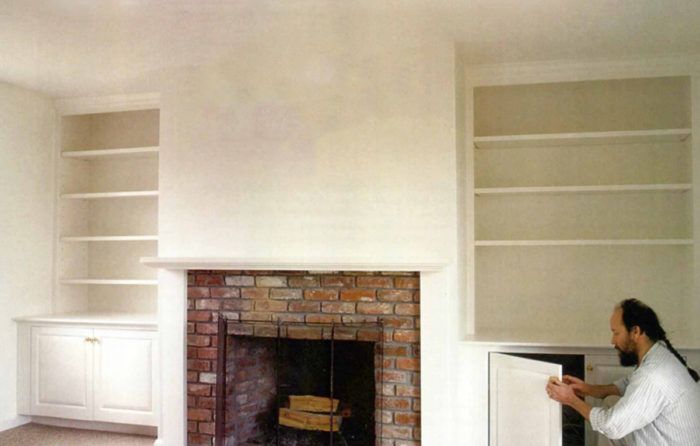
Synopsis: Faced with out-of-square spaces flanking a fireplace, a cabinetmaker builds a pair of hutches on site that cleverly disguise the room’s shortcomings. Shims, scribing, and technique save the day.
One thing I’ve learned from working as a carpenter for 20 years is that homeowners are uncharted waters. When I met with the owners of this house about building a pair of hutches, two things became apparent. First, even though they wanted to keep the price down, they wanted a quality job. This was good.
But the second thing was that these hutches had to fit into two alcoves that flanked an existing fireplace, and these alcoves were ridiculously out of square. And although they were nominally the same size, the two spaces were over 2 in. different in both height and width, a fact that threatened thing number one. Another threat to the economics of the project was that the widths of “about 4 ft.” (as I had been told on the phone) were actually 49 in. and 52 in., not great for efficient use of sheet goods.
A dry run in the shop
Each of the paint-grade hutches would consist of a base section with cabinet doors and a countertop, and an upper section with open, adjustable shelves. The cases and shelves would be 3/4-in. birch veneer-core plywood, and the doors and moldings would be solid wood. To save material, I planned to use the existing walls in the two alcoves as the backs of the hutches.
I prefabricated all the parts for the hutches in my shop. I also made the raised-panel doors for the bases and the trim pieces that would hide the variations in the walls and ceiling. I preassembled the bases and shelf units in the shop to make sure everything would go together easily, and then the parts were sanded and given a good coat of primer.
Lots of shims and scribing
When I arrived at the site, a finished house, the first things I unpacked were drop cloths. I reacquainted myself with the site dimensions and peculiarities and then located the framing behind the drywall for attaching the case sides.
With the existing walls acting as the backs of the cases, the first pieces I installed were the sides of the lower cabinets. At the shop, I’d notched each side for the toekick. The floor in one of the alcoves was fairly level, so I plumbed the sides in place and scribed them to the back wall, keeping the top edges level (more on scribing later). When I was satisfied with the fit, I glued and nailed the bottom shelf to the two sides. Then I centered the assembly in the opening, shimmed each side plumb and shot nails to hold each side in place.
For more photos and details, click the View PDF button below:


