Hanging a Wall Railing
Get it at the right height and make sure it's fastened to the framing; someone's life may depend on it.

Synopsis: A simple step-by-step guide to hanging a stair railing on the wall, plus an excellent two-page sidebar in the PDF below on fabricating handrail parts in the shop.
Building a staircase can be expensive and time-consuming. So when I tell my clients that they’ll need a wall rail for the stairs to pass code, they often balk. Sometimes they ask me to install a cheap rail that they can remove after the building inspector has signed off. My response is that a permanent railing, built and installed properly, enhances the look of the staircase, and also that the railing might be all that stands between them and serious injury.
Longer handrails are better
I begin the layout by setting a straightedge (a 4-ft. level works fine) on the tread nosings and lightly scribing the slope of the stair onto the skirt board or onto the wall. Most folks like to be able to grab the railing before stepping onto the stairs. So at the bottom of the flight, I start the wall railing directly above the point where the slope of the stairs meets the floor. I find that point by extending the straightedge down the slope until it touches the landing. I then plumb up 36 in. from this point and make a mark on the wall.
I usually end the railing at least 3 in. beyond the nosing of the top tread at the top of the stairs. So I plumb up 36 in. from that point and make another mark on the wall. I then measure between these top and bottom points to get the rough length of the railing.
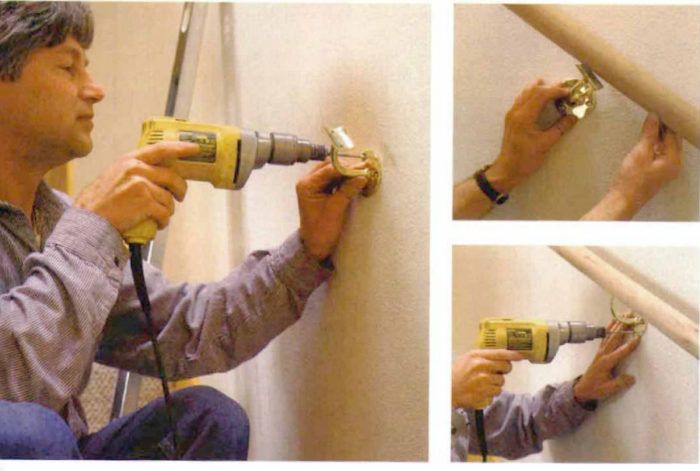
Brackets have to be screwed into studs
A safe handrail is always screwed into the framing behind the plaster or drywall. In a perfect world, the crew that framed the stair chase would have installed 2×6 blocking on edge between the studs, parallel to the slope of the stairs and centered 32 in. above the slope. On rare occasions, I’m able to install the blocking myself. But in most cases, I have to hunt for the studs.
There are many framing-locator gadgets on the market, but I resort to one, only if I can’t find any direct evidence of a stud. A nail hole in the skirt board or a light joint-compound shadow where a drywall screw was covered are good places to start. Once I’ve located a stud, I transfer the stud layout up or down the stairs until I’m close to where I want to put the bracket.
I try to have the railing supported with a bracket as close to the ends as possible, so I hope to find a stud within 6 in. of the marks I made for the ends of the rail. If more than 6 in. of railing extends past the last bracket, I either lengthen the railing past the next stud or screw the end return to the framing. The UBC codebook specifies that the railing must be able to withstand 150 lb. of lateral force. So in addition to the end brackets, I try to put a bracket at least every 5 ft. along the rail for stiffness and support.
For more photos and details on hanging a wall railing, click the View PDF button below.


