Building Kitchen Cabinets on Site
Make face frames after the doors are hung for a perfect fit and quick, no-hassle installation.
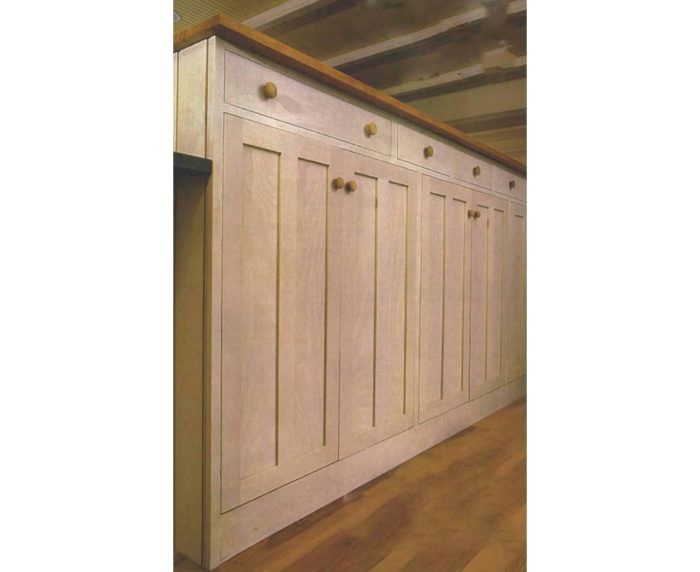
Synopsis: The author builds traditional face-frame kitchen cabinets with minimal tools and time by constructing plywood or melamine boxes, unifying them with a poplar subframe, and then installing the face frames after the doors are hung. Although the cabinets look conventional, they are much faster to put together than a standard shop-built job—and they look right.
Back when I had a small cabinet shop in Connecticut, I built kitchens the old-fashioned way, the right way. Although beautiful when finished, the cabinets took forever to build. Over time, I slowly modernized my methods. But I was really making only minor refinements of an essentially antique process. Then I had the good luck of moving to Austin, Texas. I worked briefly for a man named Paris Carroll, a craftsman with no fear of technology. He came to each kitchen-cabinet job with a stack of plywood, preripped face-frame stock, a few basic tools, and plenty of pneumatic nailers. Everything was glued and nailed. If I was a bit skeptical at first, it didn’t take long to see that his cabinets were solid and fit beautifully. What amazed me most was how fast they went together.
After I finished school in Austin and moved back to stodgy New England, I built a few kitchens with overlay doors and cup hinges using many of Paris’s techniques. I couldn’t imagine going back to my old methods. When a project came along that called for the traditional look of face-frame cabinets with flush-fit doors, I started looking for a faster way to build them. Borrowing heavily from what I had learned in Austin, I figured out how to make site-built cabinets that look every bit as traditional as cabinets painstakingly built in a custom shop. The key is making the face frames after the doors have been hung.
My cabinets consist of plywood or melamine boxes tied together with two layers of face frame: a structural subframe made from poplar and a finished face frame in the same wood species as doors, drawer fronts, and trim. Face frames are assembled with butt joints, glue, and air-driven nails, but because joints overlap each other, the finished cabinets are amazingly strong and rigid. The proper door hinge is important. Face-frame cup hinges result in a door overlay of at least ½ in., and the doors never sit quite flush. I knew they wouldn’t work. Half-overlay cup hinges made for frameless cabinets, on the other hand, are adjustable from front to back as well as up and down and from side to side. They mount on the cabinet side, not on the face frame, and result in a door overlay of about 3/8 in.
It may seem backward at first, but I hang the doors after the subframe has been installed. Then the finish face frame is added, piece by piece, around the doors. It’s much faster than the traditional method of hanging inset doors in a finished cabinet. When you do it the old-fashioned way, you have to hang a door on butt hinges, check the fit, take the door out to plane it and then hang it again. And again. It’s a tedious process at best. Now I can make adjustments on small pieces that are easy to run through a tablesaw or small jointer before they are attached. Cabinets are finished in place when they’re all done, either with a spray gun or by hand.
For more photos and details, click the View PDF button below:


