Faux Fridge Front
With a little custom metalwork and an extra cabinet door, you can make your refrigerator look like a million bucks (or at least a $5,000 Sub-Zero).
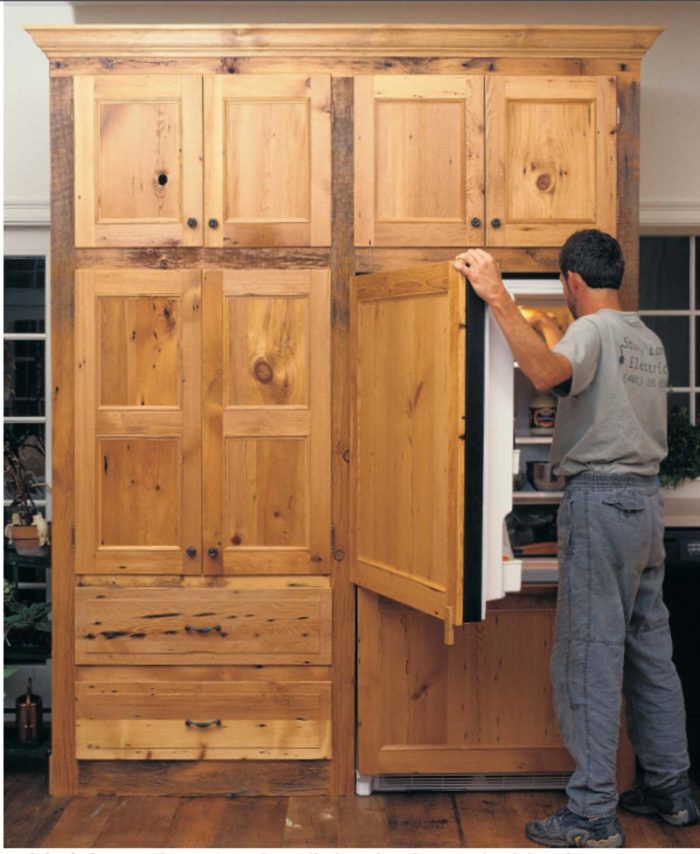
Synopsis: This article describes how to attach framed wood panels to a conventional refrigerator using aluminum channels, giving it a built-in look at far less cost than an expensive built-in refrigerator that is specifically designed to be fitted with cabinet-matching door panels.
From the outset, our kitchen plans included a refrigerator that looked like part of the cabinetry. After looking at the price tags on several models designed to accommodate cabinet-matching door panels and built-in dimensions, I had to find a better way.
Solving the depth problem was easy because I was building the cabinets myself; I just framed the refrigerator cabinet deeper to accommodate a standard refrigerator. I avoided, however, thinking about the panel mounting problem until the last minute. My wife vetoed the idea of screwing or gluing the panels to the refrigerator doors. Defacing a brand-new appliance just wasn’t an option. Then, in a moment of frustration and desperation, came a little inspiration.
The wood doors hang on aluminum channels
My plan involved metal channels shaped like a J. The channels are screwed to the backs of the wood panels and wrap around the refrigerator door.
I started with some leftover flat aluminum 0.032-in. gutter stock finished black. I figured the dark color would tend to draw less visual attention to the edges of the refrigerator door than a lighter color. I own a brake for bending aluminum, but for those who don’t, finding someone to fabricate the channel shouldn’t be a problem.
First, I measured the distance from the gasket to the edge of the door and subtracted 1/8 in. so that the aluminum wouldn’t interfere with the gasket. That was my first bend.
I made my second bend at 2 -1/2 in. (1/4 in. more than the thickness of the door) to wrap around the door. The extra width makes it easier to slide the channels over the doors.
On the leg that attached to the panel, I added a gentle S-bend. That bend accommodates the screws and the raised panel.
After testing one channel on the edge of the refrigerator door, I decided to overbend each 90° angle by 1° or 2° for a snug fit. I cut three legs for each door, one for each side and the top. The top channels are 2 in. short to avoid the refrigerator-door hinges. Because the side channels extend to the bottom of each panel, I didn’t put a channel on the underside of the doors.
When I had the wood panels made, I oversized them 1/4 in. in both directions. When I screwed the channels to each door panel, the side channels ended up a little farther apart than the actual width of the doors. That extra space kept me from having to force the panels over the doors.
For more photos and information on how to attach framed wood panels to a refrigerator, click the View PDF button below.


